The big bronze bushings PN: 35-820115
are located in the top and bottom of the trunion body. The
bushing is #5A
HERE for
the Bonanza (H35-V35) and part #47
HERE in the Baron
Nose Gear IPC Extract.
See my complete article in ABS Magazine February 2015 on my Main
Gear Strut rebuild
HERE.
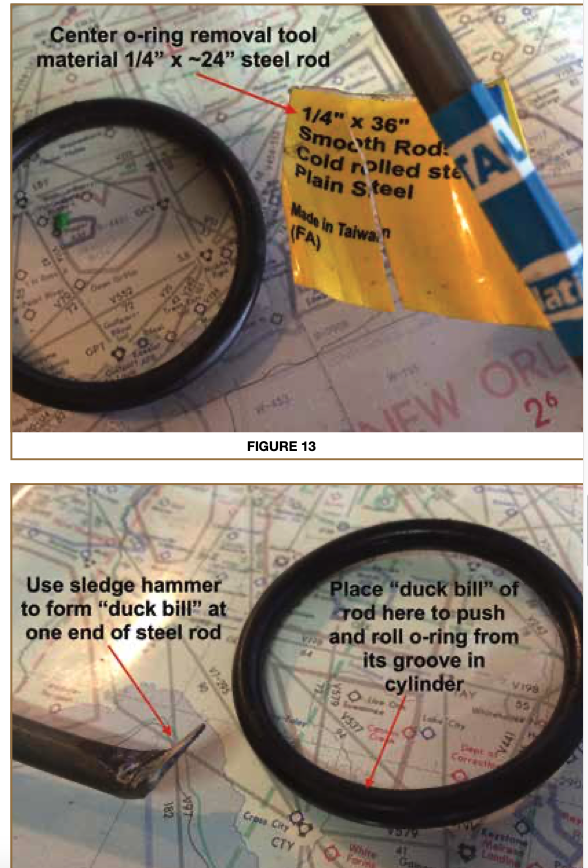
CSOB Strut Center O-Ring Removal Tool
Here are some tips dated 5/29/2020,
from 1975 F33A Bonanza owner, Shep J., on how he attacked the removal of the
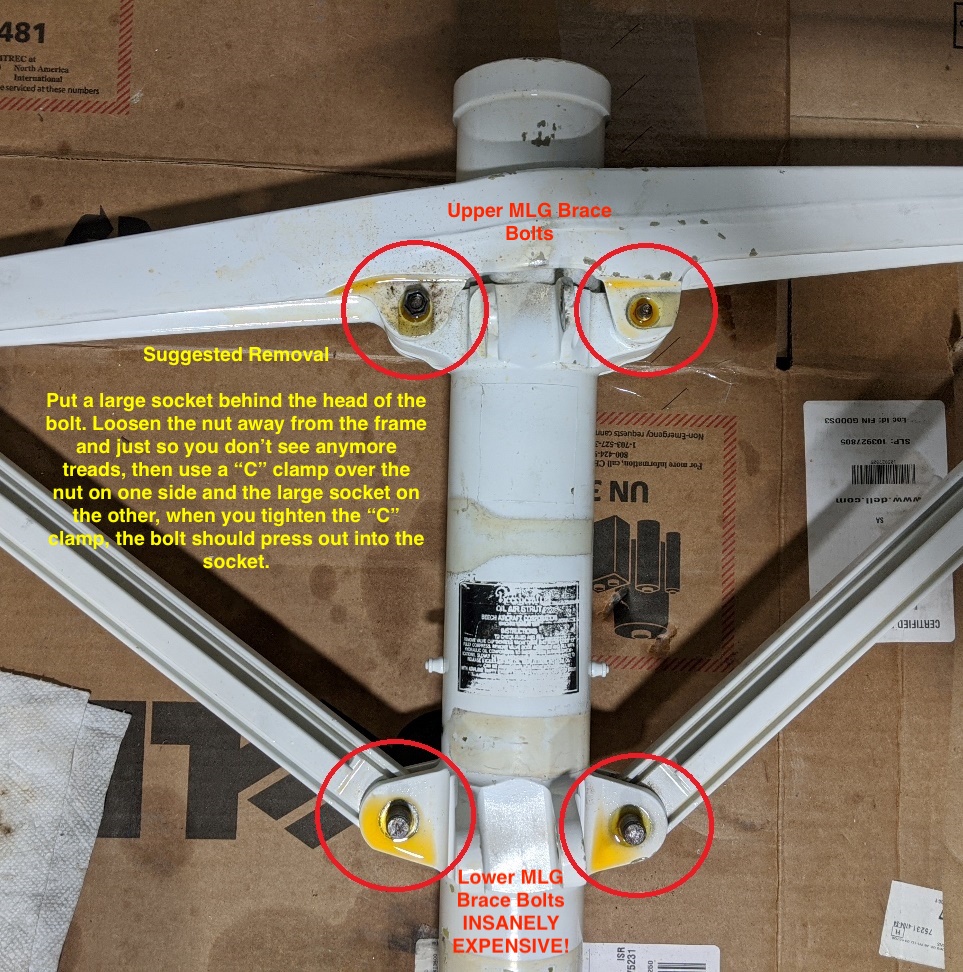
MLG bolts during his strut rebuild:
"I was able to get them out with a C-Clamp.
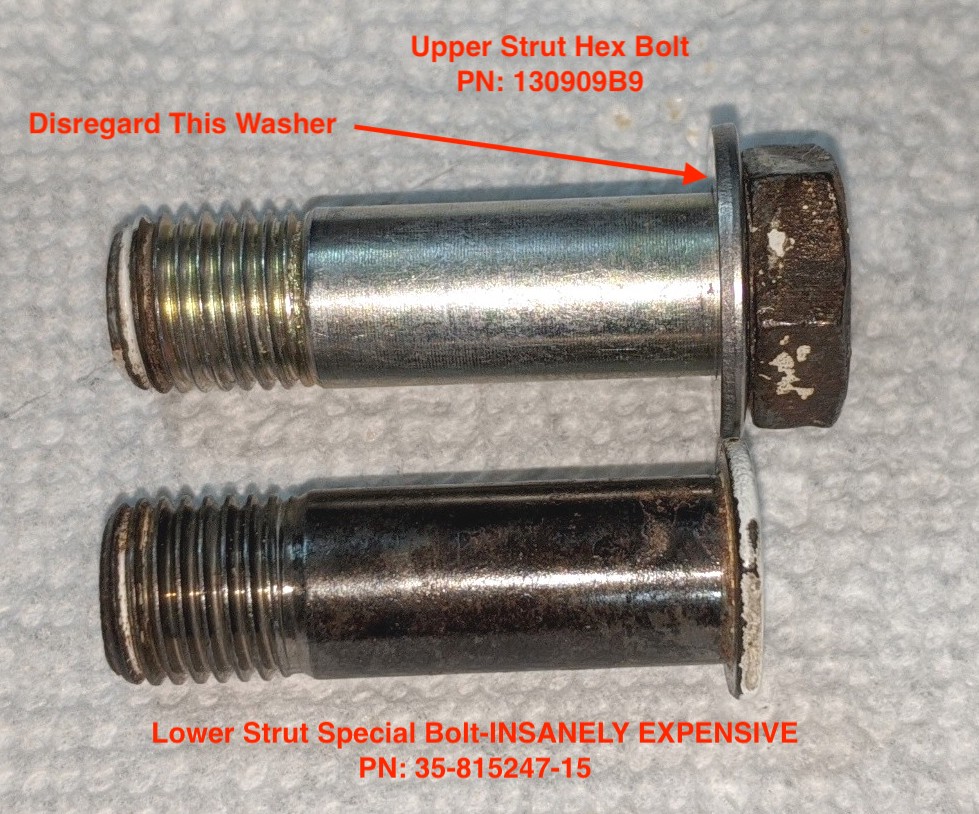
Now that they are out, I compared the upper and lower brace bolts and came up with some interesting food for thought…
They
are both 7/16” diameter. The uppers are hex bolts that I measure as
being 1 15/32” with a 1” grip. I don’t know what to call the lowers but
measure them as being 1 3/8” with a 31/32” grip.
Look at the picture below to see what you get if I add a .063 washer to the upper bolt…same grip, just a hair longer."
Here is more research done by F33A
Bonanza owner, Shep J., on the history of the bolt PNs in his 1975 F33A.
The following info from Shep is offered for your amusement and
entertainment only.
NO
APPROVED RECOMMENDATION is to be implied or inferred as relates to your
aircraft maintenance. You and your A&P mechanic are responsible for
your maintenance choices for your certified aircraft.
"…so
I called Mike T. in Lakeway, TX which is just west of Austin. We
discussed these bolts at length and he said his 1981 F33A had hex bolts
on the lower truss connecting points instead of the ones with the small
heads. This explains why the NAS part numbers he came up with were so
similar and just a tick different in length and when he put his back
together 2 years ago he went back with the replacement hex bolts. So I
went around and looked at 5 Bonanza’s on the nearby ramp here at Addison
(KADS) and found that 1 of them (a 1979 35 model) also has hex bolts
but the other 4 have high dollar lower bolts like mine.
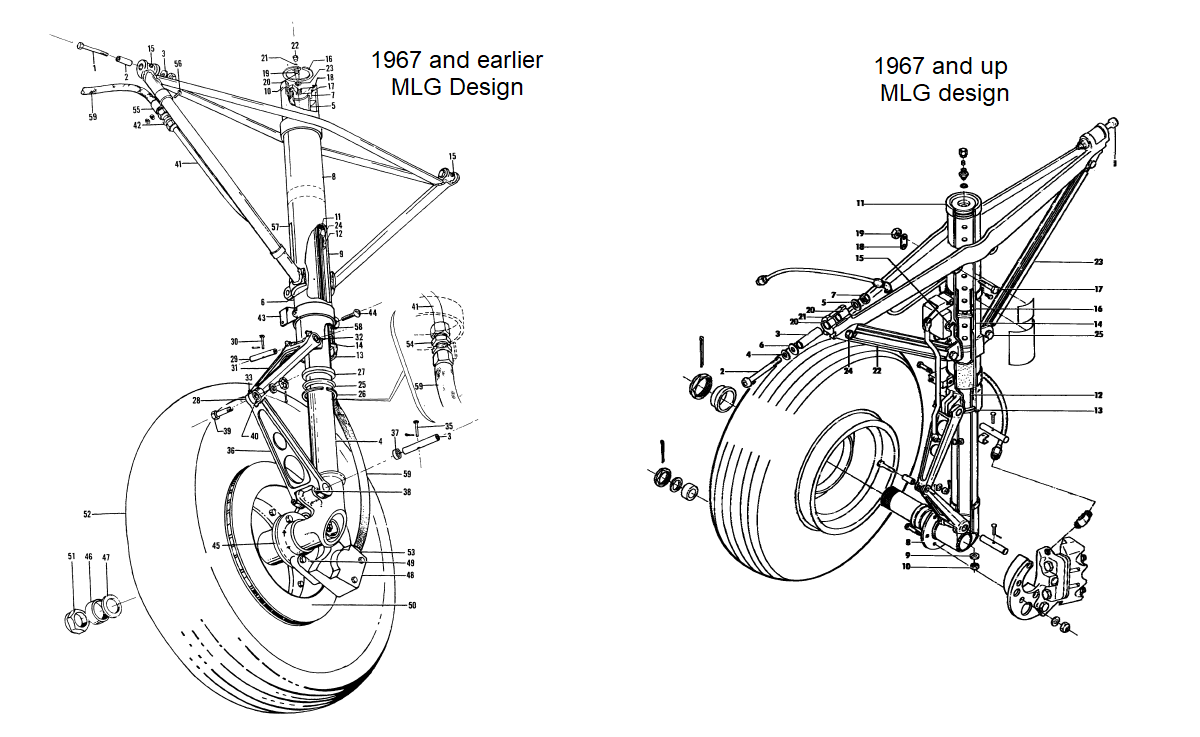
I
did some more digging through the IPC’s and found that they started
using the MLG with the separate trusses around 1967 but from 1967 to
about 1970 they used the same 4 bolts at the upper and lower points then
changed to the lowers using the high dollar bolts from then on. The
picture below shows the design difference made around 1967.
From
67 to 70 they give the same part number for all four bolts…
NAS464P7LA16/M which is 7/16-20, 1-29/64", 1" grip and now superseded by
130909B9 which are about $10 each.
In
1970 the lower bolts were changed to the current one which has the
small head and costs over $235ea. Did they change it because of a
clearance issue? I’ve studied it and don’t see any. Is the current one a
higher strength bolt despite having the smaller head? I have no way of
determining that.
If
your plane was in the 1967-1970 range the IPC calls for the same four
$10 dollar bolts upper and lower on what in every other way appears to
be the same landing gear. I did some spot checking and all the part
numbers on the trusses are the same from before 1970 and after. The top
brace part number is 35-815251-1 but is superseded by 35-815251-3 in
1970 yet the top bolt stays the same.
It
is proper and legal to use the same 4 bolts if your plane was made from
67-70 at the upper and lower attach points. Is it wrong to substitute
the same bolts for the lowers from 70 and up? I know the answer already
but have to wonder why not?
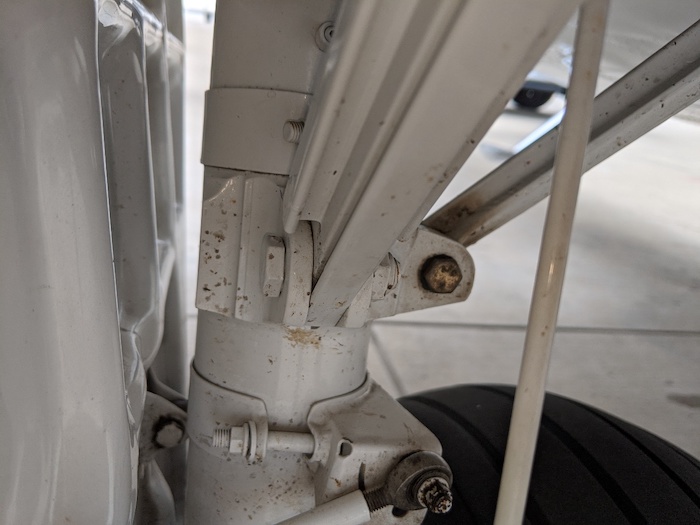
I
have since found two post 1970 planes with hex bolts at the lower truss
attach points…a 1979 35 and a 1981 F33A (see image below). Did someone go through this
process in the past, came up with the same info and decided to use the
upper bolts on the lowers?"
1981 F33A Hex Head Strut Bolts Observed on Ramp
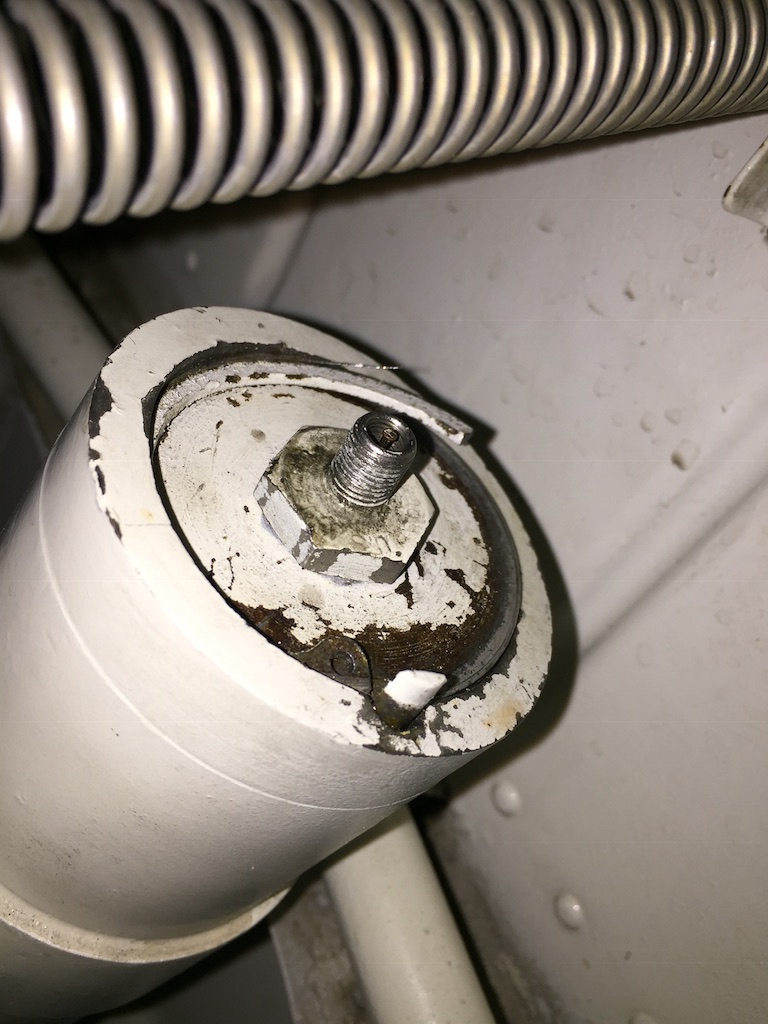
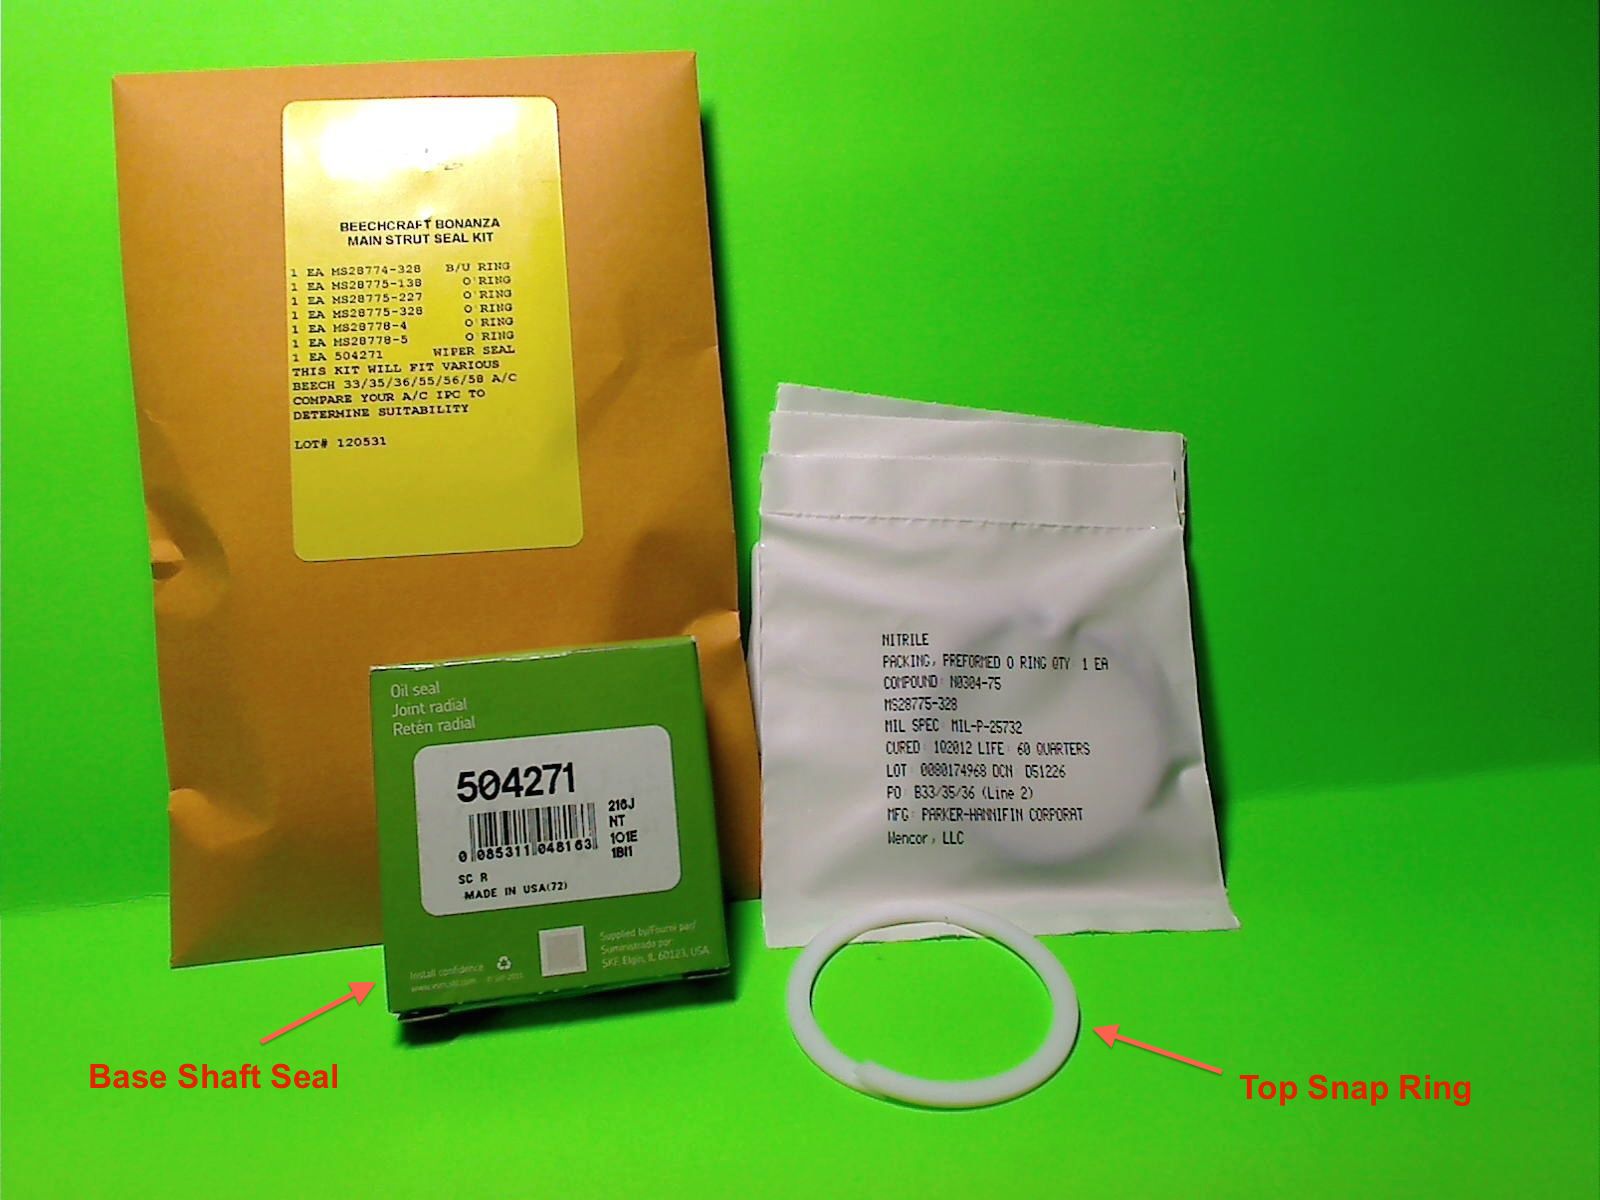
Don't be the guy who haphazardly
installs the main strut top snap ring in this manner. This is a disaster
just waiting to happen!
MLG Strut Watchout for Late Model B58 SN: ~TH-1300+
There are community reports of
internal corrosion failures of B58 MLG struts. A 2001 B58 owner, Kevin
M., reports that his gear would not retract after liftoff. After
troubleshooting he and his mechanic found that there was internal strut
corrosion so bad that it prevented the strut from fully extending,
thereby leaving the squat switch activated, which prevented retraction
as it is designed to do.
Delta Strut reports that after about SN: TH-1300 the strut design and manufacturing was changed
and subsequent
struts are more susceptible to this internal corrosion. There is no seal
at the bottom, only a scraper ring. When the felt runs out of it's
initial dose of engine oil, water and moisture creep in and begins
destroying the internal housing body.
This is an insidious
failure which can render the strut wall thickness extremely thin
without visible evidence of impending doom.
Paul B. suggests
pulling the felt every few years and installing a new freshly oiled felt
could possibly be the best prevention for this strut design.
A new strut from Textron for these models is reported to be $8,200 .
Are your struts on their last "legs"? Tired of
servicing them with nitrogen and 5606?
Beech Owner
Dr. Dave Rogers
offers this pirep on his A-36, E33A strut repair/rebuild:
"A-36 nose gear strut and the left main gear strut on the E33A repaired by
Eric Massey at Safe Flight (410-643-7728) in Stevensville, MD (W29). He
did a good job at a reasonable price."
DIY Nose Gear Strut
Servicing Tips from Beech Expert Paul M.
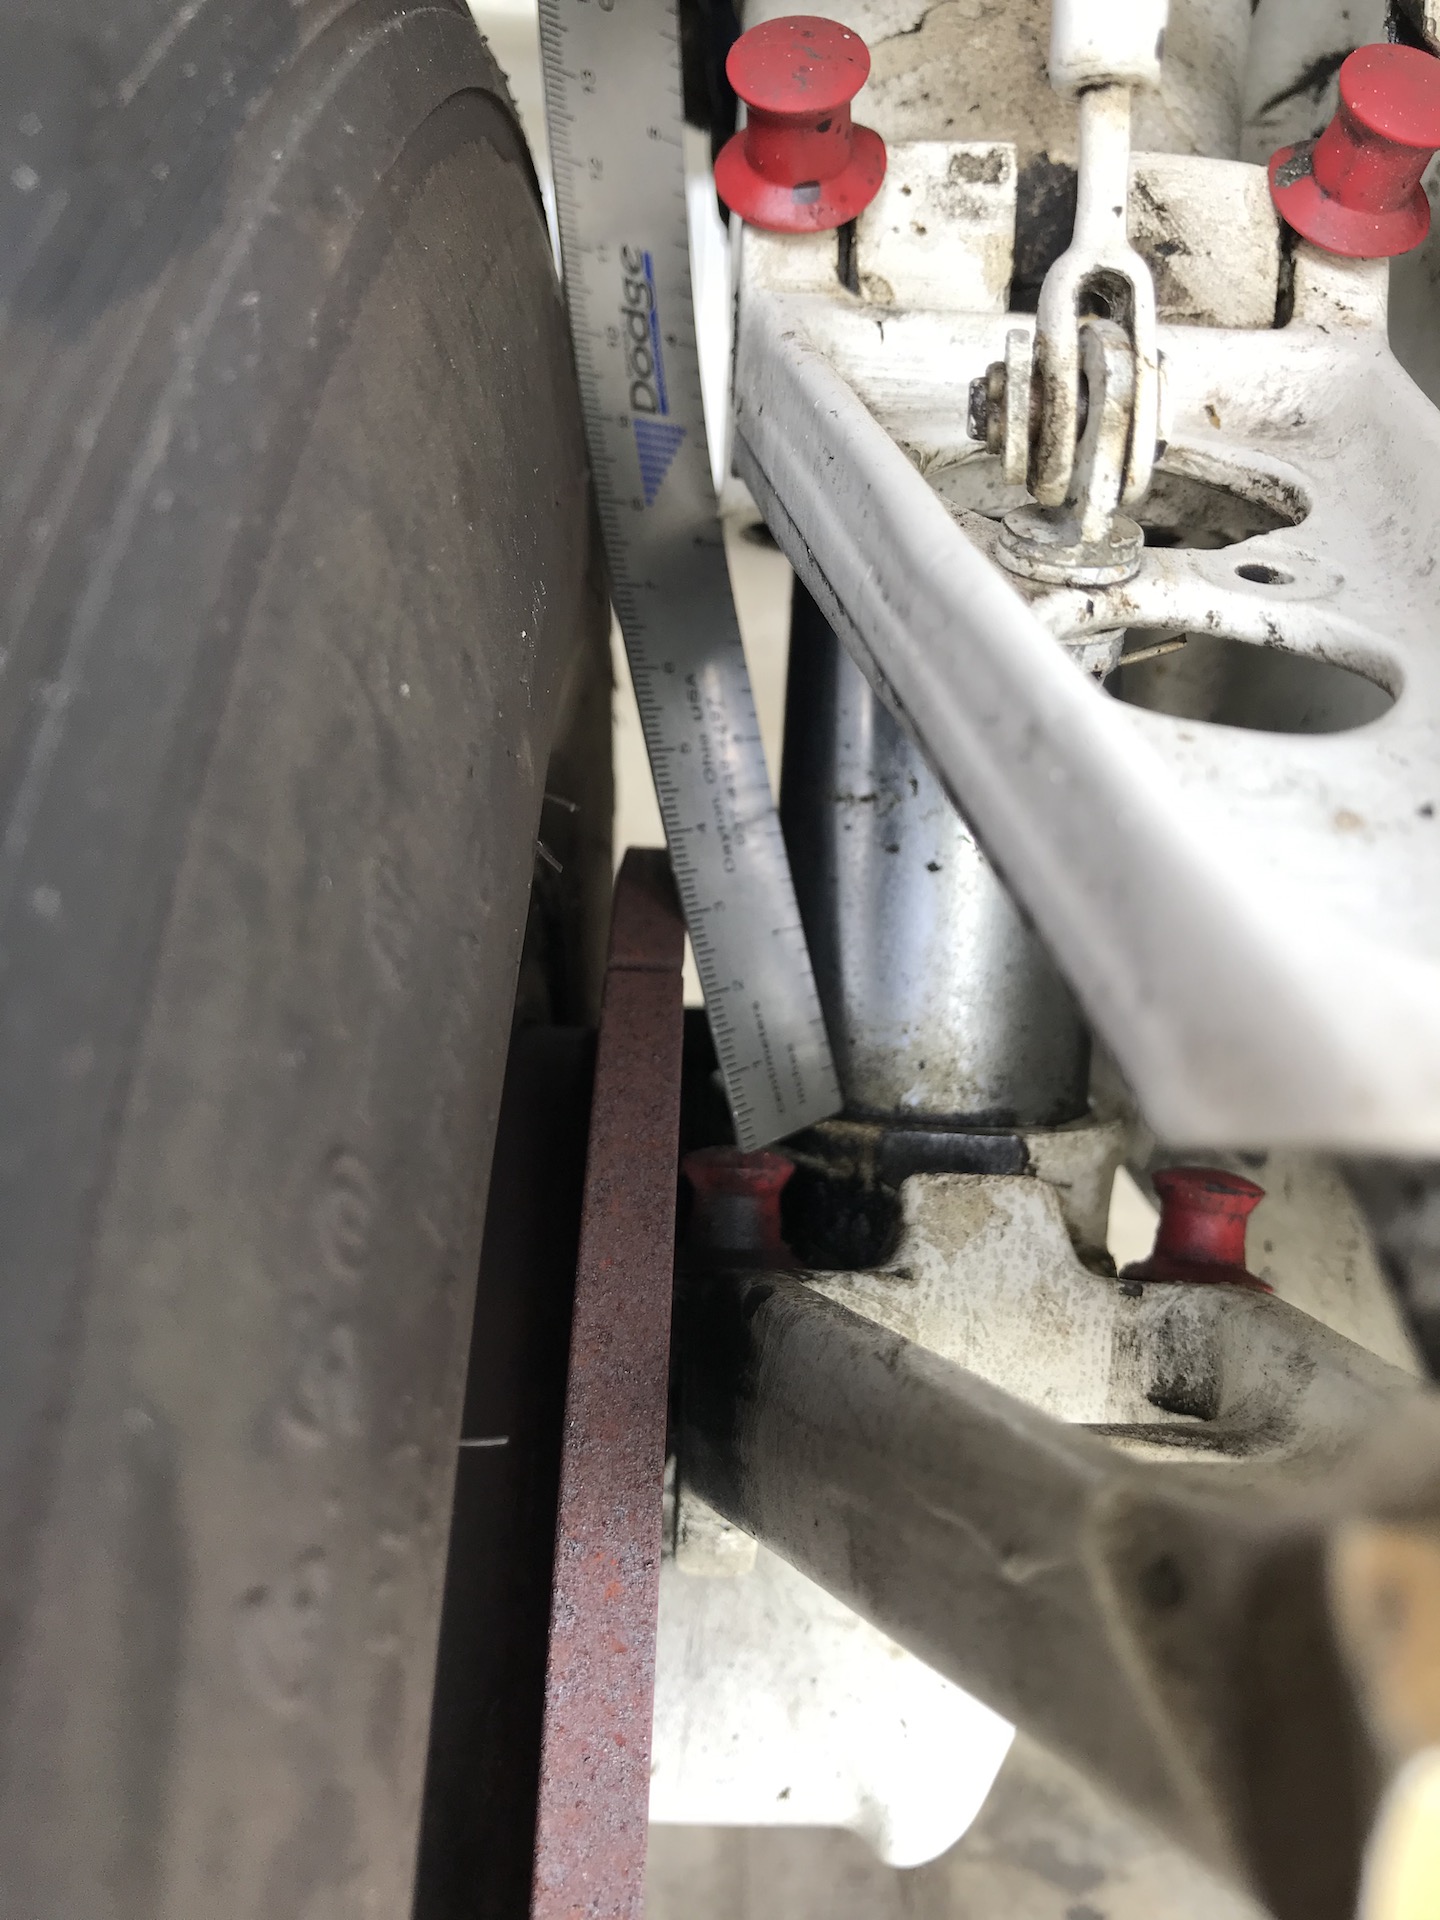
1). Be sure you check the end play on the strut ass'y where it bolts to the
airframe. Often those shims are left out or its never checked after years of
service. I think max play is .015 (check the MM to be sure) and you use up to
two 100951S016YP washers per side to shim the play out of it.
2). Replace the laminated shim that goes under the top "cap", peeling
each layer off until it fits freely. See MM. Those shims don't last that long
and should be replaced and the strut/top cap play eliminated whenever the strut
is disassembled.
3). If the felt pad is in good shape, there is no need to replace it. If you do
replace it, you may need to trim it. Also, do not "over-soak" it in
SAE 10 oil or it will swell up so much you'll never get the piston into the
strut.
4). Get a hose that will fit over the Schrader valve threads snug enough, and
dip the other end into a gallon jug half-full of 5606 for the servicing part.
That's really the best and quickest way to service a newly OH'd (dry) strut.
Have your assistant hold the jug while you actuate the strut slowly, stop to stop,
until its sufficiently filled. Sufficiently filled on the later model nose gear
is the piston fully compressed to the stop after 3-5 full travels of the strut.
Earlier models called for compressing the strut to within a 1/2 or 1/4 in. of
fully compressed before calling it good, IIRC. Remove the hose while the strut
is compressed. Then you can relax. Put the valve core back in and put shop air*
in the strut until you can get the plane on the ground and service it the rest
of the way with nitrogen.
5). Make sure you don't accidently bolt the steering "collar" to the
strut with the zerk on it pointing up, as you won't be able to grease it. It can
swivel 180 degrees while its disassembled without you noticing it. Seems like
I've seen that a lot lately on some new customer's airplanes. Make sure that
steering stop "cone" rolls freely on the end of that bolt, too.
*CSOB1 note: Some "shop air" can be laden with
moisture (which can corrode the insides of the strut), so be careful if you
choose shop air.
Here is another piece of guidance for nose strut rebuilding from Beech Talker
Larry M.
With the
plane on jacks, remove the nose gear. When you disconnect the steering yoke,
careful for the tiny spacing bushings that fall out, get lost. These are very
important. Carefully bleed pressure from the Schrader valve, remove the valve,
replace the O ring under it.
Drain 5606 fluid. Remove tire and wheel from axle. Remove lock ring at top.
Disconnect NG torque knee. Be systematic in disassembly, carefully store parts
to help you with reassembly. When cylinder is open reach in lower portion and
remove oil soaked felt, and place in solvent to clean. Have your new O rings
(Performance Aero) ready, and greased with #5. Make yourself an O ring pick
from a brazing rod, sharpened on the ends. Bend one end at a 45 degree angle,
the other about 120 degrees. Shine your light into the tube, locate the old O
ring, stab it with your pick, and work it out of the groove. Be prepared with
two 3/4" dowels, about 2' long. Place the new O ring on one dowel, insert into
tube, from the other end, insert other dowel. Now you can work the new O ring
into the groove, and push it fully into place.
Clean and
examine scraper, install other easy O ring, wash the felt and re oil it. Your
maintenance manual will give you wear allowances for you to measure with a
micrometer. If you have no excessive wear, you can reassemble. Reinstall, add
new 5606 to a collapsed strut, work it up and down for bubble removal, check
level to full with a 1/4" block at bottom. New valve core, inflate with
nitrogen to about 125 lbs, adjust later to proper height as shown on your
strut decal.
While you
are in there, check the magnesium strut delta for corrosion. Water gets into
the vents in the front, and bi-metal action takes place. Some of those parts
are dissolved like an AlkaSeltzer tablet. Prevent that by making a curved
aluminum cover for the vents in front. ABS has details.
Blackwell
Aviation
is a supporting site sponsor and states that they specialize in nose and
main landing gear restoration for the full line of Beech piston
aircraft.
Another popular strut repair/rebuilding source is
Delta Strut, the company
previously owned by Arky Foulks and then Lawson Barber.
NEWS FLASH 1/1/2018: Delta Strut began 30 plus years ago in Stockton, California near the
Sacramento-San Joaquin River Delta, and so the name "Delta Strut". The company
was purchased in the 1990's by Arky Foulks and moved to Mesa, Arizona. In 2007
Lawson Barber bought the business from Arky and moved it back to Madera,
California. A few years later Lawson moved the operation to the Fresno area
where it is located today. On January 1, 2018, John and Tracy Koester became
the new owners of Delta Strut and run it out of Clovis, California 93619. Lawson
Barber will remain in an advisory role and will continue to share his 50 years
of Beechcraft experience with us all.
559-441-1316 (Land Line)
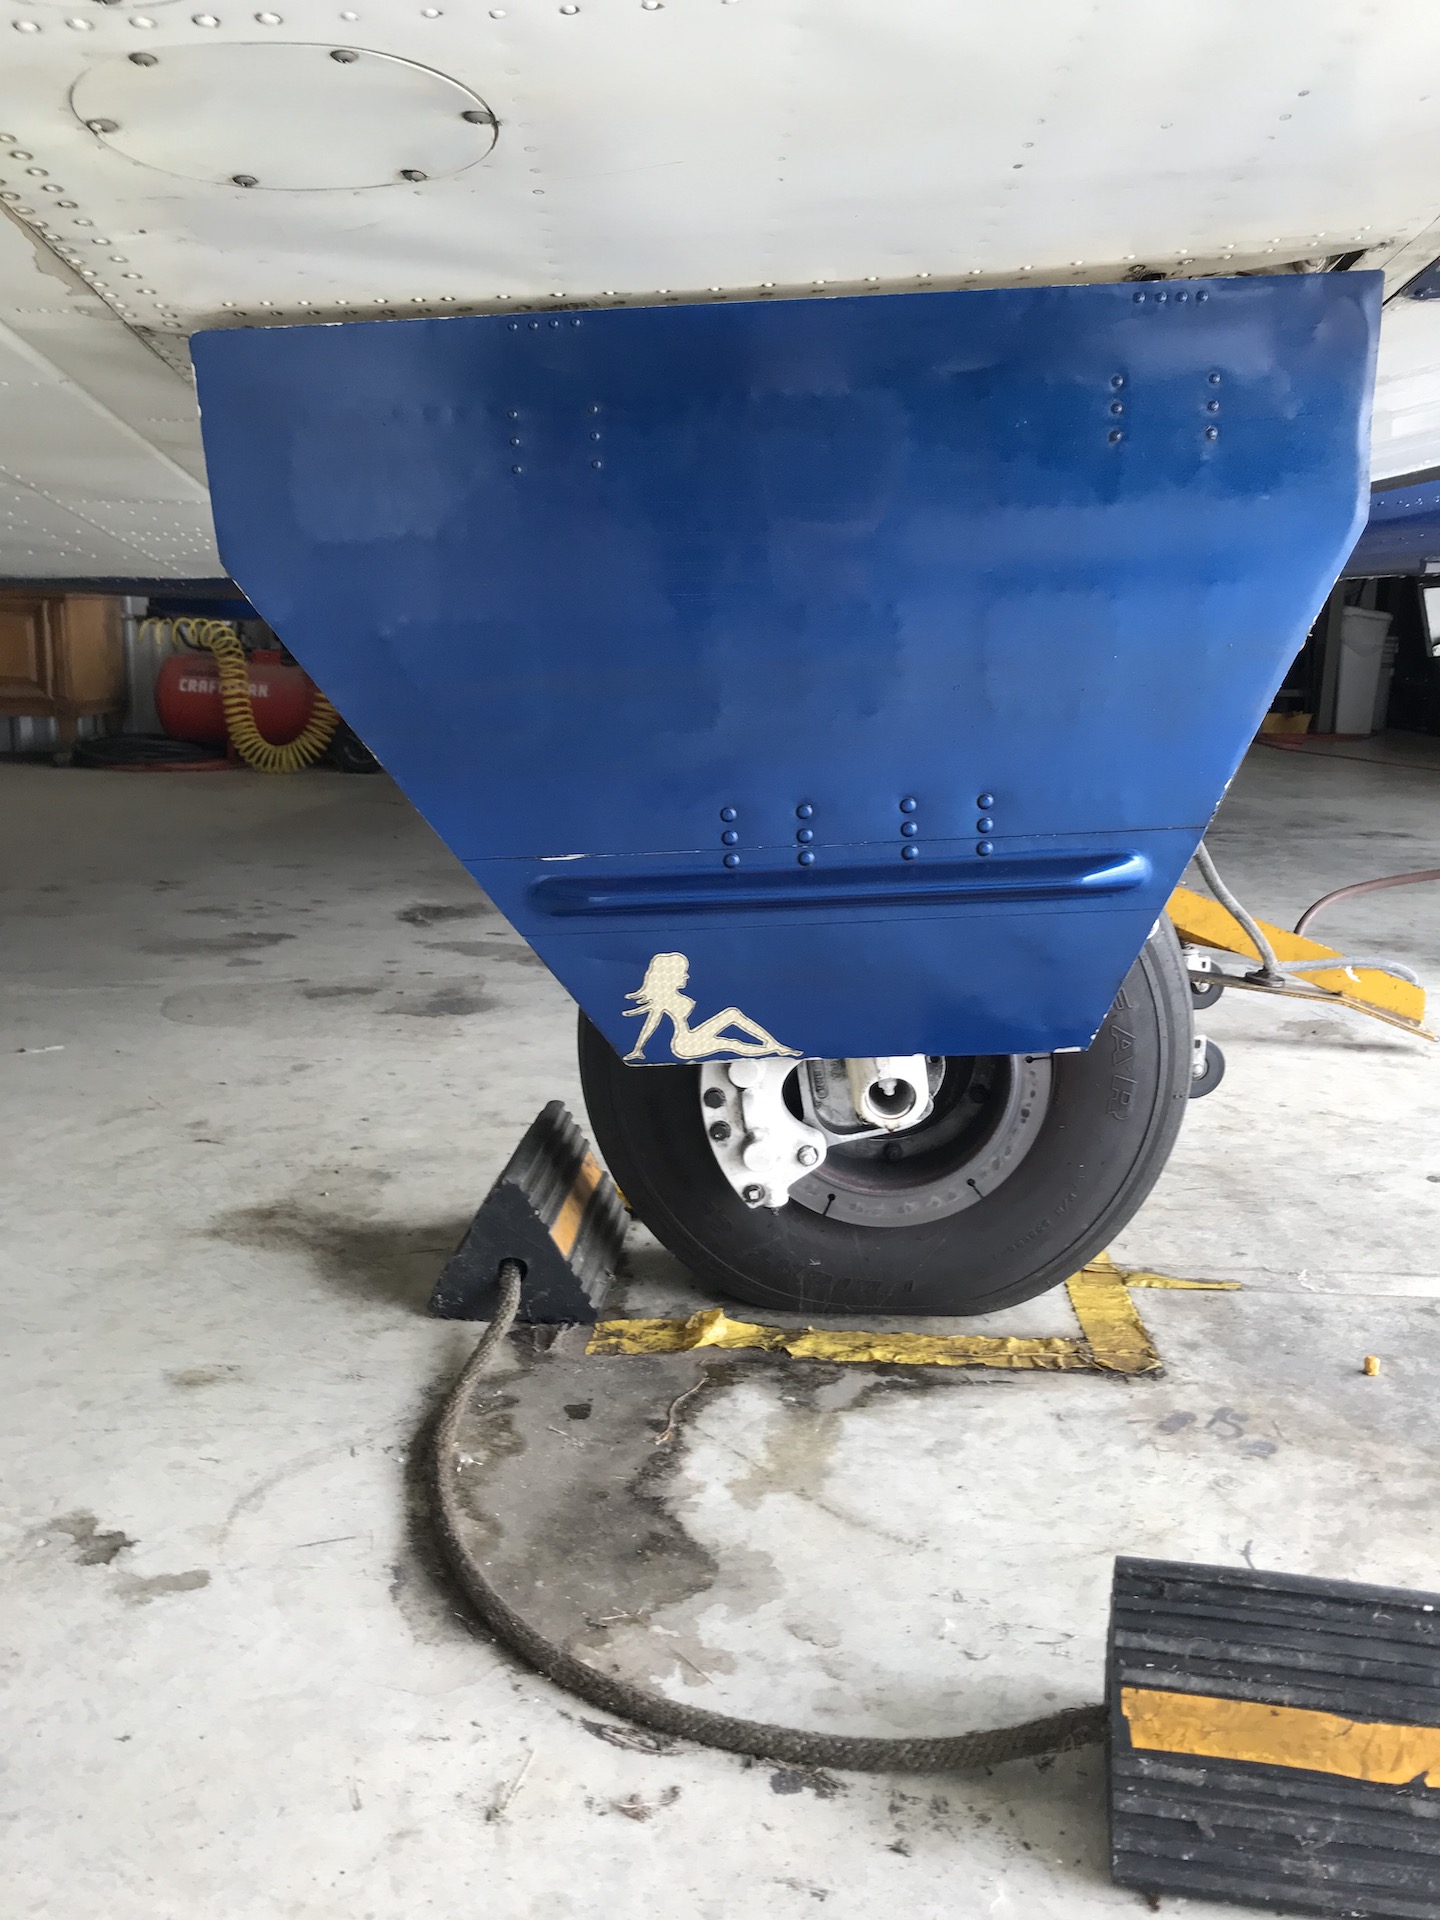
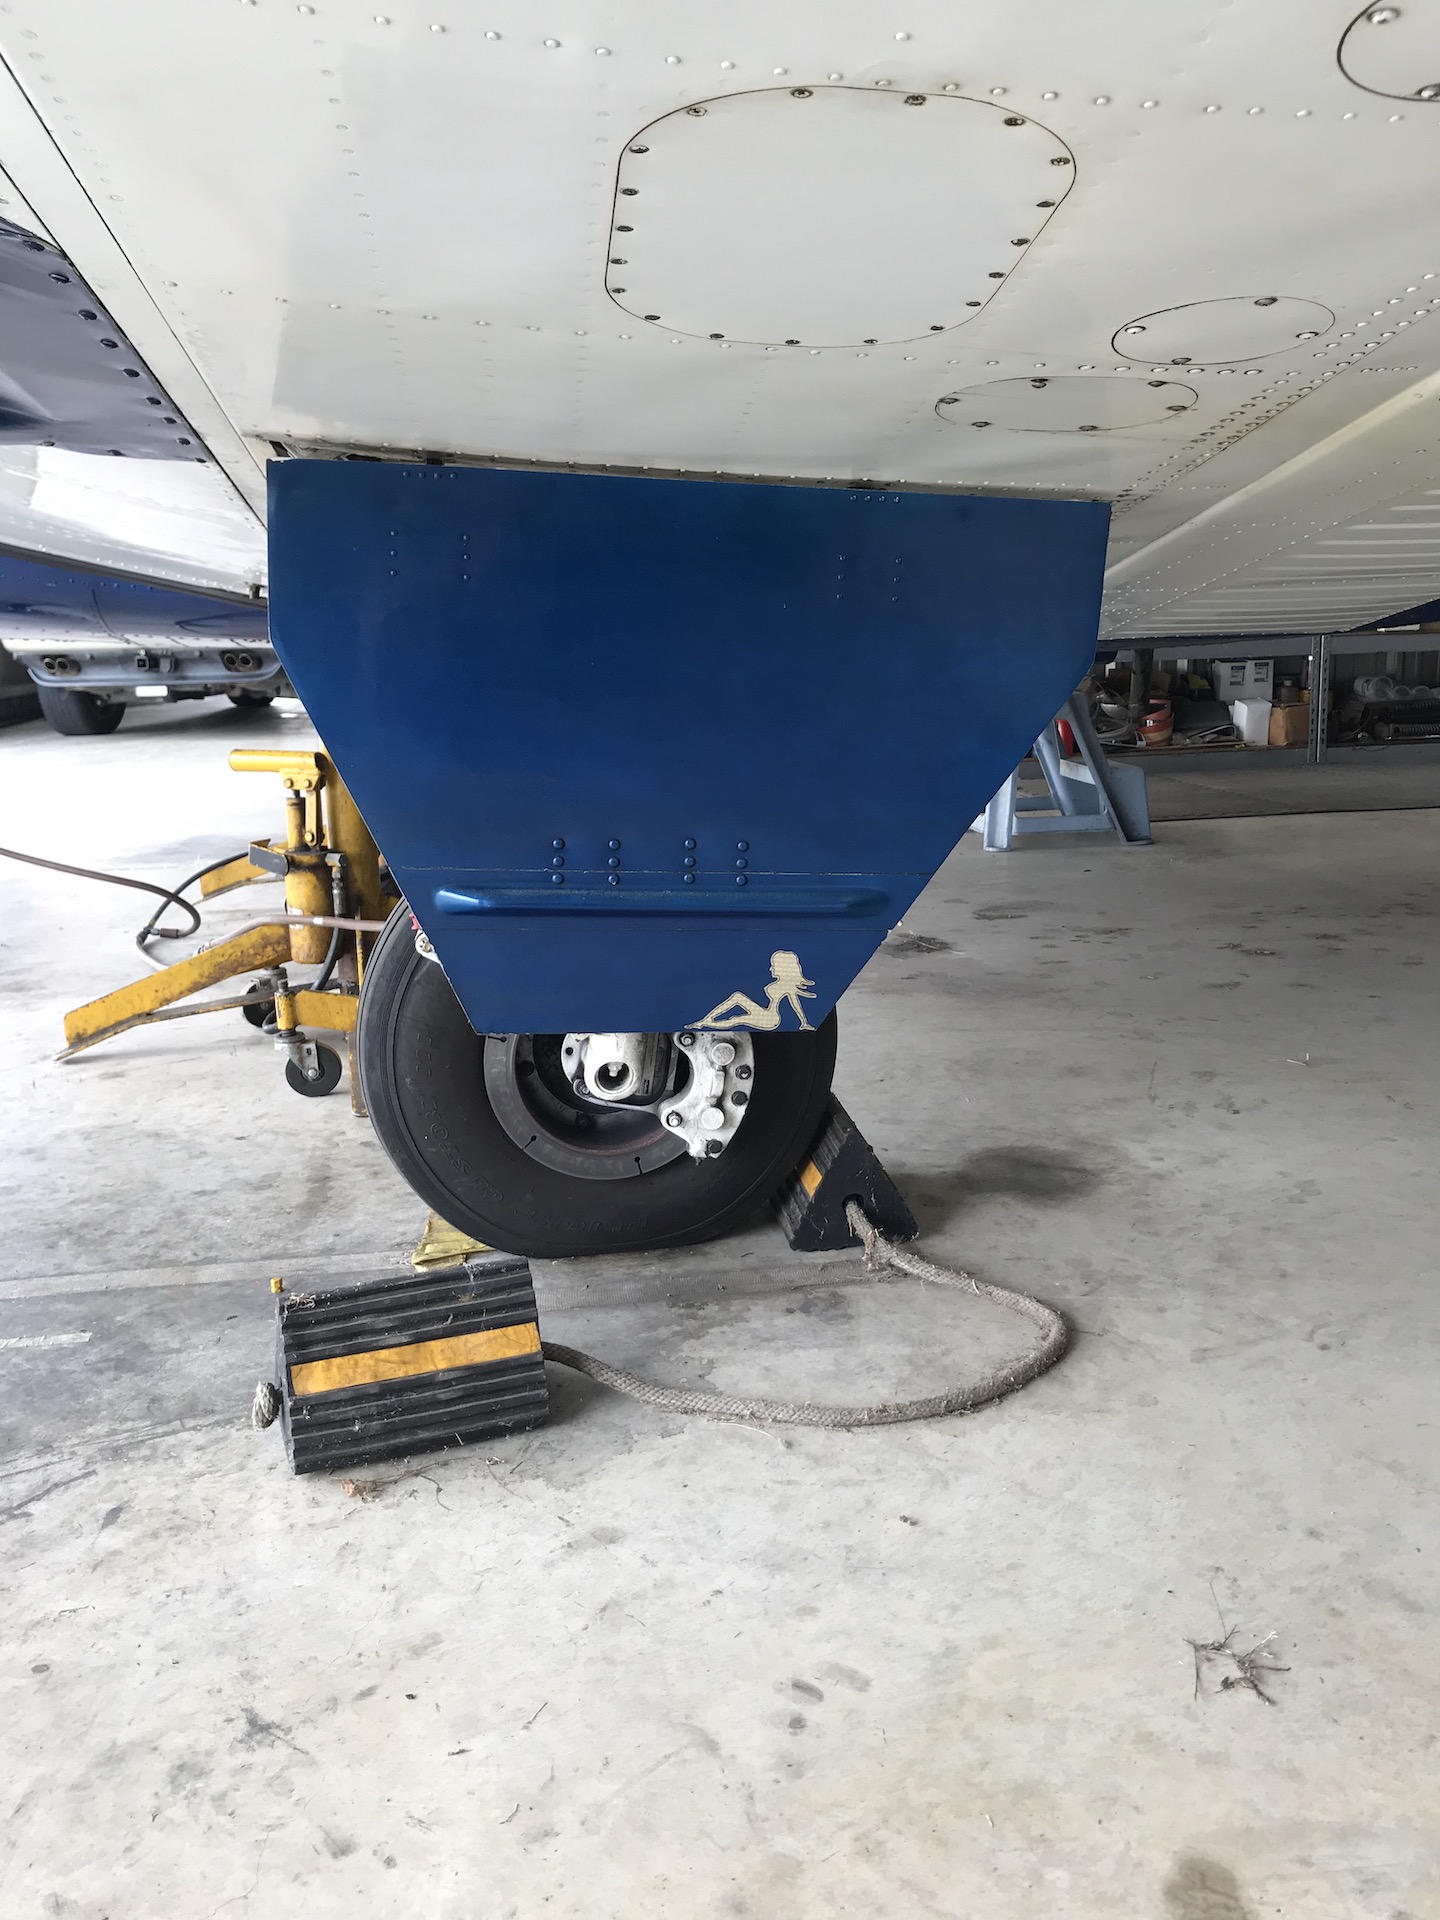
Below are some Baron specific images for exposing the main gear strut
to spar bolts. The exhaust shield removal and reinstall was pretty
challenging, especially some of the forward screws which are nicely
blocked by the exhaust pipes. If your insulation on the back of the exhaust shield is damaged or oil soaked, now would be a great time to replace it.
Another idea to prevent oil entry behind the exhaust shield area
would be to employ a silicone seal on the shield (with A&P approval
of course). This M-D Weatherstripping at Ace or Home Depot
fits the bill nicely. The thin finger is toward the outboard side of
the shield and the self adhesive adheres nicely to a clean surface.
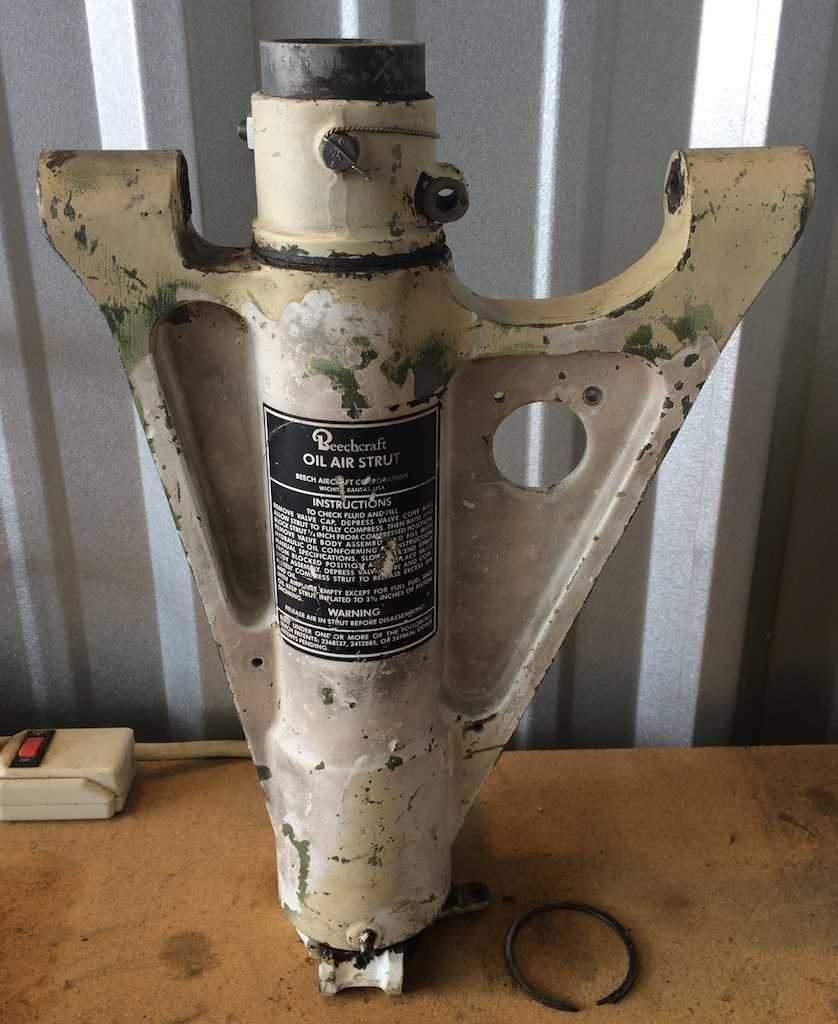
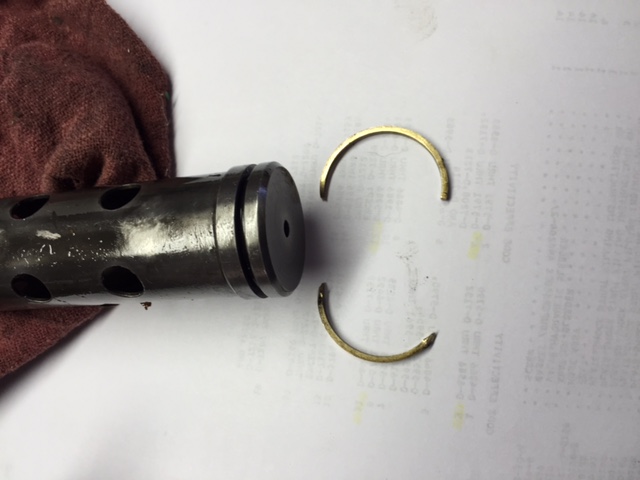
Be careful, if you break this snap ring that lives on the end of the upper shock
tube, it is rumored to be about $200 from Beech.
Below is my insertion procedure
for the top tube with the snap ring into the lower strut cylinder. I
inserted the lower strut cylinder all the way into the strut body being
careful to slowly slide it past the center o-ring so as not to gouge the
center o-ring (-328).
Then I inserted the top tube to
meet the lower cylinder stopping at the brass piston ring. Gently nudge
one side of the piston ring to collapse the ring and allow full
insertion into the lower cylinder.
At this point I attached the
scissor bolt and scissor bushing hardware in place which prevents the
lower cylinder strut from falling out.
Now I tapped the top cylinder into
place making sure to lube the top o-ring (-227) before tapping it into
place. Tap it down past the snap ring retainer groove, then install the
snap ring retainer.
Once
you have the strut top and bottom installed and the scissor hardware
installed, you could proceed to servicing the strut with hydraulic fluid
on the floor cycling the strut up and down with your bottle of fluid in
the top valve body (sand schrader valve). Then gas it up with N2 to
your known pressure for the chrome height you desire. For my full fuel
B55 this is 350-370psi.
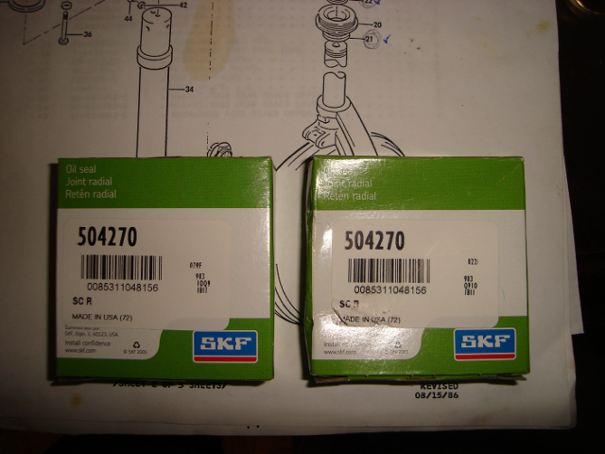
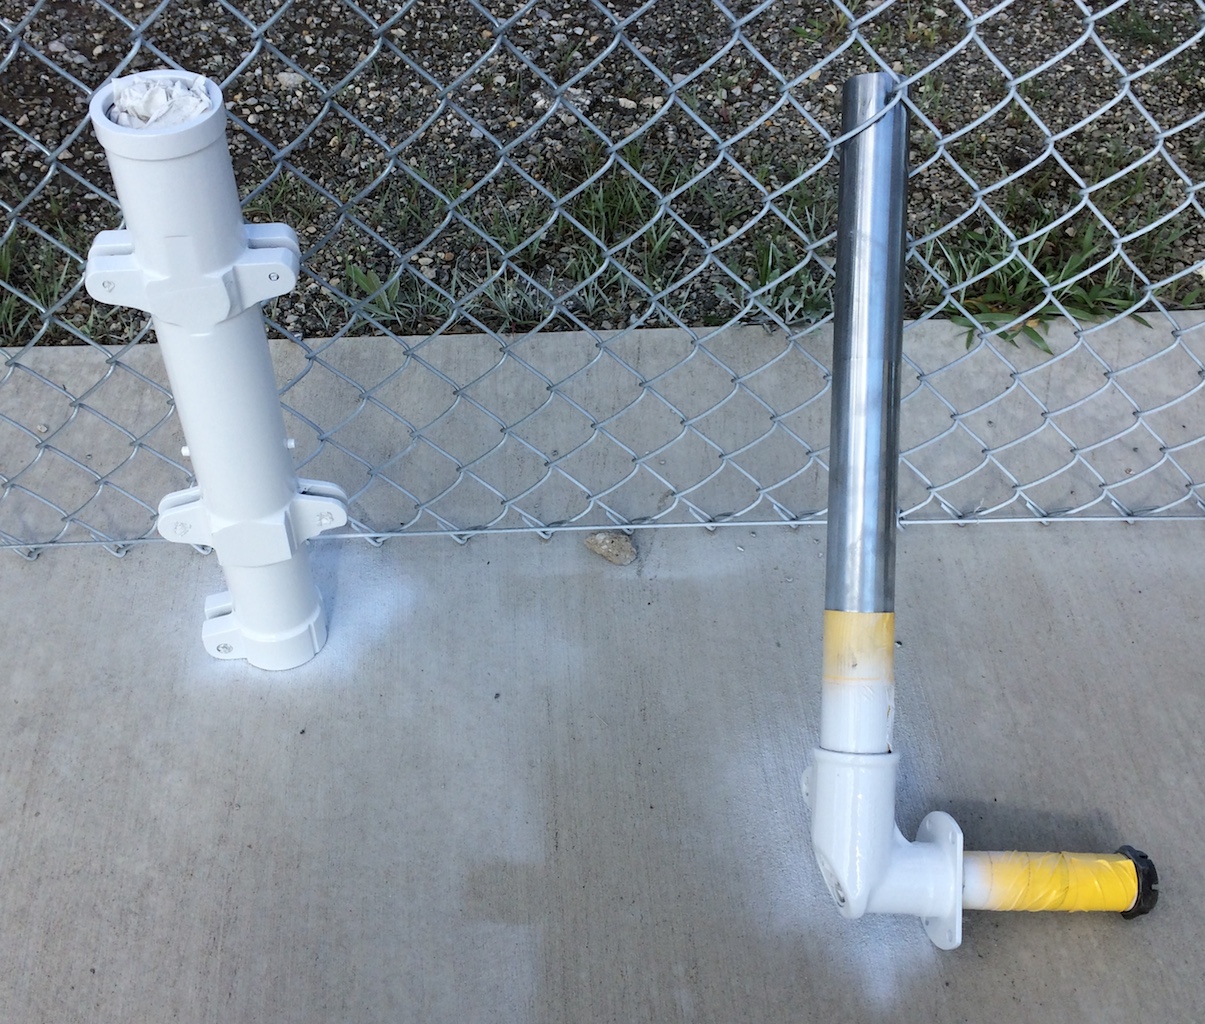
Here is a find by BeechTalker, John K. Can you tell the difference between
these two PN: 504270 strut seal parts? I didn't think so!
The one on the left is a nose strut shaft seal from Beechcraft at >$20 and the one on the
right is sourced
HERE
at $16 or
HERE for ~$15!
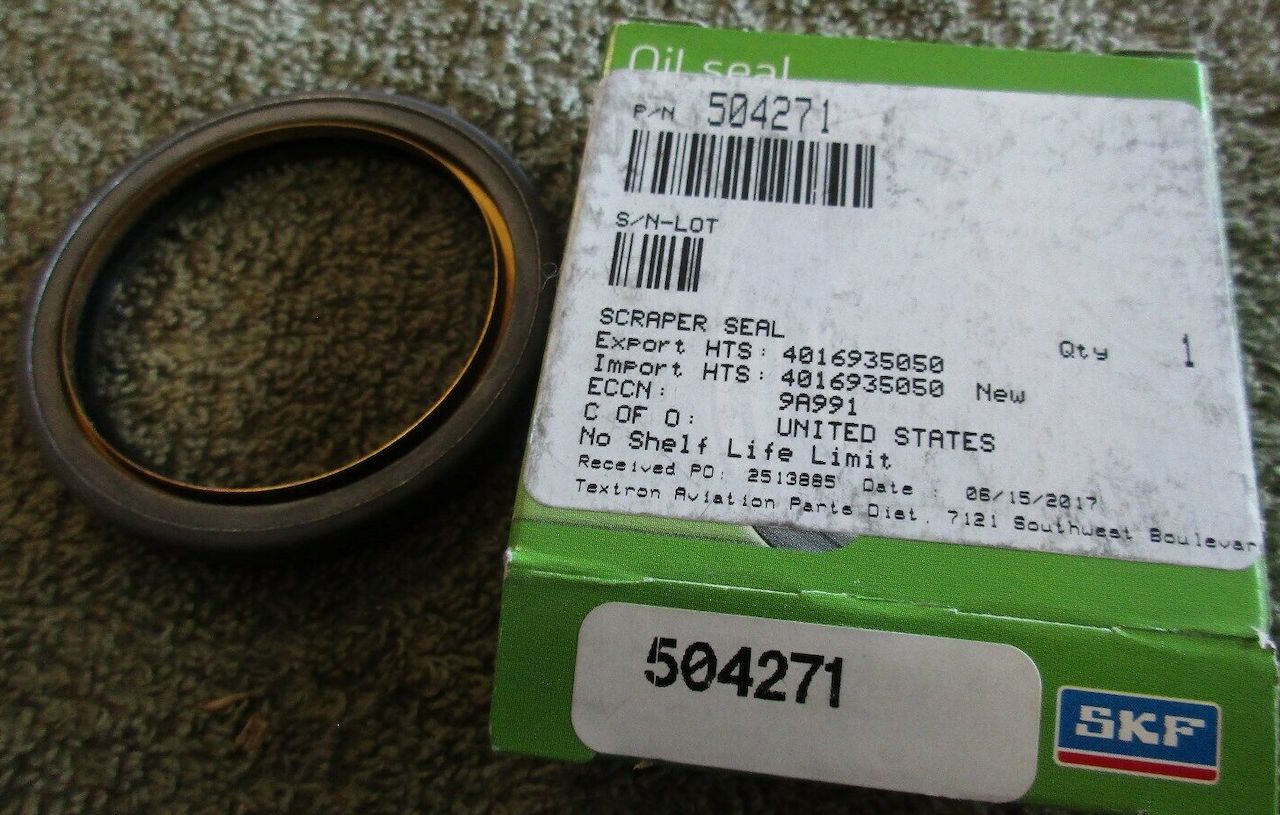
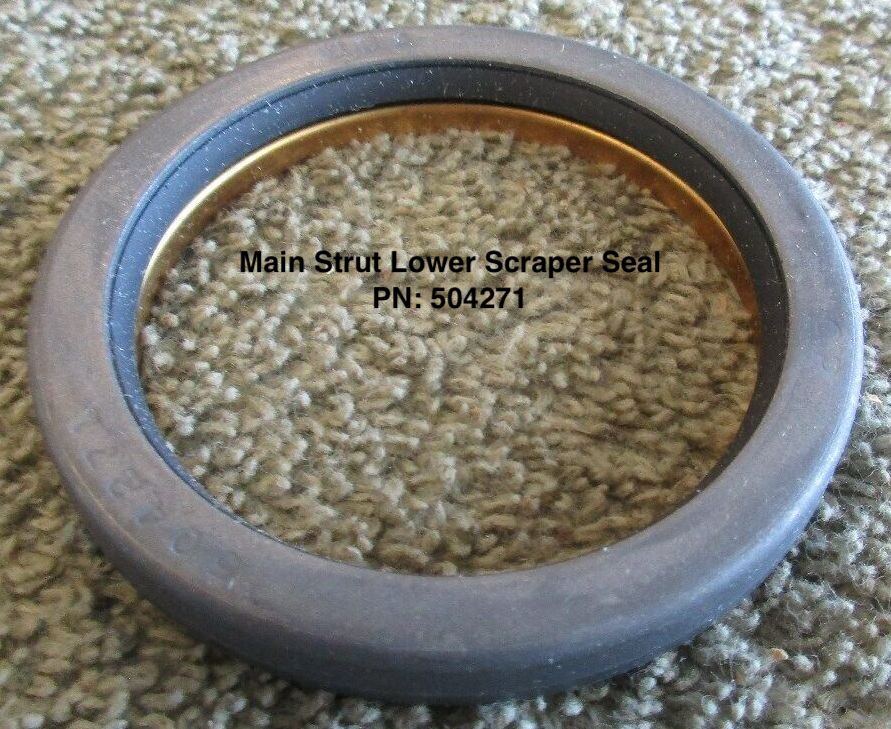
The main strut lower shaft seal is PN: 504271 and is available
HERE or HERE for ~$18
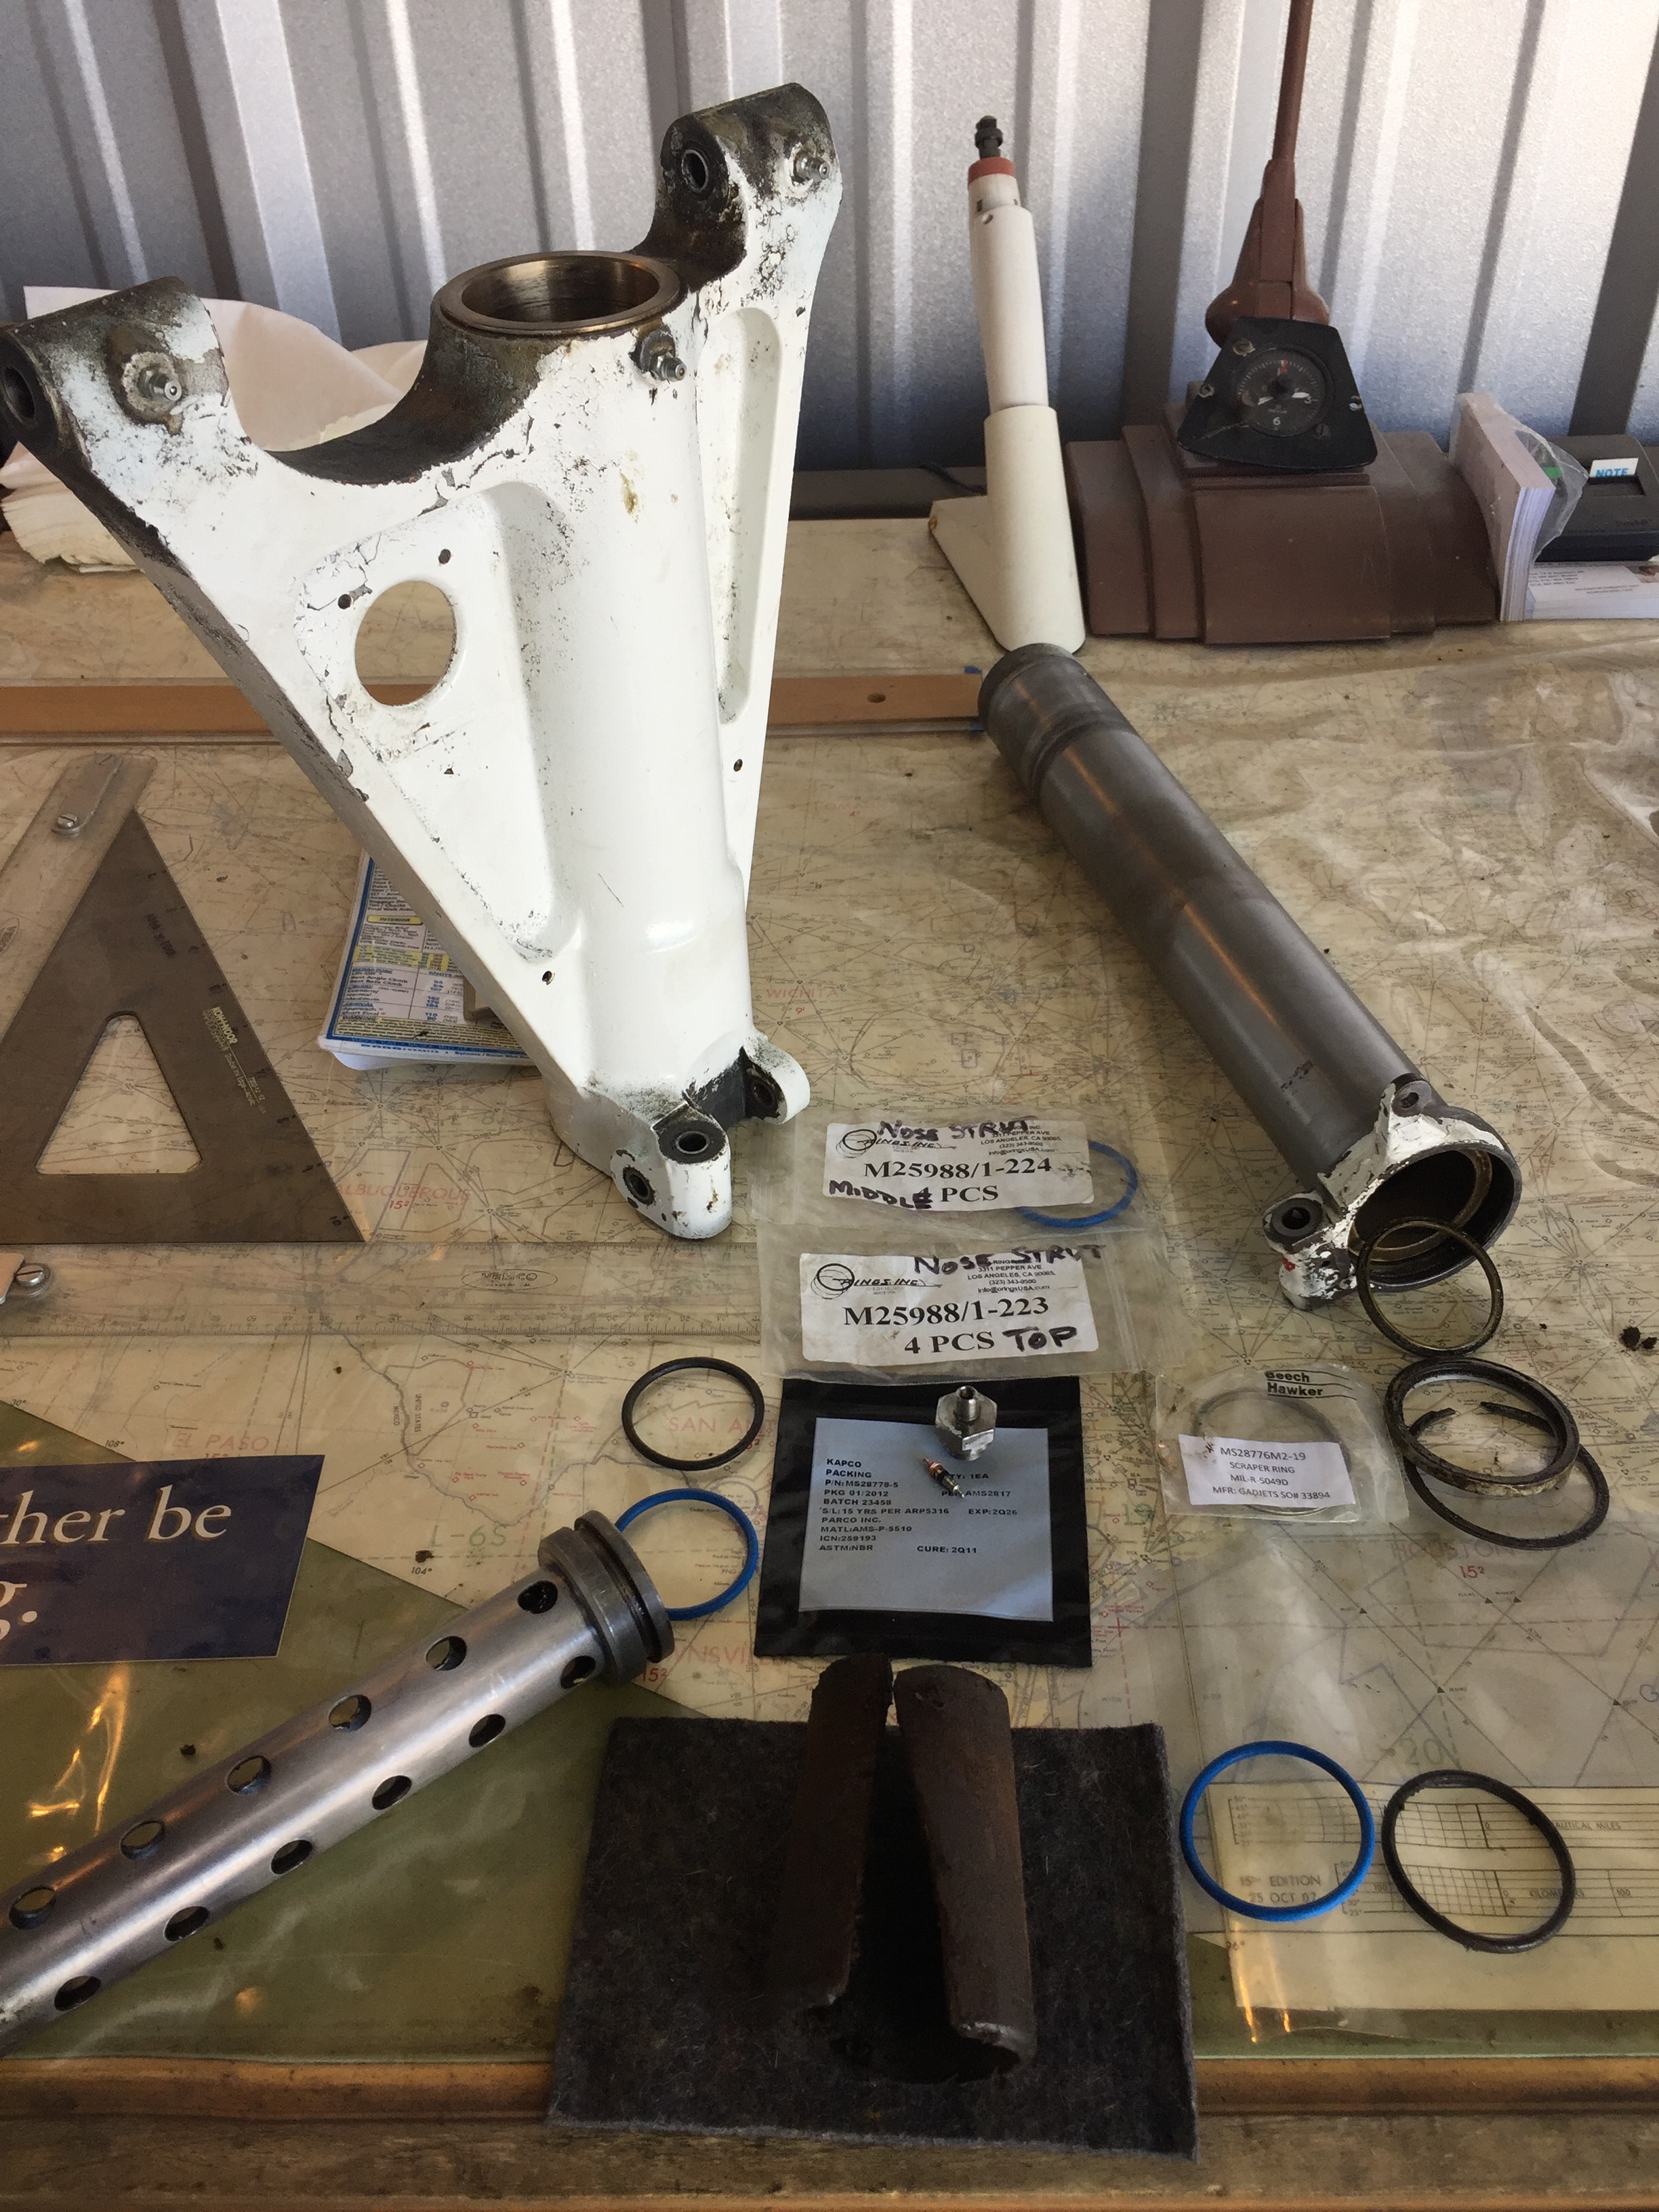
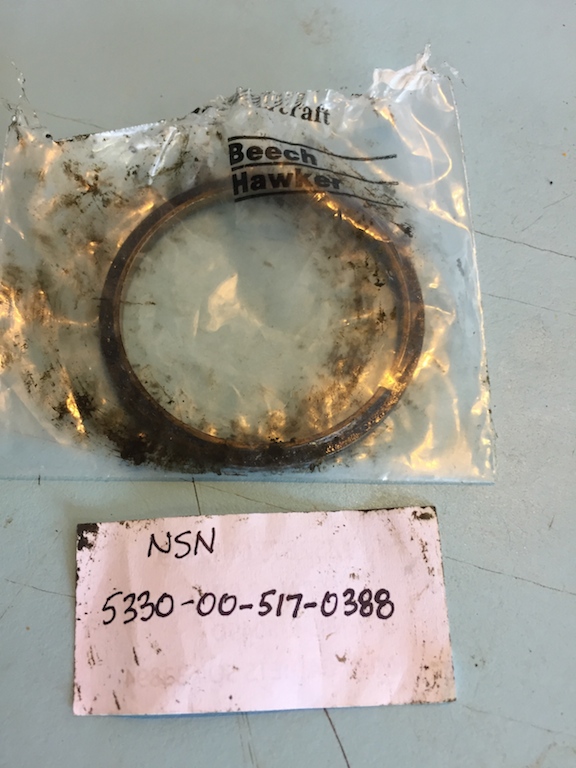
The nose gear strut scraper seal is PN: MS28776M2-19 or NSN: 5330-00-517-0388
Need high pressure Schrader valves? AN809-1 (Mil Spec PN: AN812-1 or
PN: 302DN) is what is used. Check Plane Parts out as they are a CSOBeech
advertiser:
AN809-1
Click
HERE for a catalog of Standard & Custom High Pressure Fill Valves
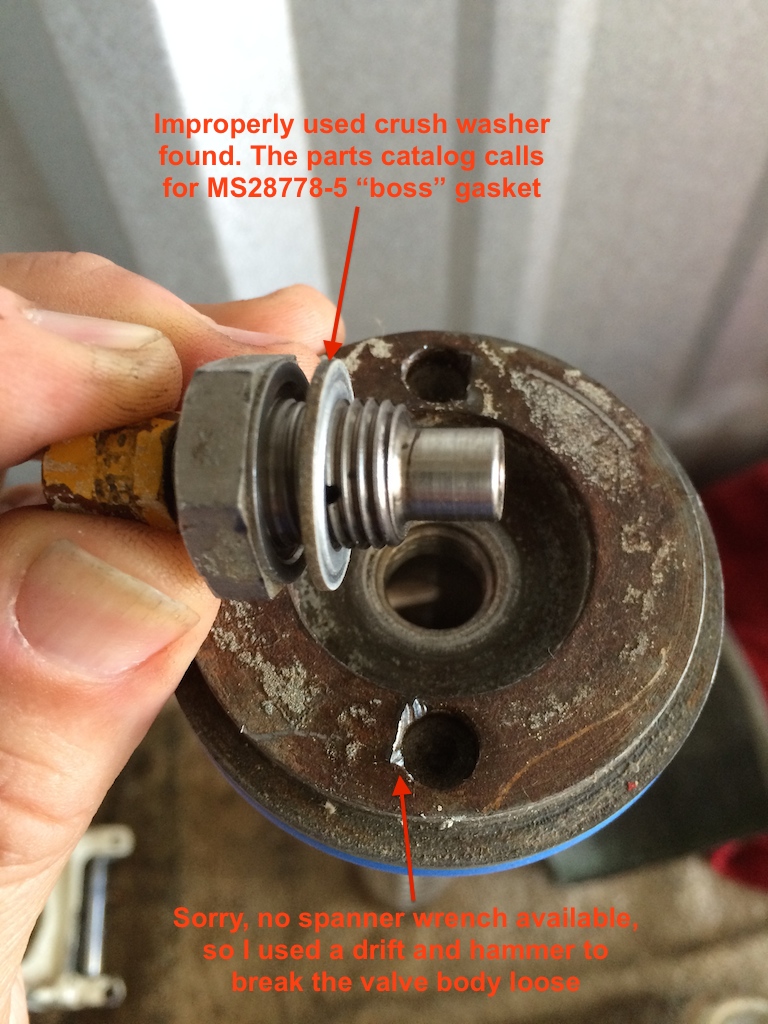
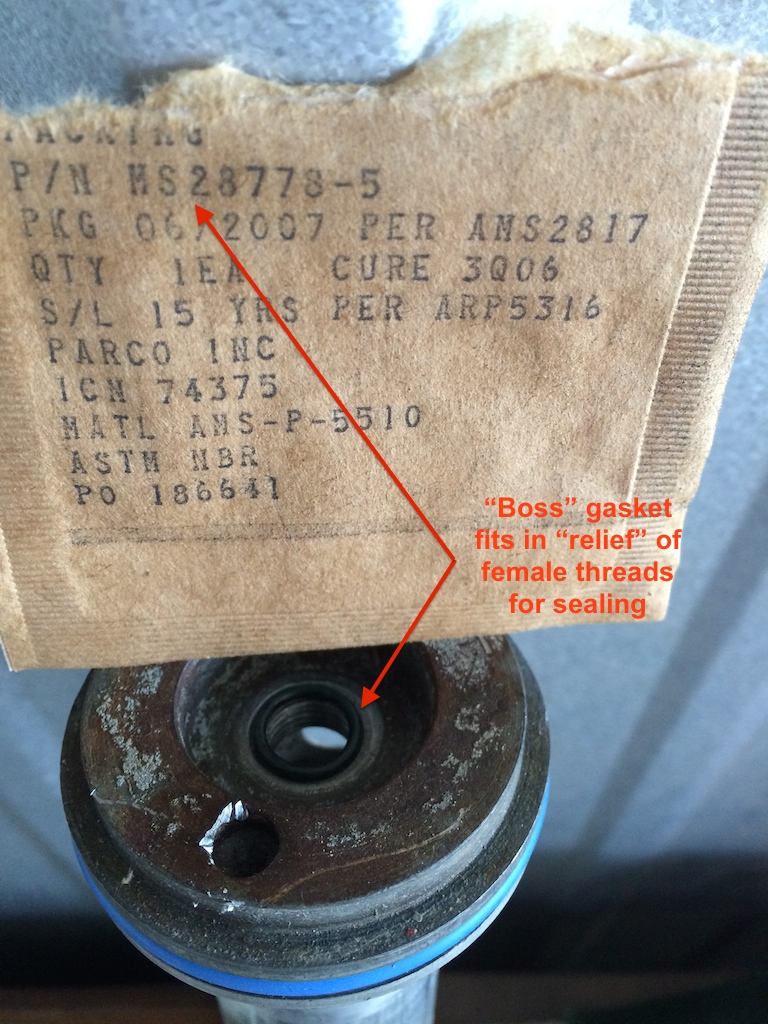
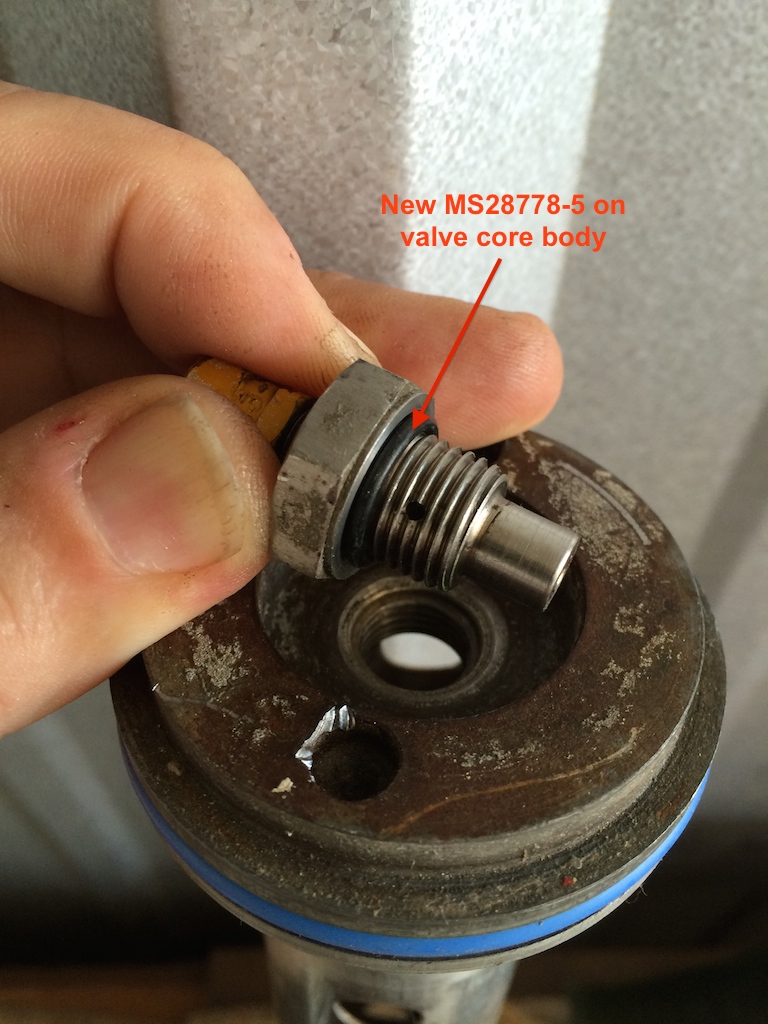
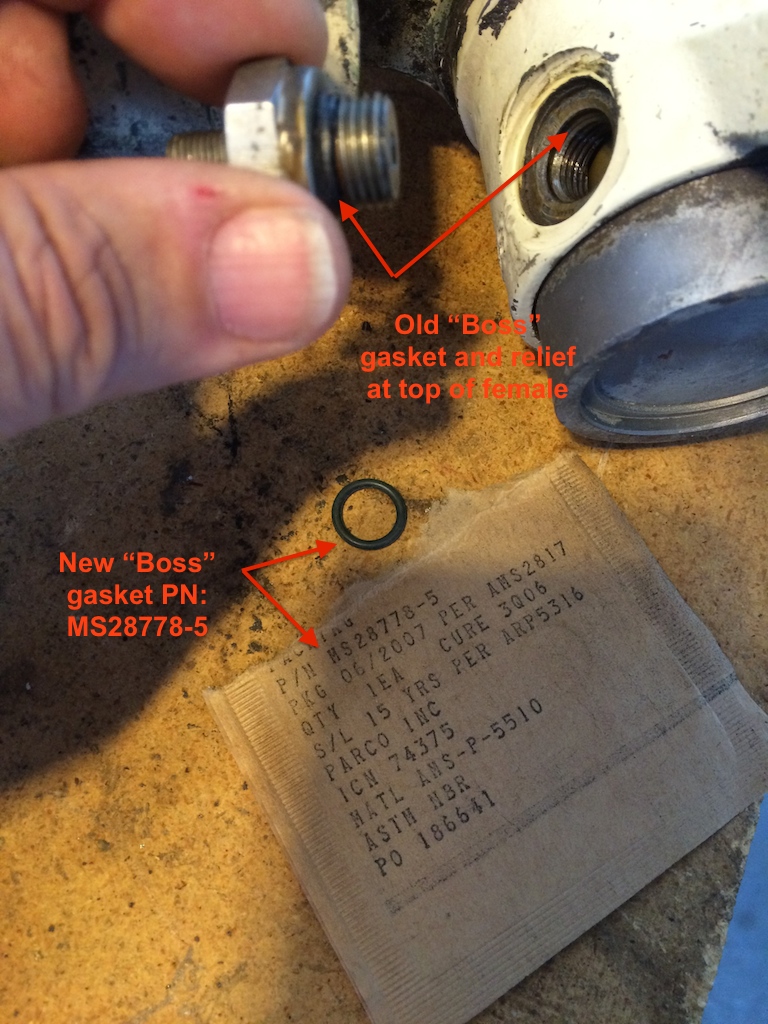
Here are some pictures (click on them to get full size) of the valve core
body area and why you really should use the specified "BOSS" gasket PN: MS28778-5
for the sealing of the valve core body to the top strut tube. I found crush
washers in use on a pair of serviceable main struts I was refurbishing to
replace my 50 year old main gear legs.
It is much simpler if you can, to find a
younger pair of "legs" and refurbish them then, having them at the ready, insert them at annual without
removing the supporting structure from the airframe. Also less chance of gear
mis-rigging, IMHO.
The top tube O-ring for the later model Bonanza & Baron Struts in black
nitrile rubber is MS28775-227, in flurosilicone blue it is M25988/1-227. The
barrel center o-ring in black nitrile rubber is MS28775-328, in flurosilicone
blue it is M25988/1-328.
Below is the nose gear valve core body showing that it too uses PN: 28778-5
"boss" gasket for sealing.
Over many years or in fact decades, these gaskets are prone to wear and can
be the source of frustrating leaks. So if/when you tackle this job, do it right
and refurb all the problem areas so you can get another 40-50 years out of them!
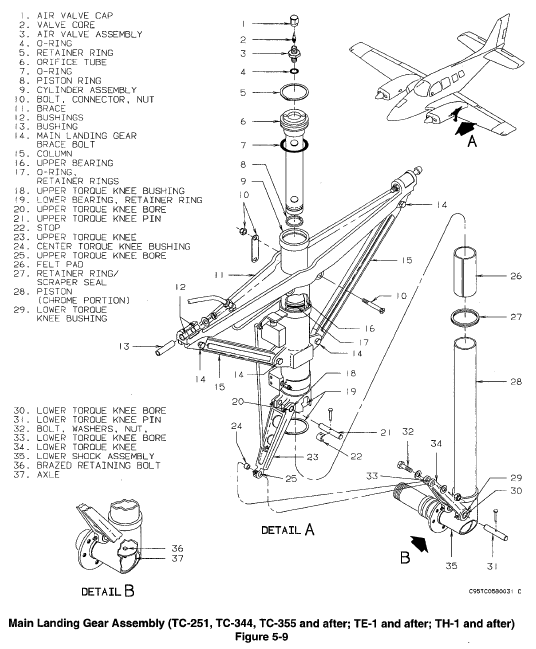
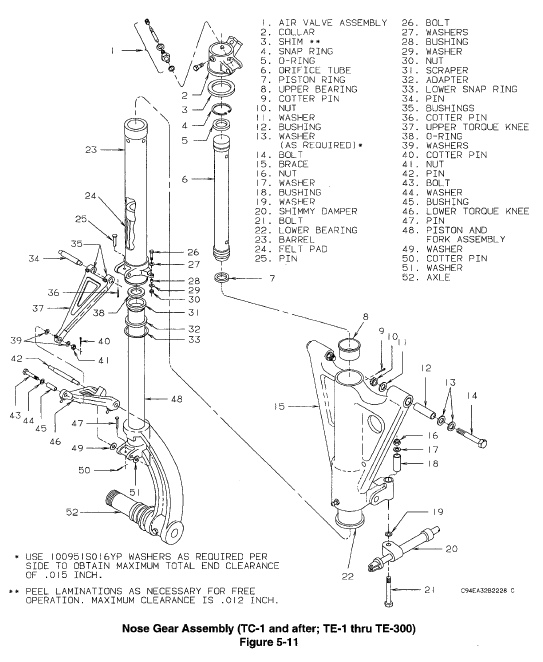
See the Bonanza 33 Series Landing Gear IPC
Extract
HERE
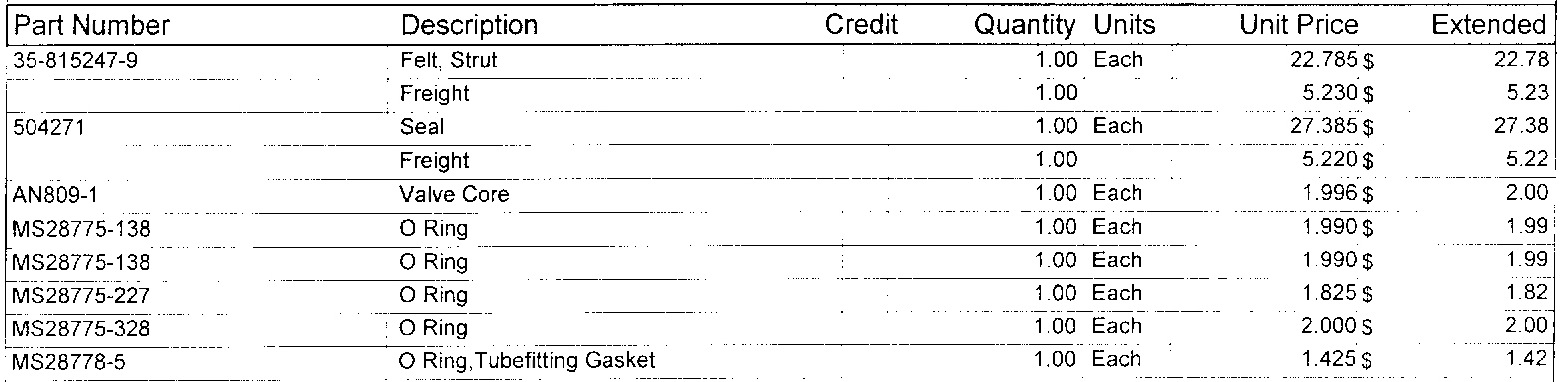
Here is a picture of the parts list for a Baron 55 main strut rebuild.
Caveat: Check your parts catalog to be sure this works for
your SN airframe!
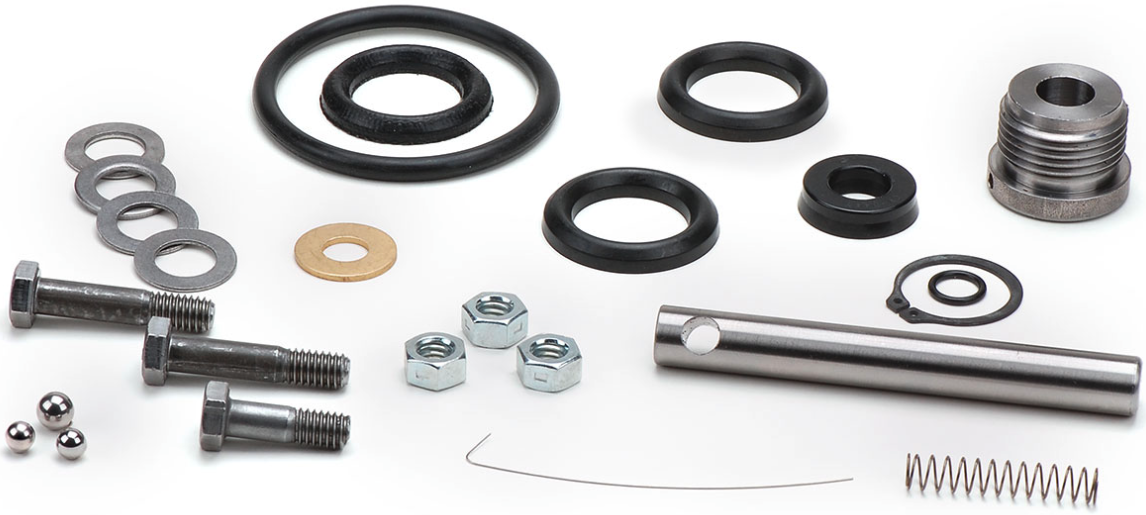
Here are pictures of Nose and Main strut seal repair kits that have been seen
on eBay. Do your research in your parts catalog to be sure you get the proper
pieces for your specific SN!
Main Strut Kit
Nose Strut Kit
Got Leaking struts? Well here is a pirep from Debonair Owner and Beech parts
maven Kevin O.:
"When I bought my Deb15 years ago , both my main gear were leaking. I used a
mixture of 50/50 trans stop leak and 5606 just to get me to the next annual.
WELL--never did leak again. I have to add a little nitrogen about once a
year---and a little fluid about every 3 to 4 years. My struts have never been rebuilt ( 1960 Debonair)
I do have a new set of mains still in the wood beech crate that were built in
1961---when the ones on my plane start giving me trouble--will put new seals in the new
set and put them on.
Transmission stop leak is less than $5.00 a bottle---Granville
Strut Seal is 5-6X$! Same functionality--both soften the seals and cause them to swell just a little."
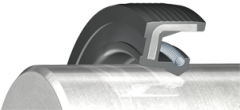
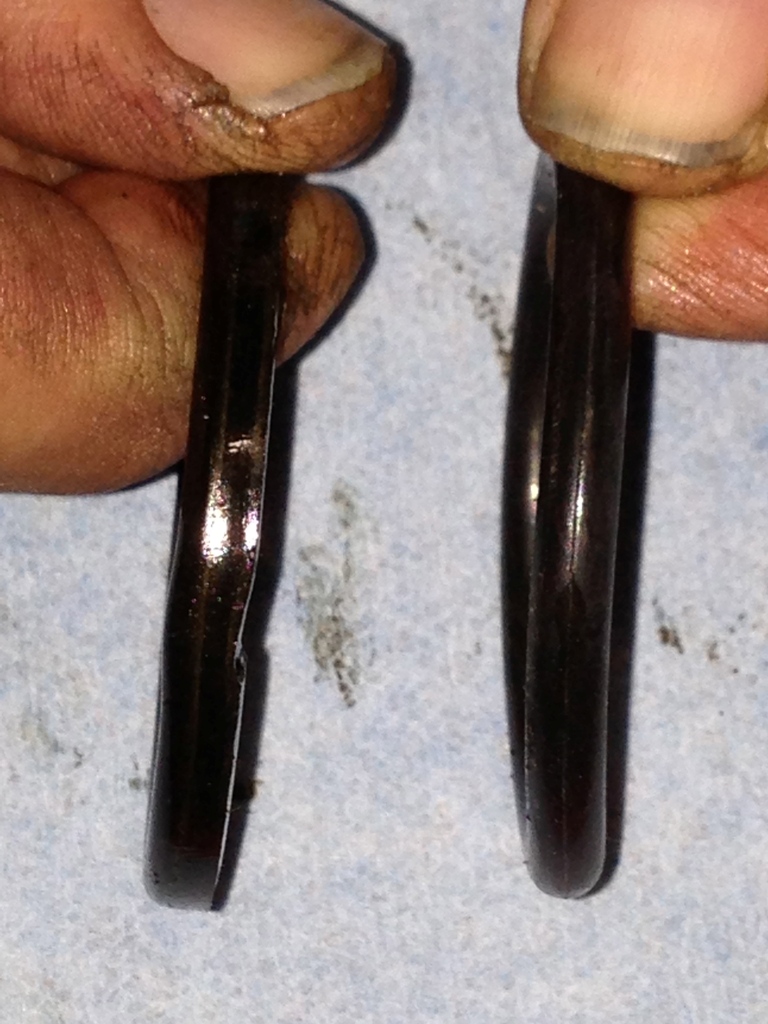
Here is a picture of a typical o-ring failure that causes the strut to
deflate or lose fluid. On the left you can see the deformed edge, on the right a
new o-ring.
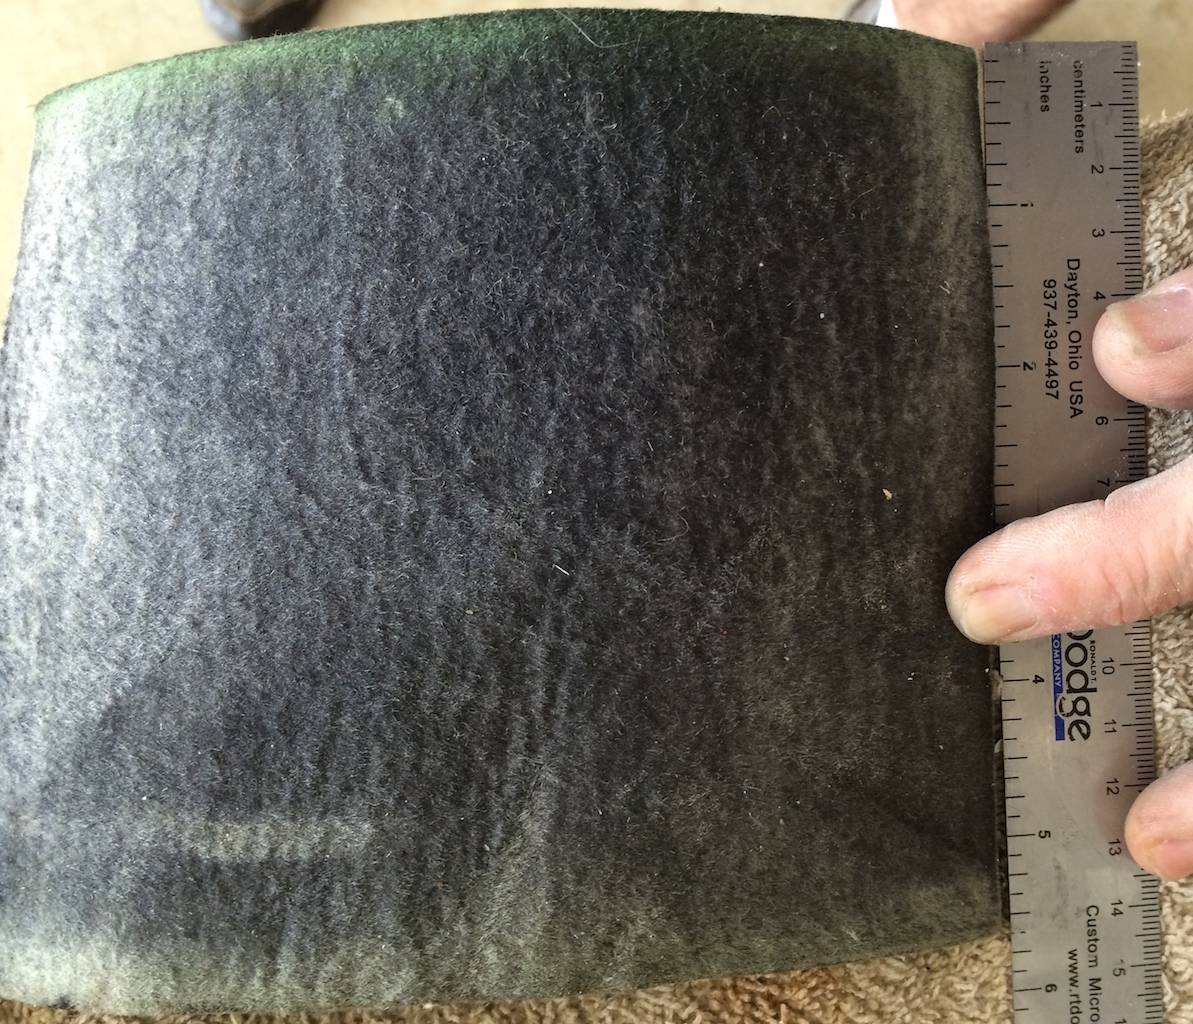
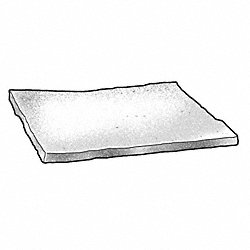
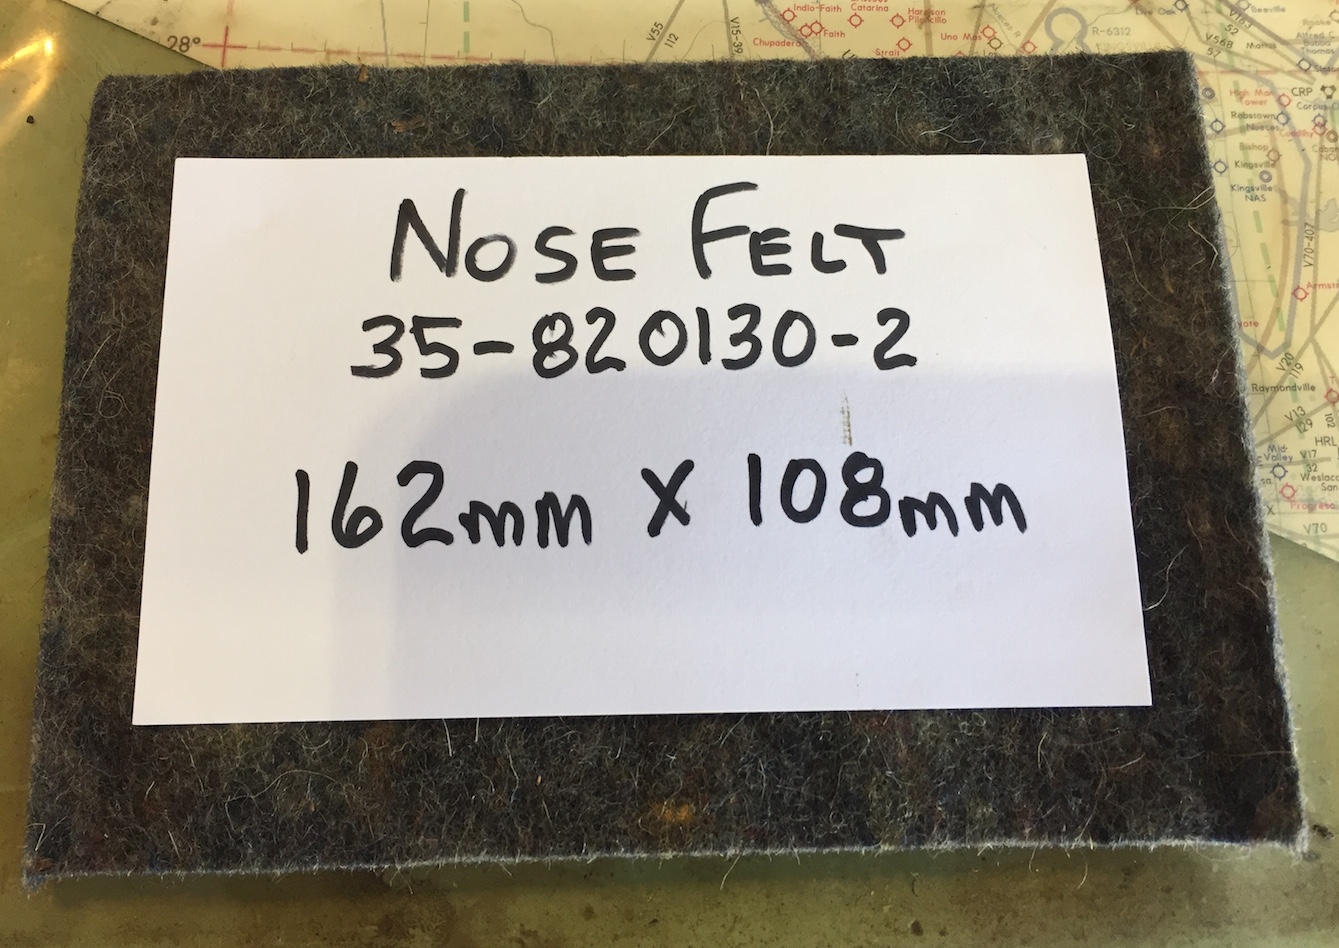
Thickness 1/4 In, Width 12 In, Length 12 In, F1 Grade, Off White Color,
Density 4 Lbs/Sq Yd.
F1 and F3 refer to the SAE grade, F1 is the highest. Both are indicated for
wiping applications.
They also have it in 24"x24" sheets.
Nose Felt PN: 35-820130-2
Legacy Nose Wheel Grease Felts are Retired
Speaking of Felts, here is a discovery that the legacy 5 x 5 nose gear grease
felts have been discontinued in favor of a bearing with a molded grease seal (PN: LM67048XL), available at Amazon HERE and bearing cup (PN: LM67010XL) available at Amazon HERE.
From This
To This
WOW, how long did it take to get out of 1940's grease sealing technology????
HERE
is the Parker Reference Memo (PRM97) outlining the change.
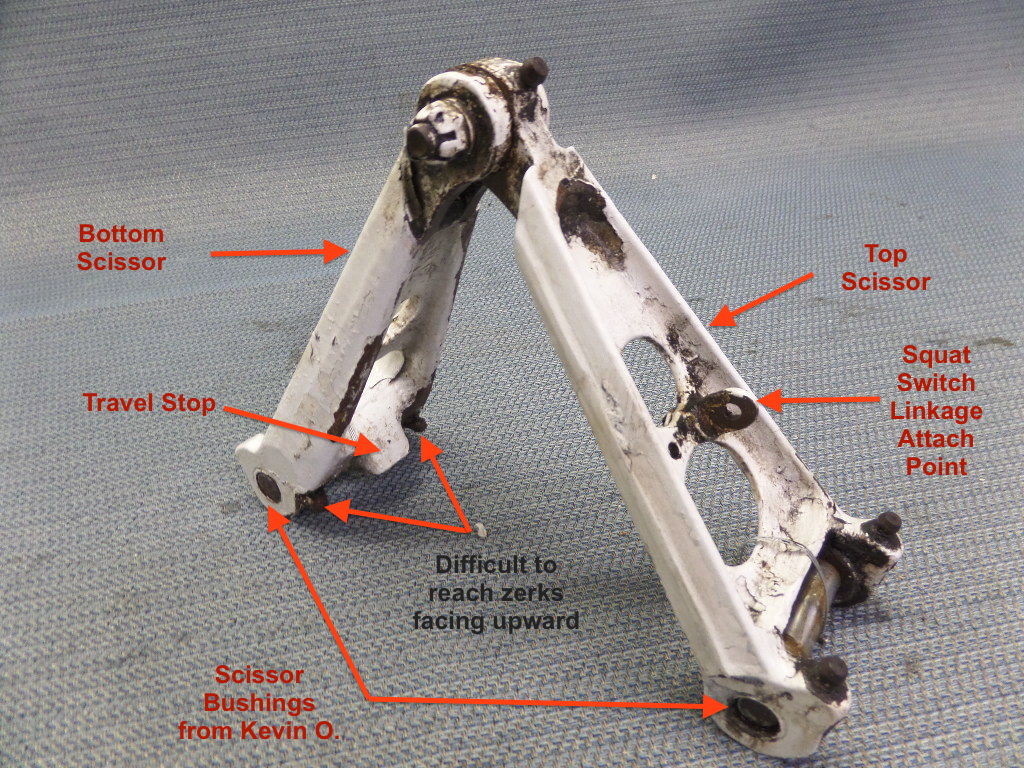
Many airframes are equipped with the lower scissor zerks in a
difficult to grease upward facing position. Whose idea was that? Or was this a
Beech shop floor Boo Boo? Well, those zerks are a PITA to get a grease tip on
unless it's annual time and you have the plane jacked up and the outer gear door
linkage detached. BUT, alas, we have found lower scissor linkages with the zerks
facing downward in a much easier to grease position in PN: 36-810016-5 as seen
below. Possibly easily sourced at eBay if your zerks are really that bothersome
to you.
OK, since you hung in this far on the strut rebuild page, you must really be
interested in this topic. As a reward,
HERE is the ABS
Article Extract and high resolution Figure links!
If you've found this content useful, even though you're a card-carrying
CSOB, please consider a
secure PayPal donation by clicking the "Donate" button to defray some
of my expenses.
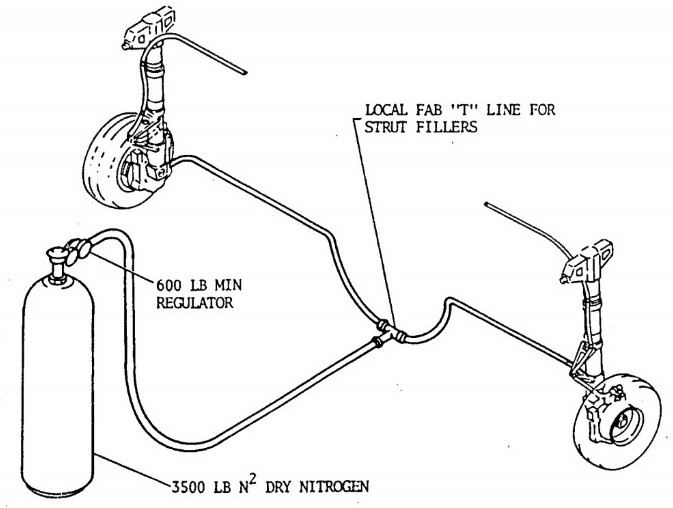
Easy N2 Filling Hack To Balance Main Strut Heights
Aerostar Shop Manual Diagram
After years of bouncing back and forth with
the N2 tank between the two main struts of my B55 to achieve an equal
strut height on each side, my IA came up with this simple but effective
hack to equalize the strut heights.
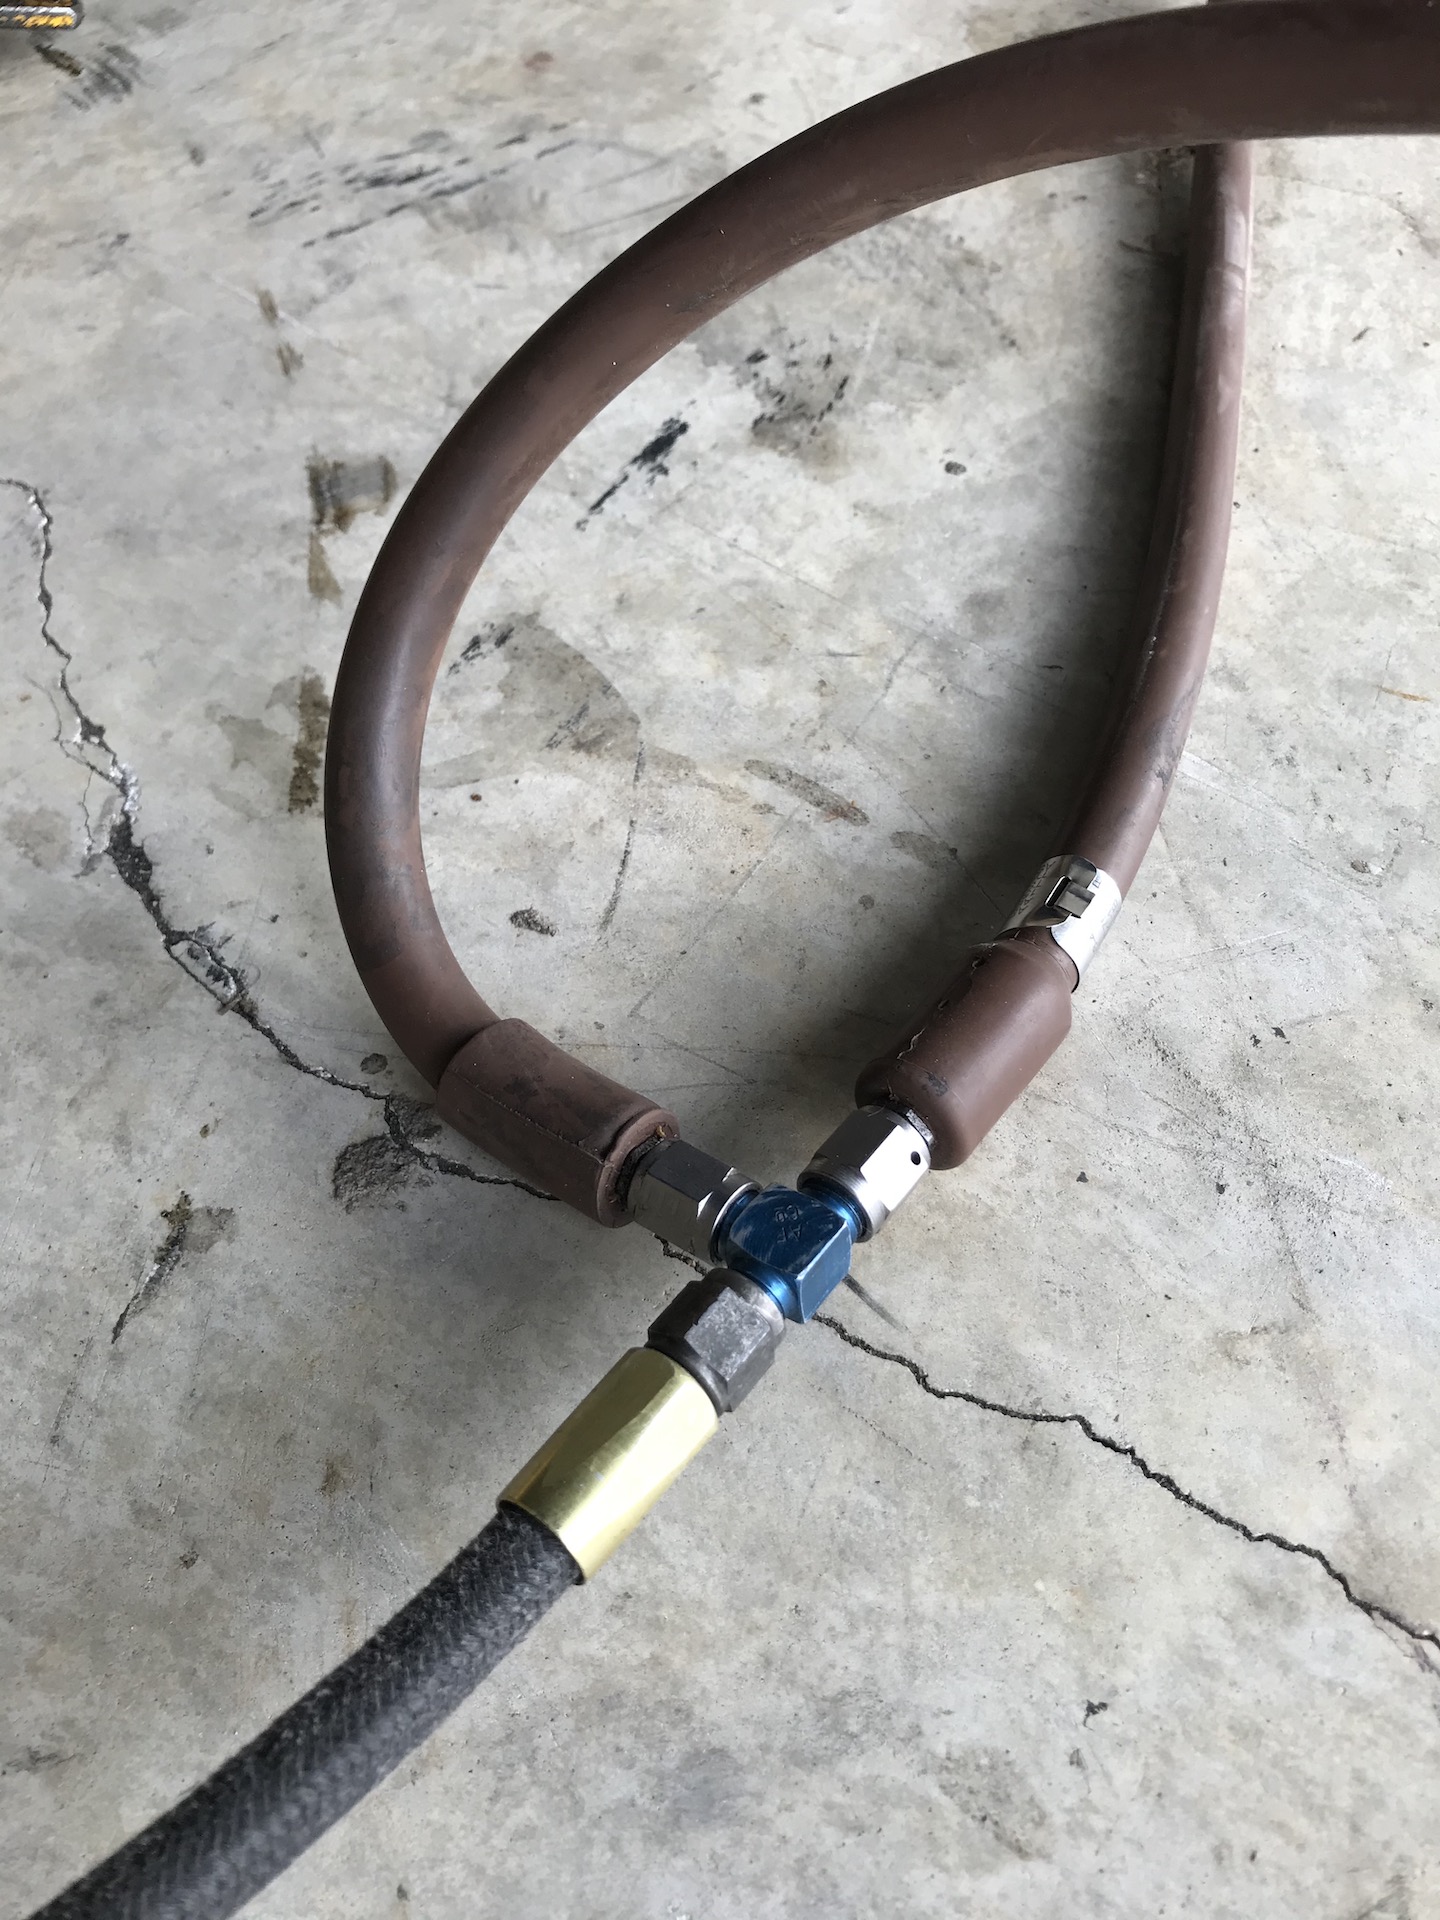
It simply involves making a "T" connection
off the N2 tank to connect to both struts at the same time. It works
great! We simply jack the plane (using a tail stand obviously) to extend
the struts to max extension, connect the N2 lines to the top schrader
valve, then open the valve on the tank and adjust your pressure
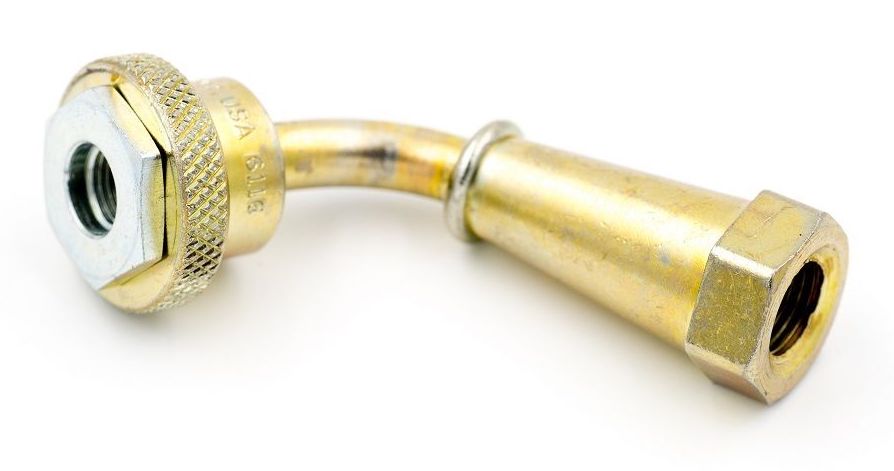
accordingly. We like the Gooseneck filling connector PN: PPK-3706 from Plane Parts (a CSOBeech advertiser)
Or if you'd rather purchase
a complete Dual Strut N2 Filling Rig, check out the below which
would be "Plug-N-Play" to your N2 tank complete with dual hoses for a
balanced N2 fill of your main struts! If you prefer, you could swap in the Gooseneck filling connector above onto the N2 lines.
Bonanza owners/visitors are encouraged to me with the pressure they use and chrome height results they achieve for their model. We use a regulator to precisely meter the pressure of the
>2000psi N2 tank and hope that you will too.
My full-fuel B55 takes 370 psi to create
roughly 3" of chrome showing on the strut when the full fuel weight is on the
wheels. Your height preferences may vary, but at least you have a psi
benchmark to work from.
The B55 nose is reported to need ~200 psi when on
jacks to create 3" of chrome showing. I had my plane off the jacks just
after annual and the nose was at about 2.25" of chrome showing. Rather
than jack the plane up all over again, I decided to try adding N2 with
weight on the nose. I installed the above goose neck fitting to the
strut and set my regulator to about 250 psi then went to the tail and
rocked the tail up and down a little and was able to achieve the 3" of
chrome showing.
Here is a tip for a
nice fitting hose that seals over the schrader valve. The O2 connection
end of a cannula hose fits great for me when I need to refresh my strut
hydraulic fluid or fully service the strut. Click HERE for a low cost hose option.
Here's a strut
servicing hack if you don't want a bicep workout. Use an automotive
floor jack to slowly cycle the strut up and down until no more air
bubbles.
Jeff W., a Travel Air owner advises the following:
the first time you compress it, put the tube in a waste can to get rid of the old oil.
Then
put the tube in clean 5606 and let the strut down, drawing in clean
fluid. Put the tube in the waste can one more time for another
compression and now you have all that old junk out of there.
Submerge
the tube in clean fluid again and don't take it out for several
compressions & extensions, until you aren't getting any more air
bubbles on the compressions.
One
more time extended and on the last compression stop maybe 2 inches from
full compression. That is the fluid that will stay in the strut.
Take
off the tube, install the valve core, connect to your N2 or dried-air
source and start to add a little air as you let the strut down to fully
extended with the jack.
Then inflate it normally. Some N2 pressure guidance can be found HERE for some Beech Models.
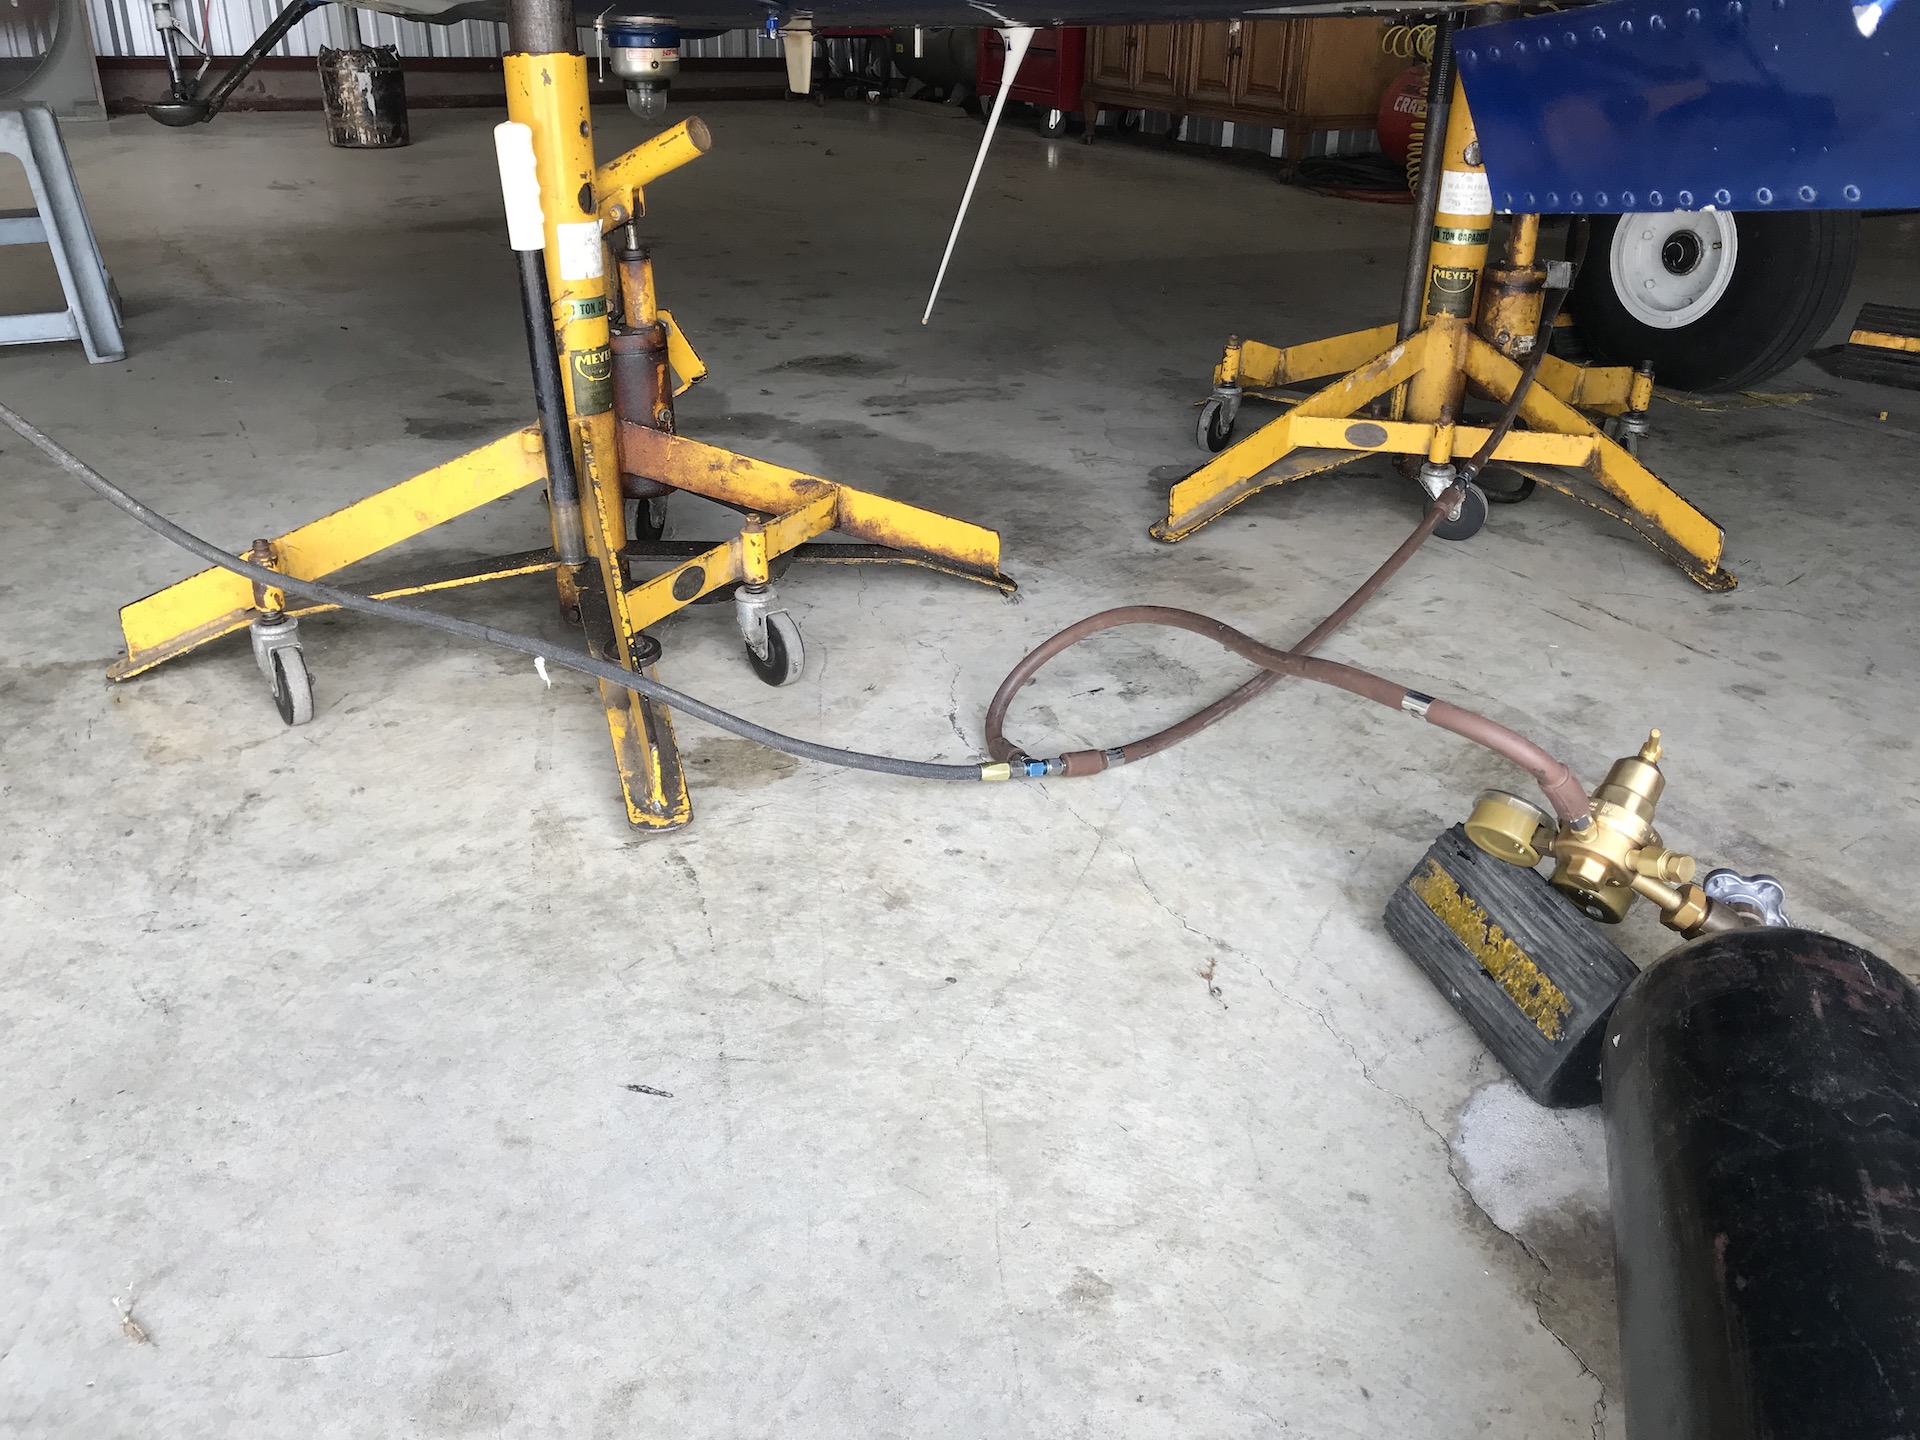
PS: Meyer's Jacks are the
best, however, they are extremely expensive as jacks go. I inherited the
pair seen below. They are Model A5 and I recently (3 December 2023)
rebuilt them with the excellent Meyer rebuild kit PN: K-150A.
Details to build your own N2 filling rig can be seen HERE.
Below are pics of the "T" rig that I use and my results achieving equal strut heights. Check out this Dual Strut N2 Filling Rig if you want to skip the DIY build.
1994 A36 owner, Jose R.. reports inflating his struts (with wheels off the floor) to 215-220psi.
1972 F33A owner, Steve B.,
reports inflating his main struts to 150psi and getting 3" of chrome
showing when full fuel weight on wheels.
If you've found this content useful, even though you're a card-carrying
CSOB, please consider a
secure PayPal donation by clicking the "Donate" button to defray some
of my expenses.