Electric
Motor Repair & Refurbishment Ideas & Methods
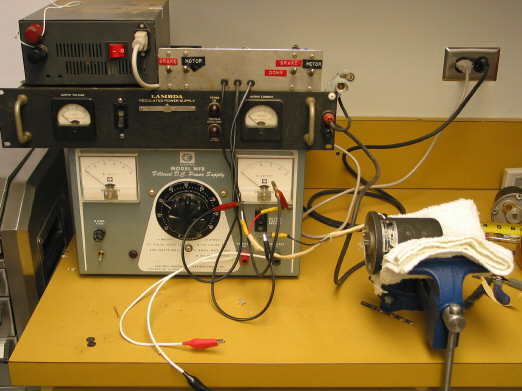
Ever wonder what magic those motor shops
perform on the electric motors in your Beechcraft? Well wonder no more, here is
an array of equipment and methods used by Kevin O., a Beechcraft owner to keep
electric motors operating at top form. Pireps of 7-8 seconds retract time have
been reported on his rebuilds. Email him HERE for info on how he can help you with your electric motors.
Here is his narrative (and yes, of course he
is A&P supervised)
:
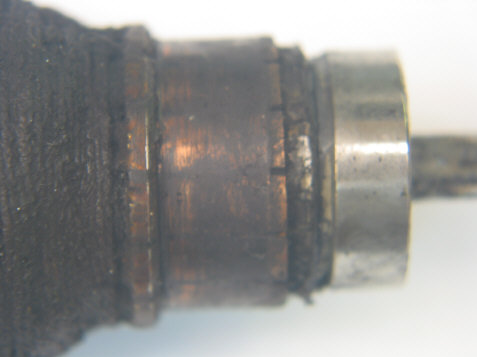
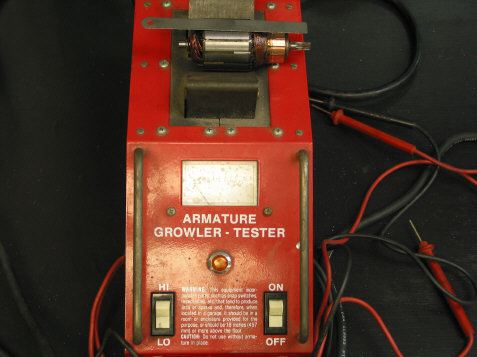
1st picture is of as removed armature. Remove Bearings
Clean it in a ultrasonic ammomia bath for 20 minutes
check segments of armature for shorts or breaks using a
armature growler
As Removed
Armature
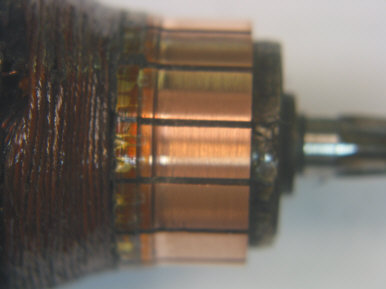
After Clean Up
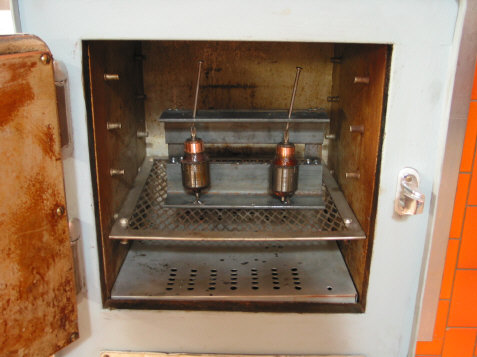
Dry it in lab oven for 1 hour at 180 degrees
Check
segments of armature for shorts or breaks using a armature growler
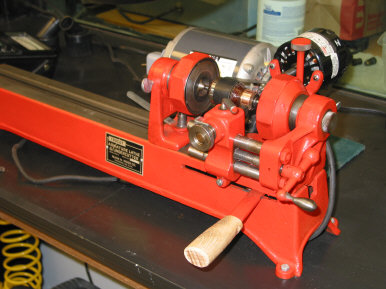
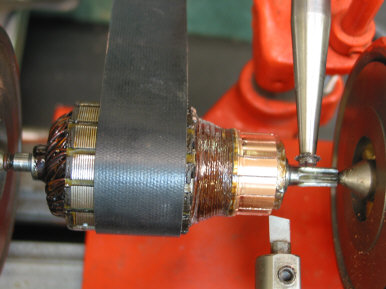
Then take the armature and true it in the armature lathe and also cut the
mica to the correct depth--after that he checks it to make sure it is still within
spec ( greater than 1.00" diameter)
Then it gets checked on the growler again
The armature then gets new bearings--the housing is cleaned
and any worn wires are replaced the motor is then reassembled its run in one
direction at 3 volts for 15 min--then the other direction for 15 minutes--it is
then brought up to speed at 14 volts and run each way for 1 min. The dynamic
brake is also checked both ways--if everything checks out--the motor is taken
apart and cleaned again and reassembled--its run up again to check for vibration
, etc
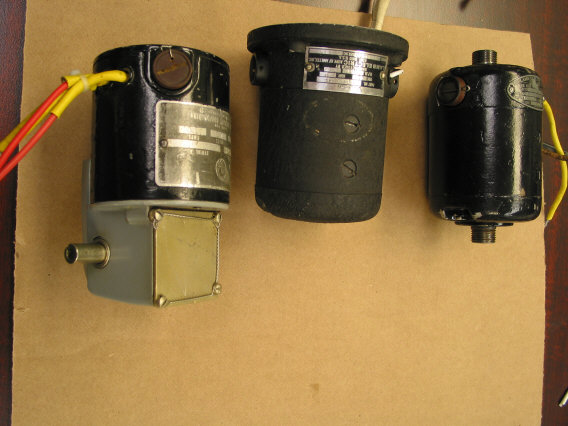
Some of his refurbished/repaired motors
Left one is a flap motor, center one a gear motor, right one
is a flap motor from a 47 bonanza.
This was just a brief show of what he does--- He has a check
list of over 20 items that are checked.
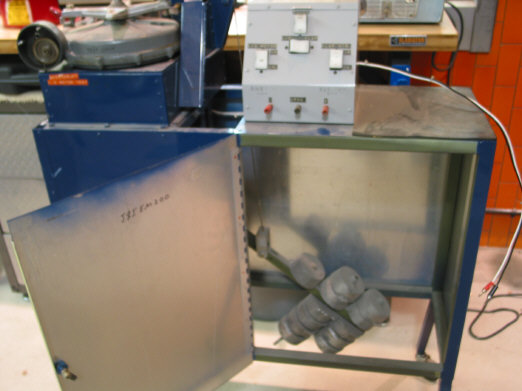
A landing gear motor is then taken to the blue fixture
pictured below -- attached to a gear transmission--run up and down to make sure
its producing the right torque and the dynamic brake is working under a load.
Note the weights on the fixture equal the weight of both gear
and have the same arch as the gear does (swing).
Below is a video of Kevin testing dynamic braking of one of his
refurbished 12V motors. Notice the torque his hand experiences when the motor is
stopped. Don't even think about holding a 24V motor in your hand while testing
dynamic braking!
Here is what one Beechcraft owner who has opened up a lot of these motors,
thinks about Beech gear motor brands:
"had several to play with today--3/4 of them would run , but no dynamic
brake----started switching parts around with the few good electomech motors I
have---turns out that the armatures on the bad motors were the problem---they
tested fine on the growler ( no shorts)--but had higher resistance than the good
armatures----my thought--when the electromech have a problem (due to bad brushes
or contamination of the armature) they would lose dynamic brake--this causes the
gear to go too far and hitting the stops in the trans---it then takes a higher
current to get it to move off the stops--this higher current causes the armature
to heat up--screwing it up someway.
The lamb armatures are a more robust unit--even though some are 50 years
old--you can tell someone took pride in what they were doing--I almost never
find a bad Lamb armature--they just get worn down below service limits--this
usually happens after 4 or 5 OHs."
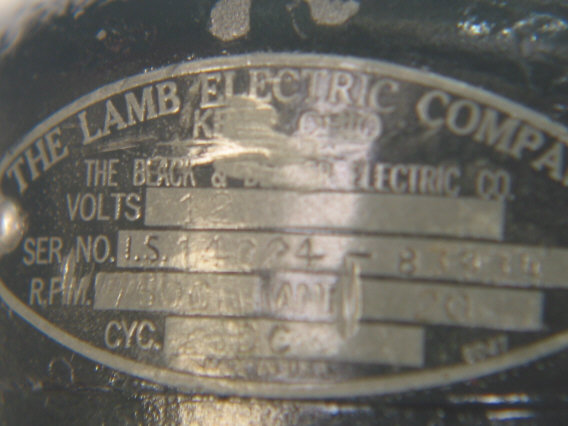
This is a picture of a data plate from an early Bonanza (circa 1947) gear
motor---its a lamb motor made by Black & Decker!
Who knew????
Happy Electric Motor Skies!
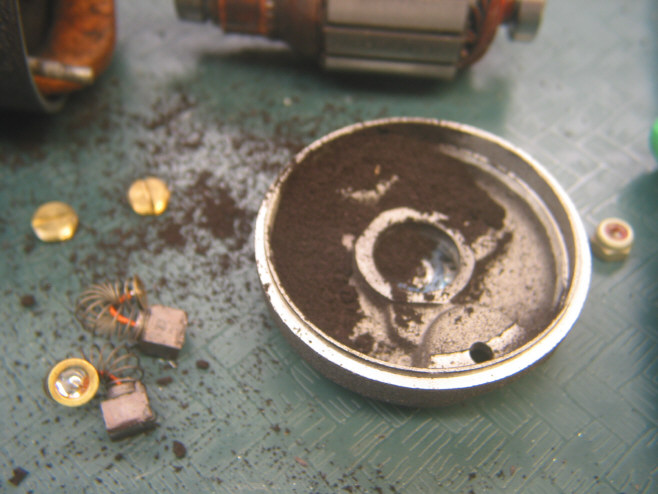
Why Continuing to Replace Gear Motor
Brushes is not Such a Good Idea!
This is what the motor refurber with the above
equipment found when he opened up a 12V landing gear motor and NO, that's not a
fire ant dirt mound
This is a classic case of several
motor brush replacements without a complete open up and cleaning and servicing
of the motor.
The motor's owner reported that
it would not work every once in a while, it was slow on RPM, had little to no
dynamic braking, and was low on torque.
After cleaning the armature three
times to get all the gunk out of it, installing new bearings, new brushes and
running them in, this refurbisher returned the motor to smooth "sewing machine"
operational status.
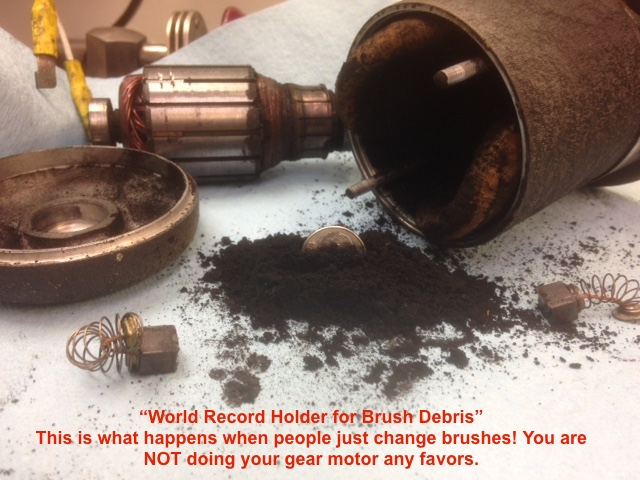
Below is the World Record Holder
for gear motor brush debris. No folks, the brushes don't vaporize into a gas and
escape out of the case!
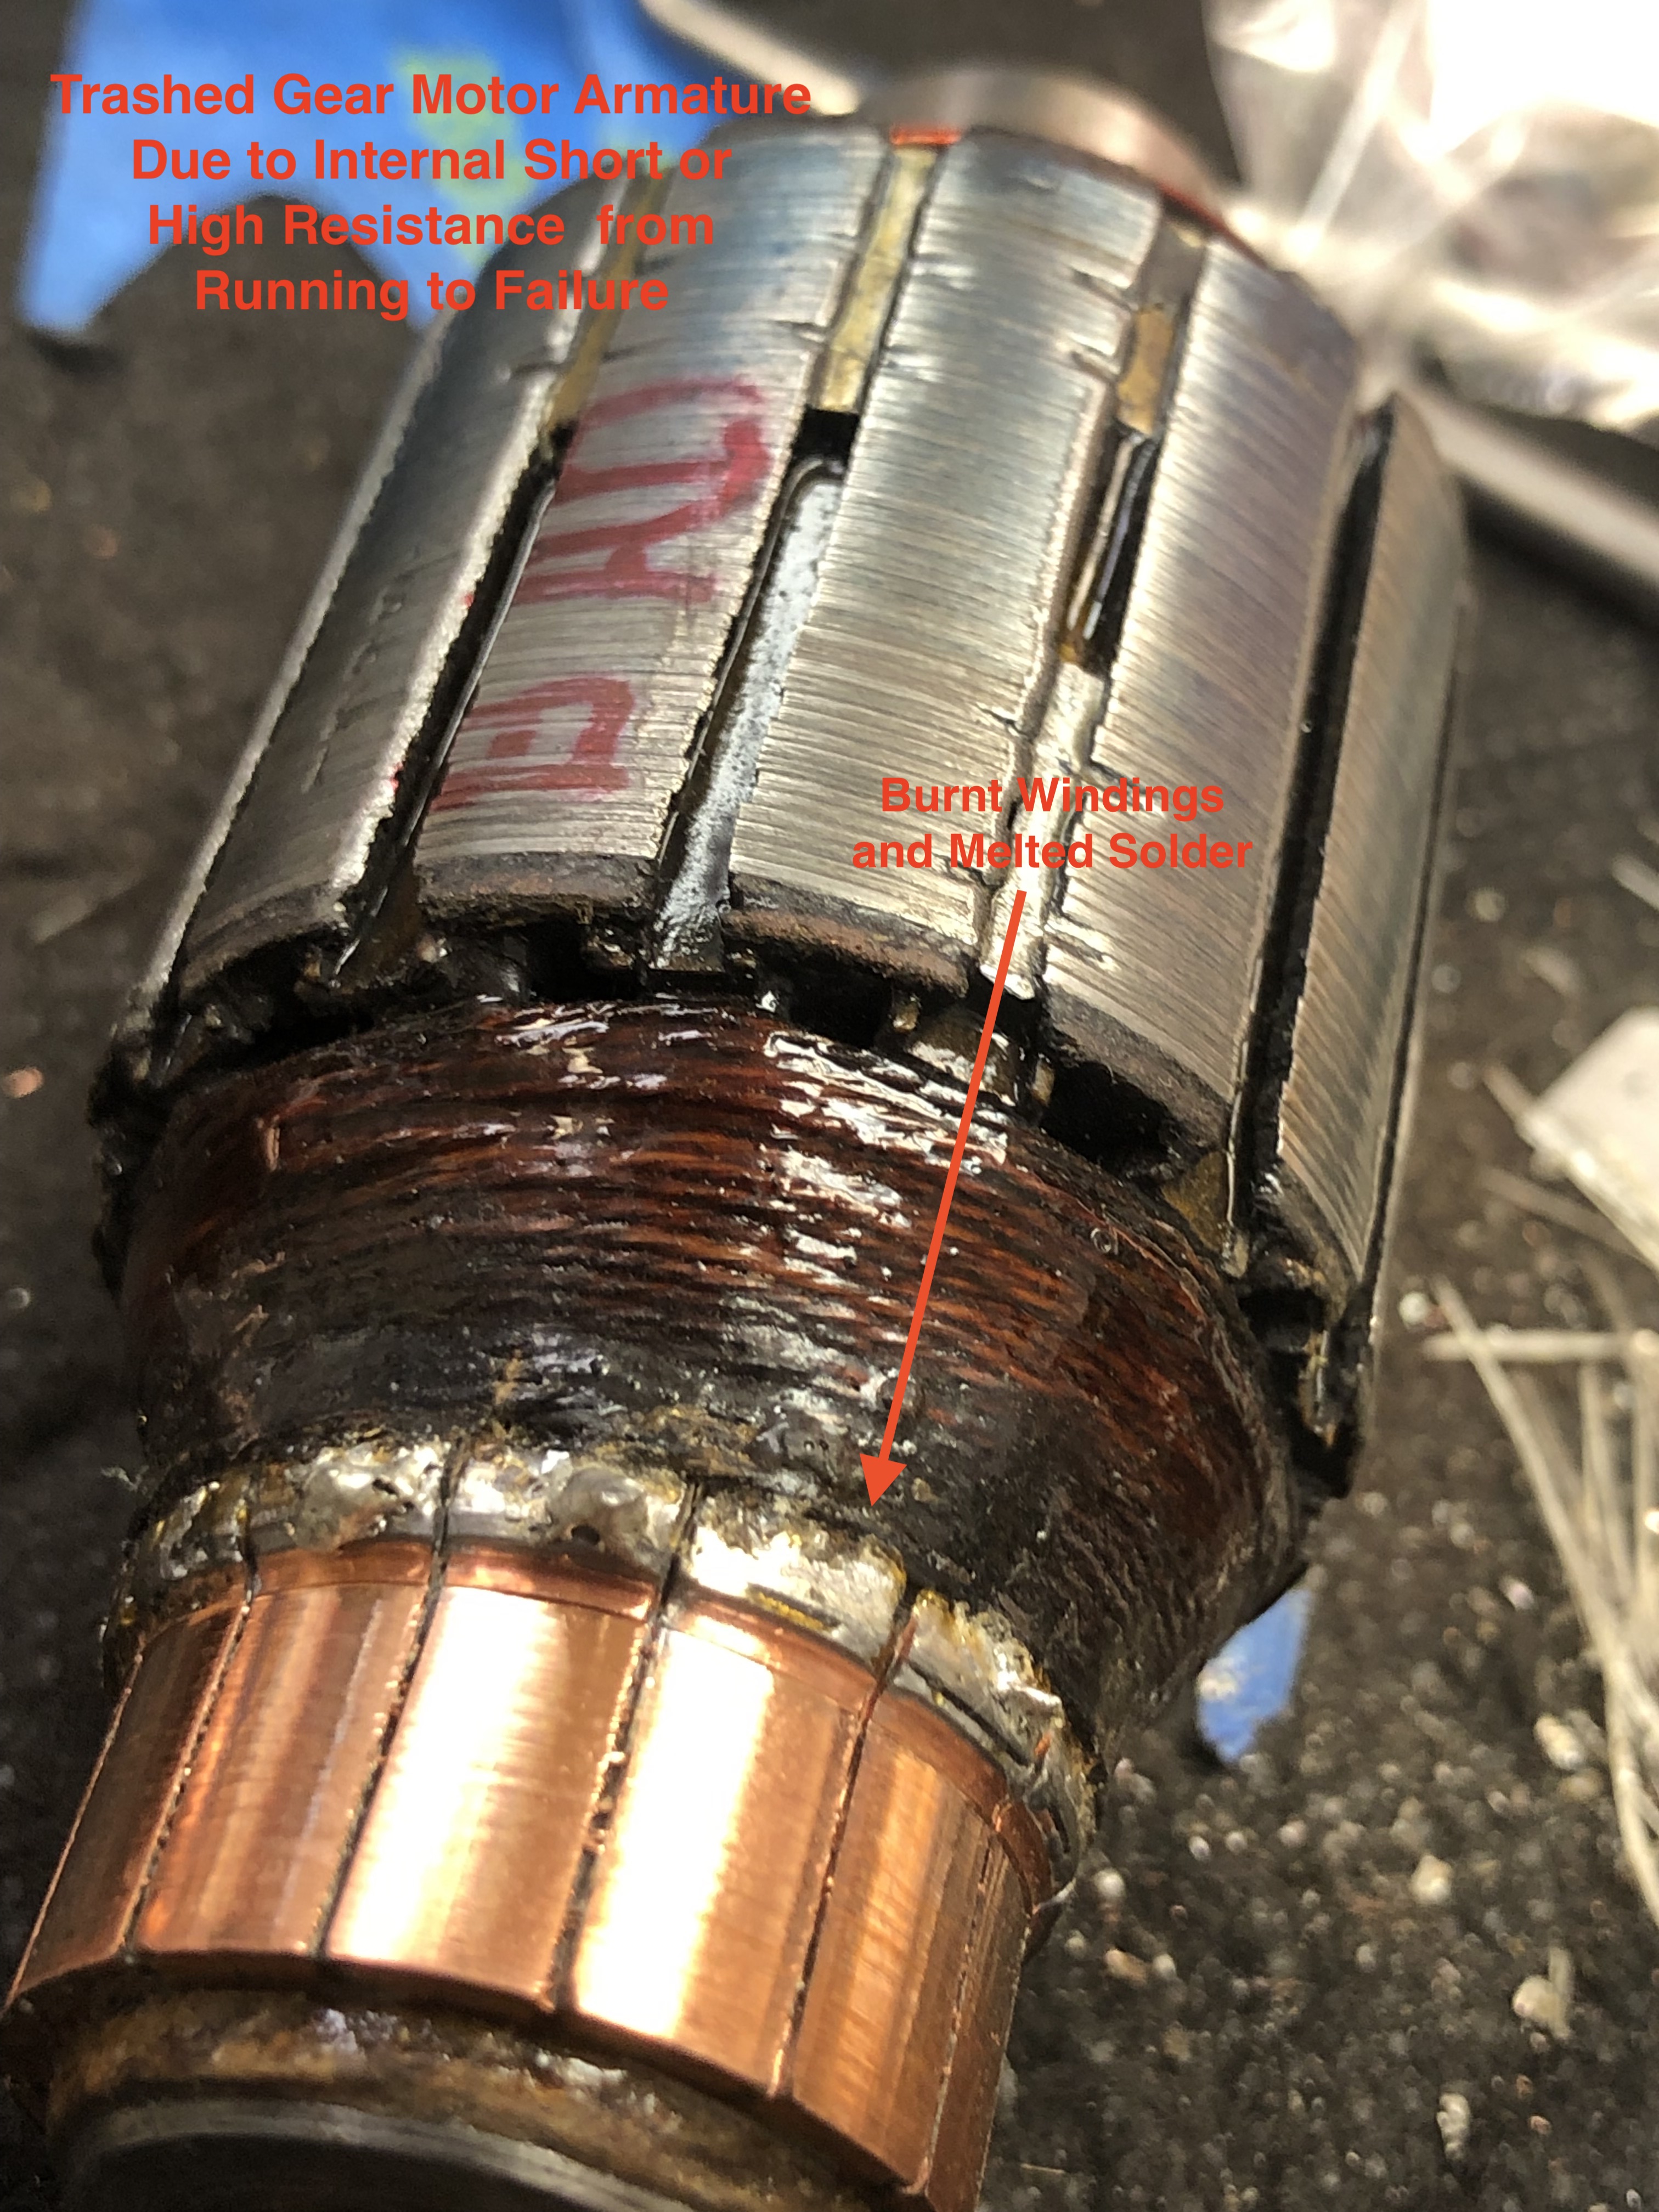
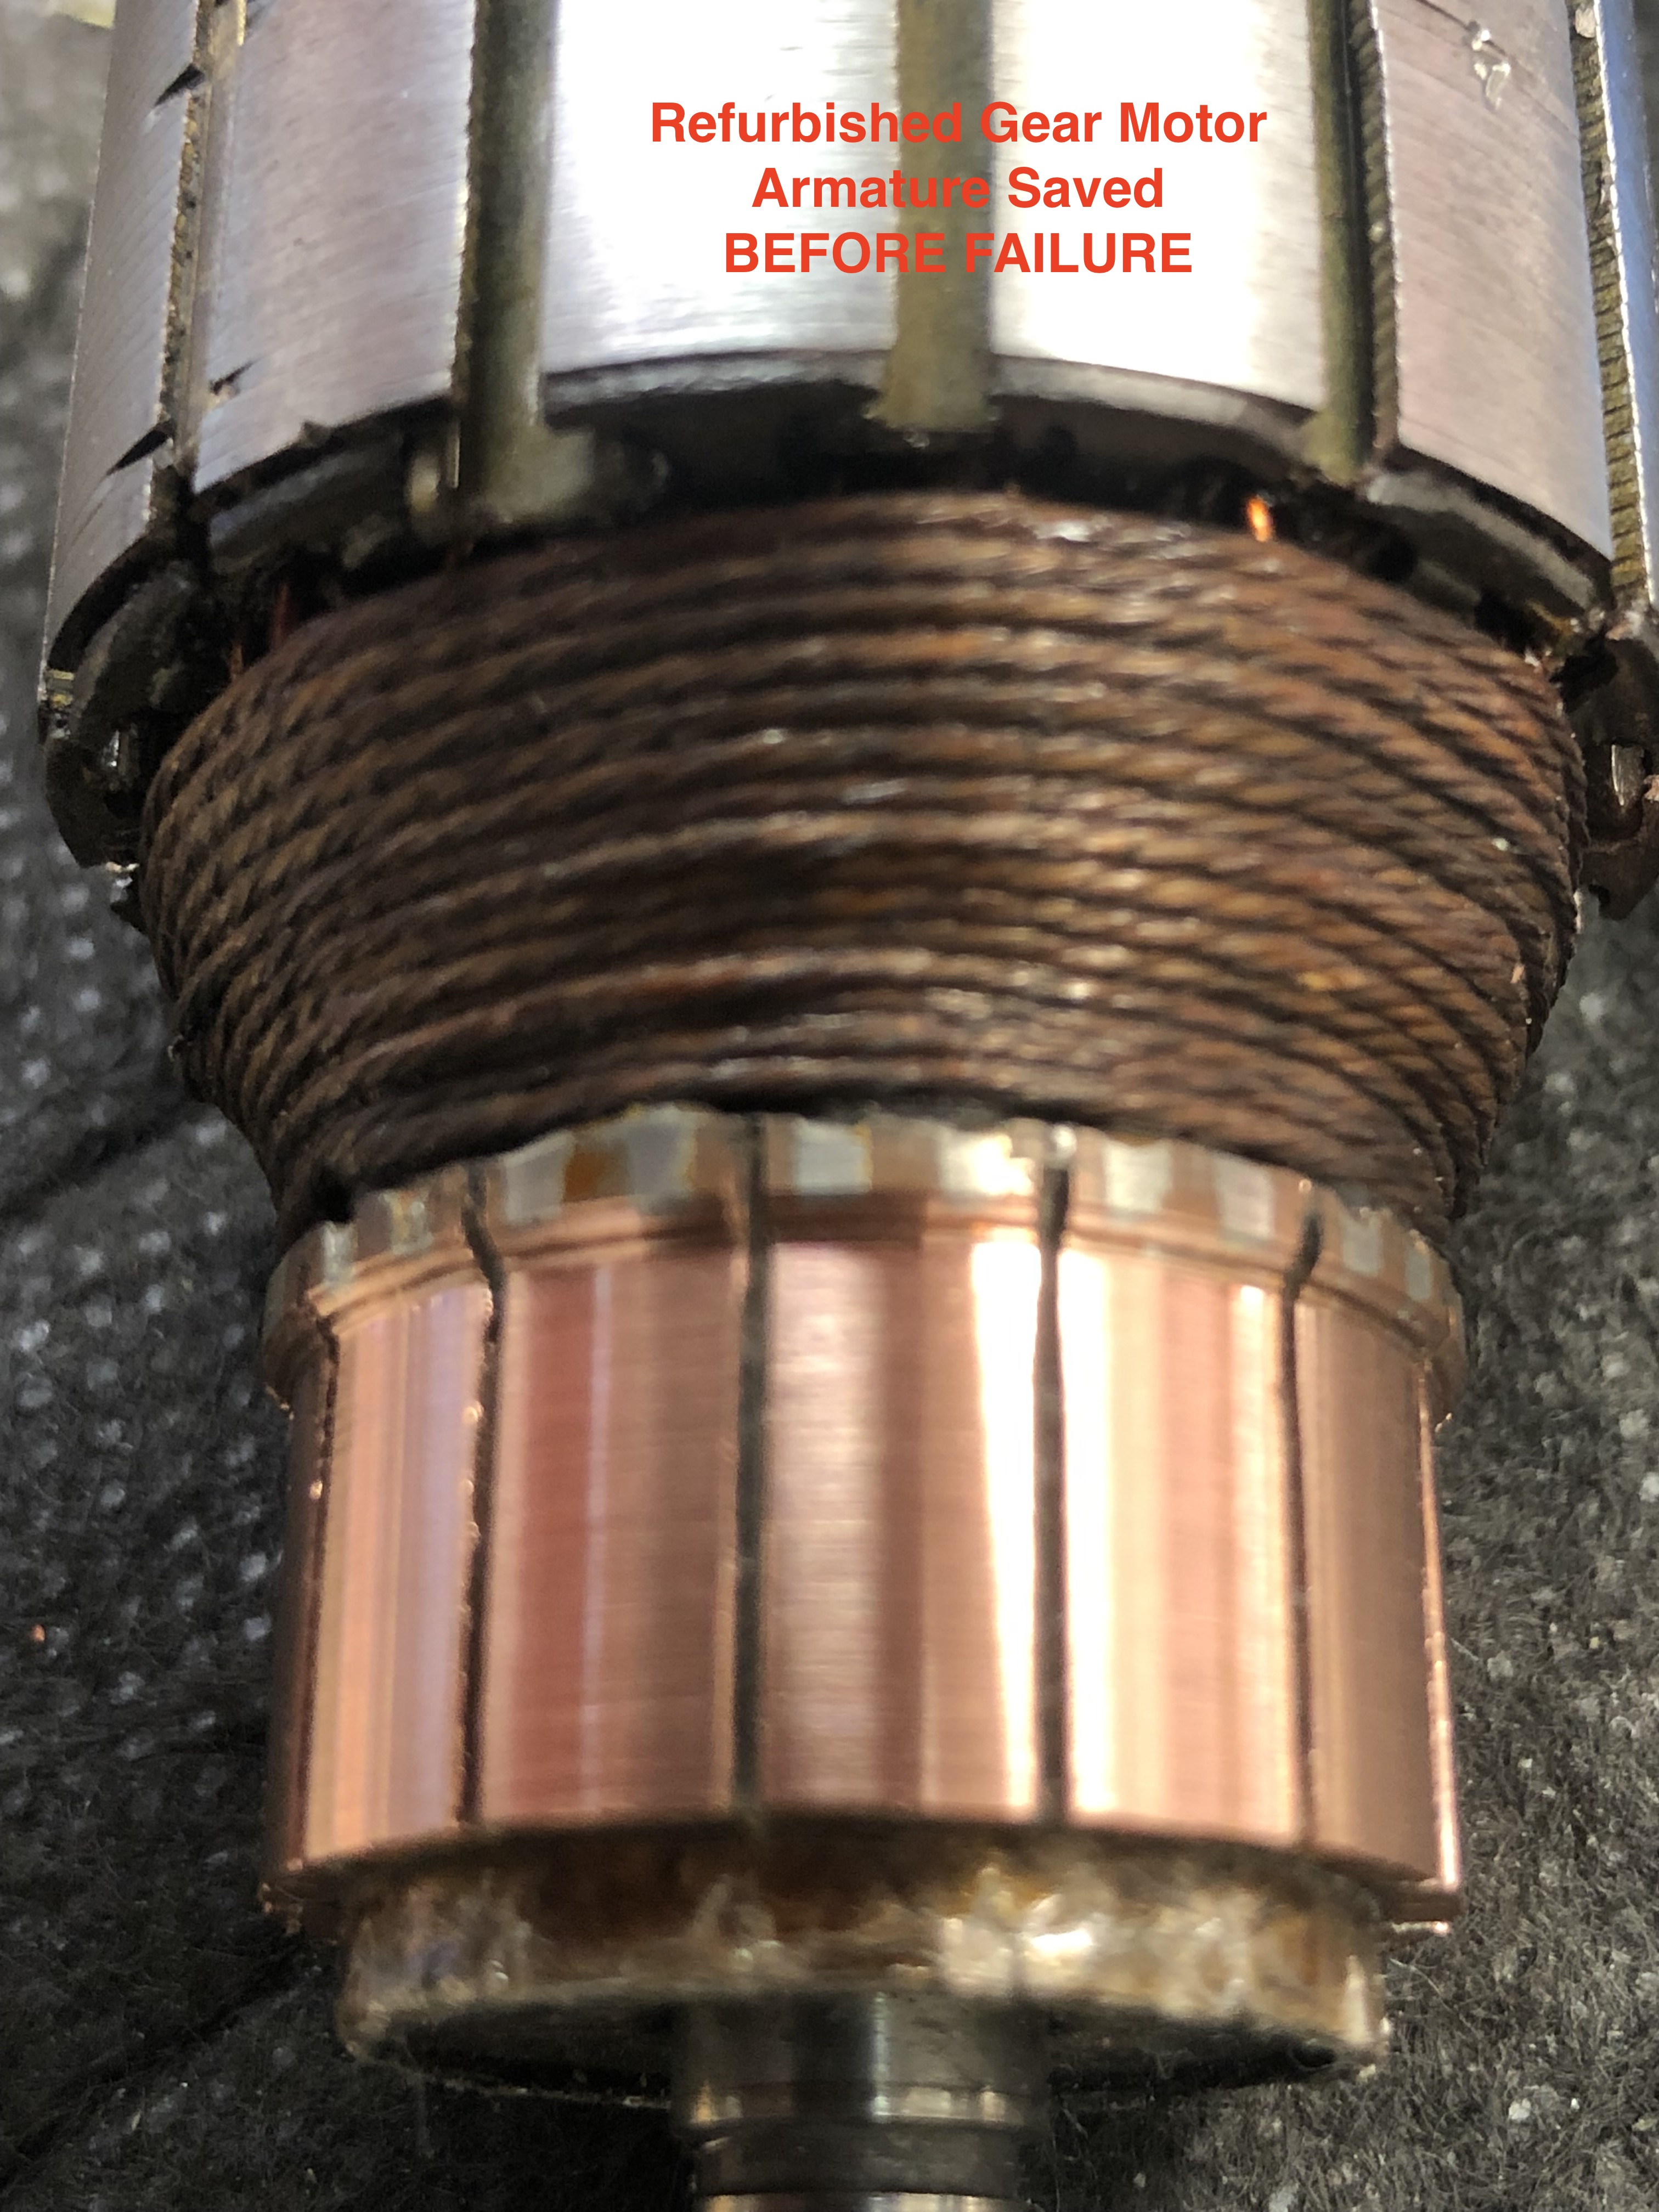
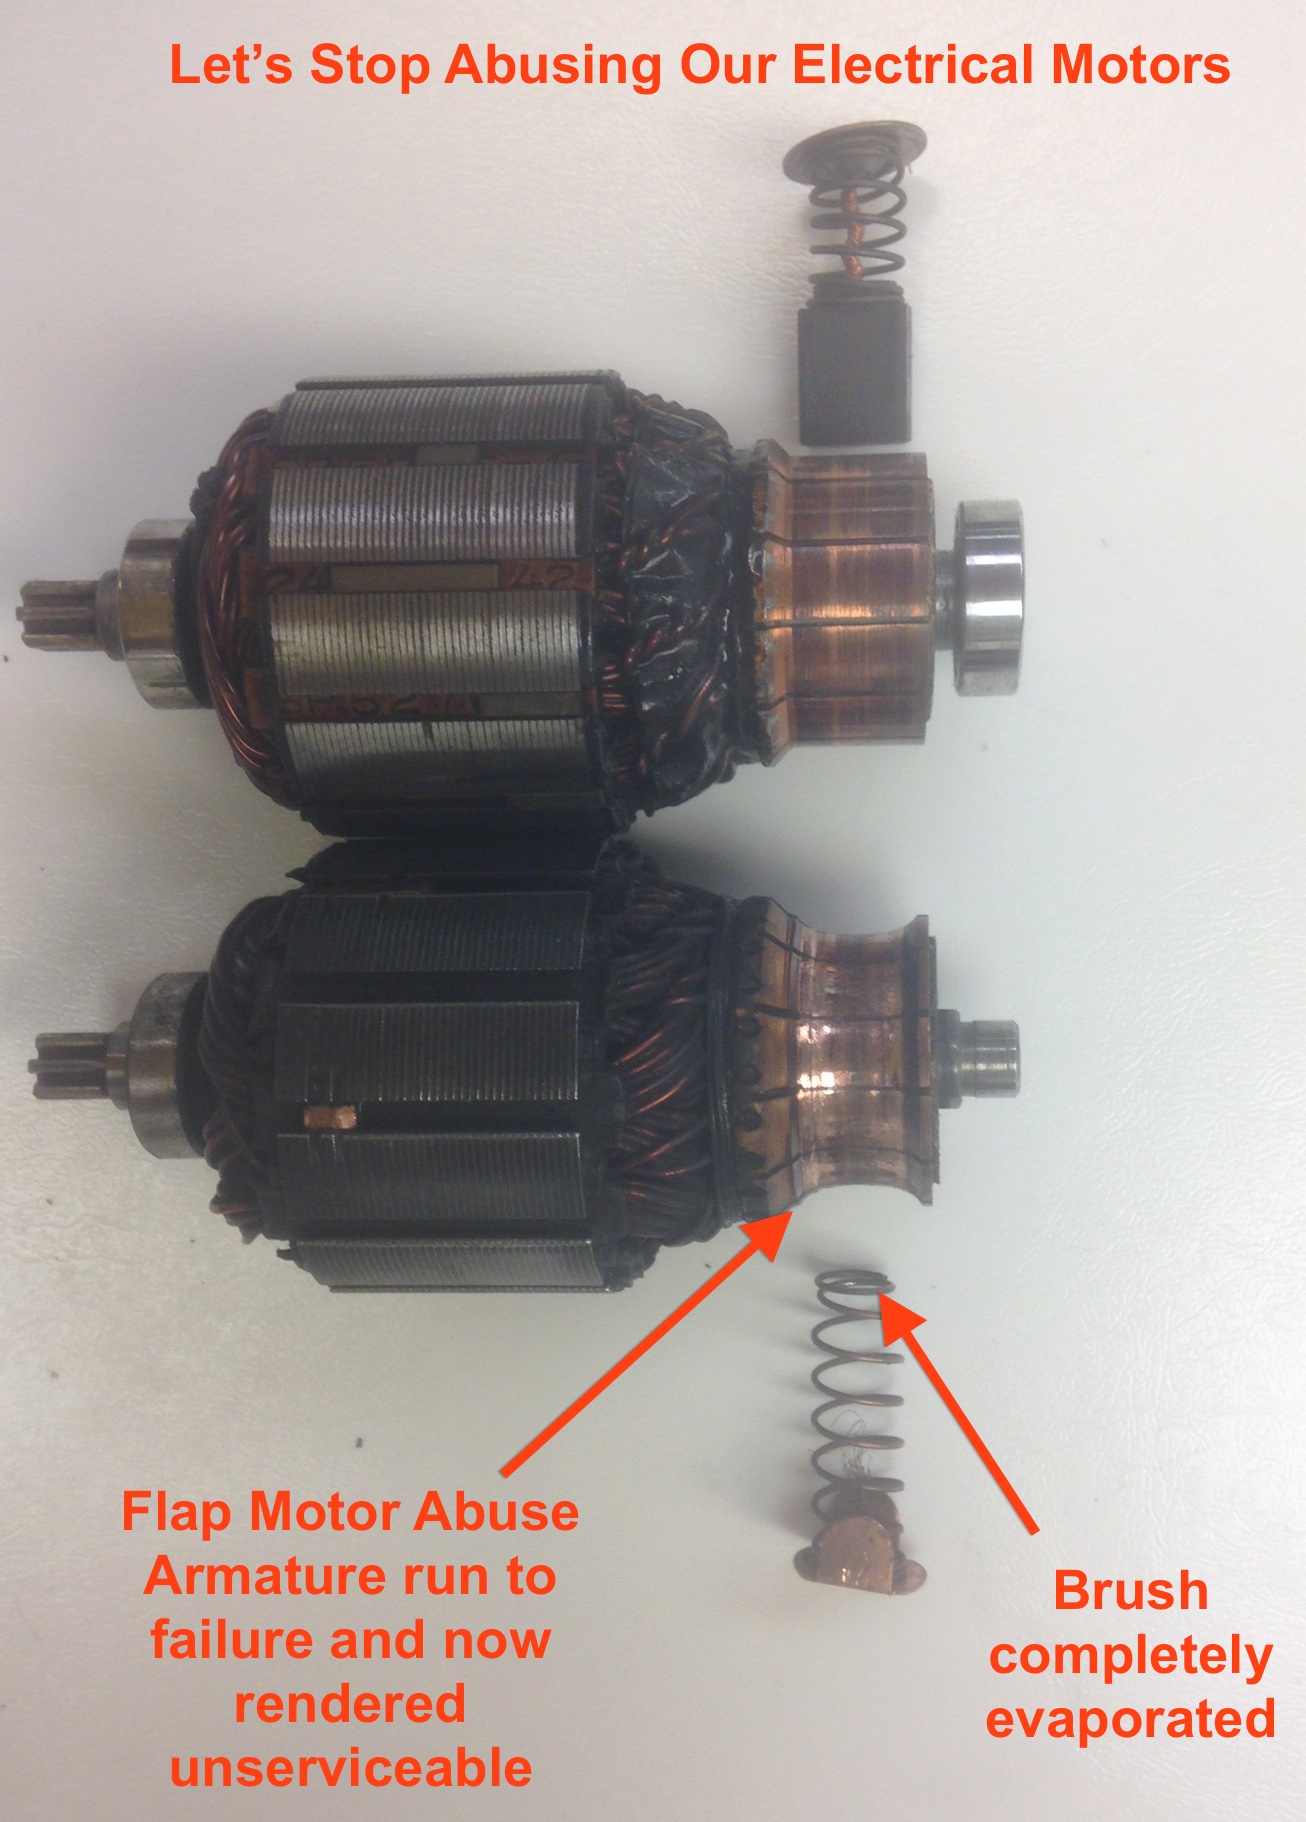
Below is a classic case of running a gear motor to FAILURE , rendering the armature useless for further service via refurbishing/overhaul.
Gear motor cores are becoming scarce and running yours to
failure just makes it ever more difficult to provide economical
rebuilds to the Beech community.
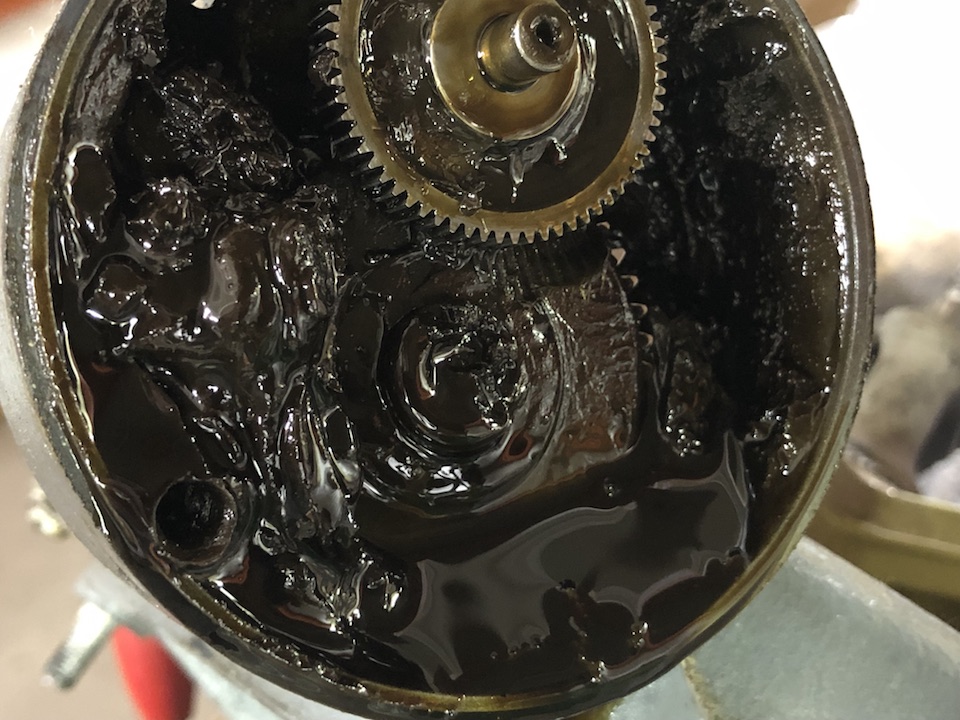
If you or your
mechanic insist on overfilling the transmission, you run the risk of trashing
your gear motor by having the gear lube enter the motor and then BAM, your fresh
overhaul landing gear motor is fouled and then fails because your motor mounting
flange looks like the one below.
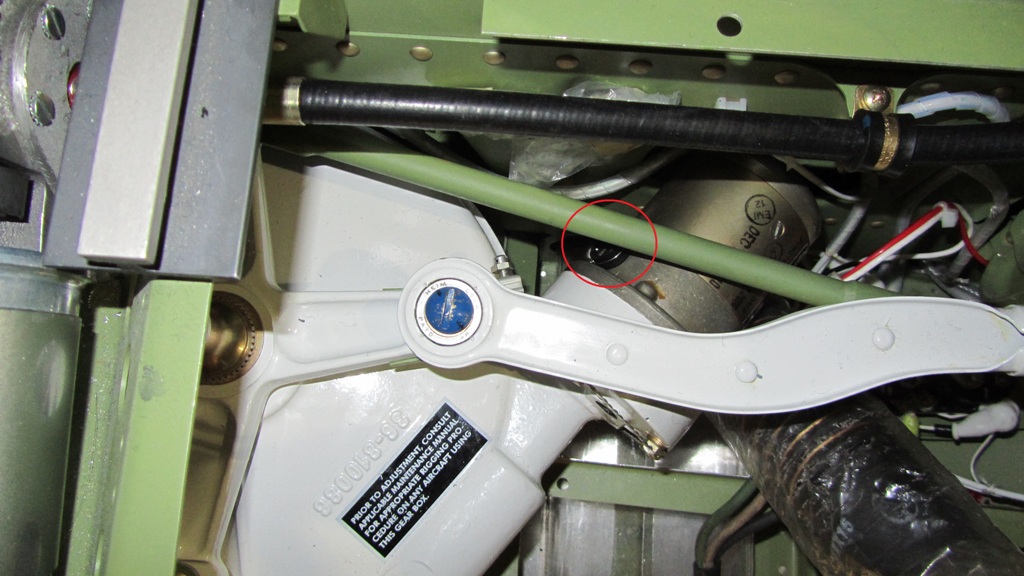
If your mechanic tells you he
inspected the motor brushes and they looked good, ask if he looked at both of
them because only one is easily accessed. Of course, if he completely removed
the motor, both can easily be inspected.
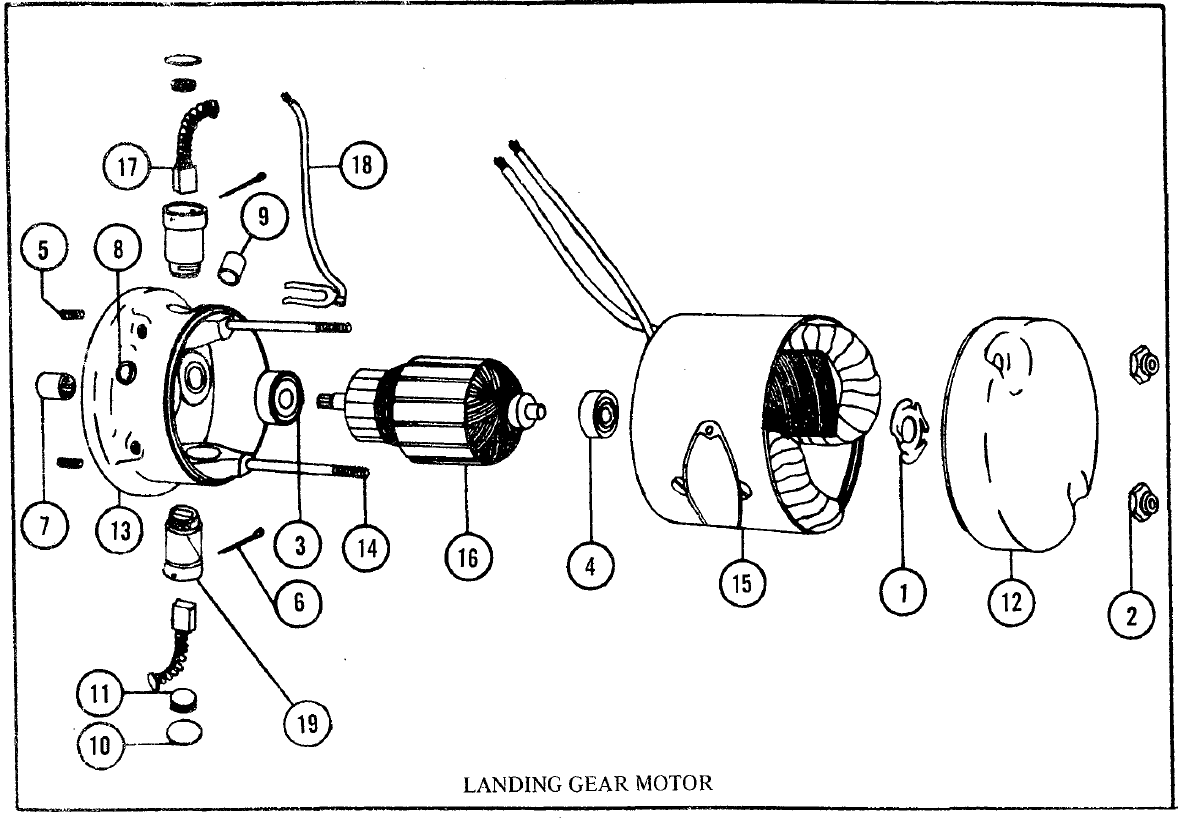
Here is a parts diagram explosion
of the gear motor:
Let's Run the
Gear Motor Brushes to Failure!
Here is what Kevin O. reported in finding a Bonanza fuselage caused by a
so-called "nose gear failure". Here is his narrative:
The nose was all screwed up from where the nose gear failed. I tested the
trans with the manual handle---stuck solid--thought the wreck might have screwed
the sector gear ???
Took off the gear motor--then the trans worked perfect and smooth ??? This
above picture is what I found when I opened the motor up.
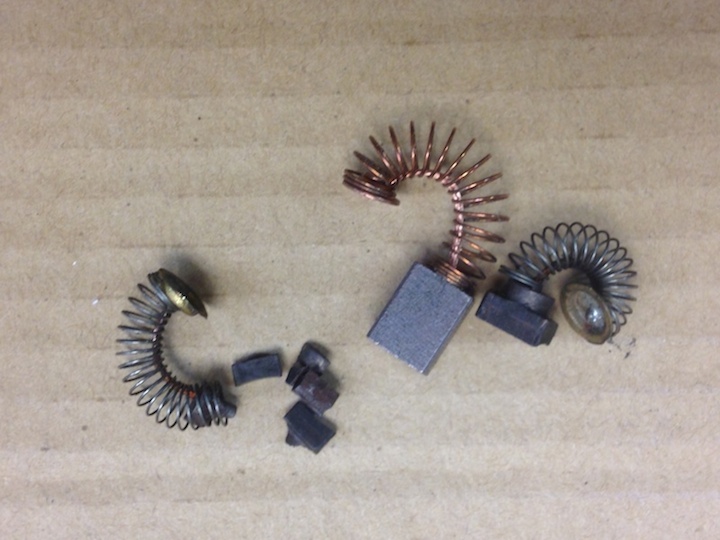
Brushes wore worn more than any motor I had ever inspected. One came out of
the brush holder and shattered against the armature. Pieces of it had lodged and
jamed up the motor so it could not turn--there was no way to do a manual
extension with out removing the motor first ( good luck on doing this while in
the air)
I'm sure the motor had been talking to the owner--His thoughts--if its not
broke--don't fix it.
Listen to your motor--speeds--dynamic brake , etc. and if its got over 1500
hours on it--HAVE IT CHECKED!"
See the above pictures if you think just changing brushes is good motor
maintenance
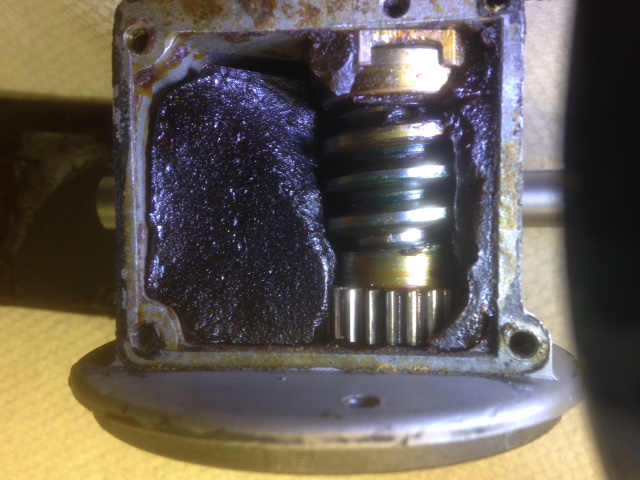
This is what a 50-year old 12V Bonanza flap motor
looks like inside that has not been serviced in its 4000 some odd hours of
airframe time.
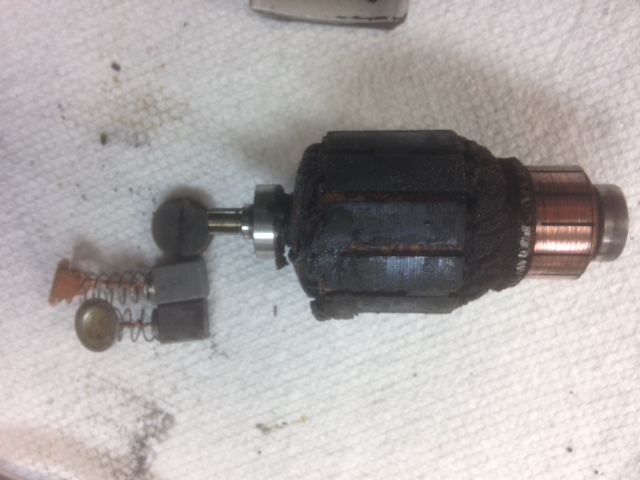
This is what a severely abused flap motor
looks like. Running components like this to failure is really doing a disservice
to the Beechcraft community. It removes a serviceable core from the market which
makes replacements scarcer and more expensive!
Click
HERE for the 24V
Baron Landing Gear Motor IPC and Maintenance Manual
Click
HERE for the 12V
Bonanza Landing Gear Motor IPC and Maintenance Manual
Folks, it doesn't have to be this
way. Don't let your electric motors get
this bad before giving them the service they deserve.


