|

Do you still think stepping on your 50 year
old flap for
entry and exit is a good idea?
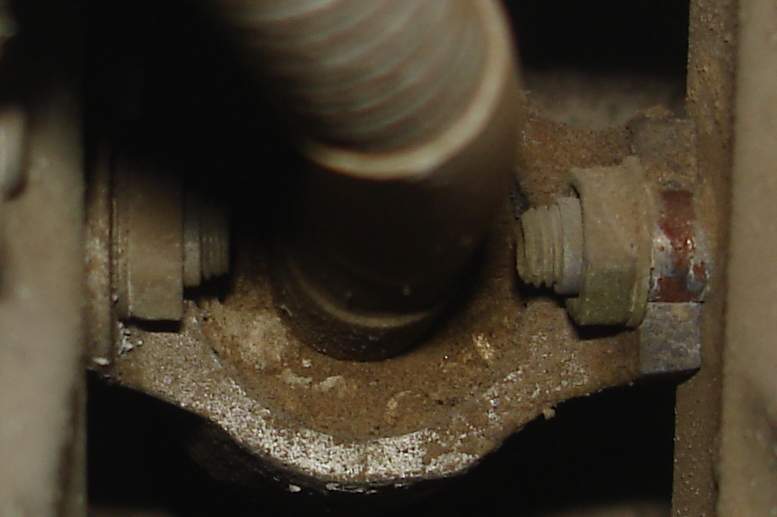
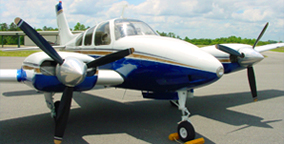
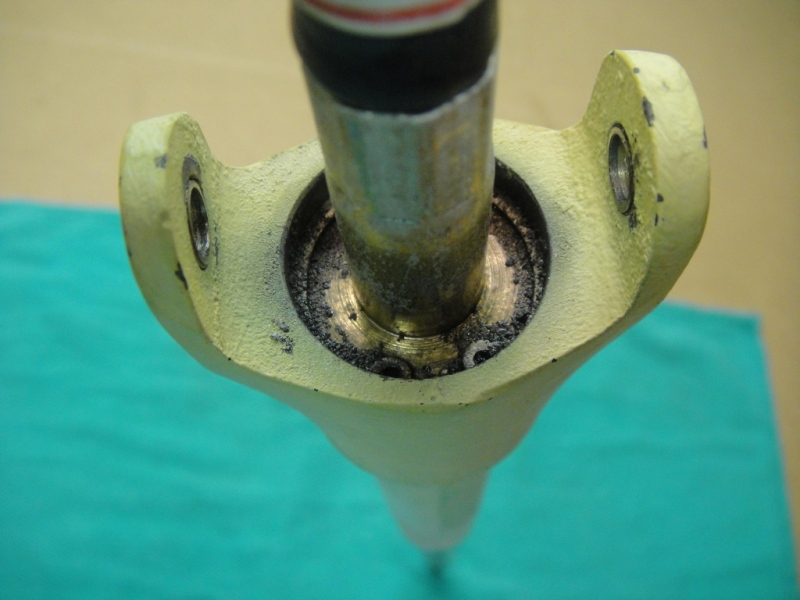
Above is a picture from Paul S.'s N35 right
flap actuator mounting showing the right mounting ear broken off.
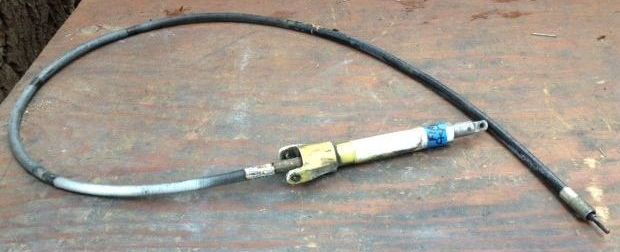
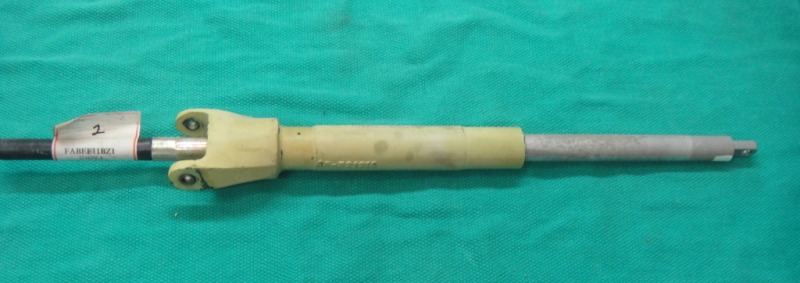
Here is a picture of the actuator and cable
assembly.
Here is a recent HBC
Safety Communiqué #313
issued to be on the lookout for these types of flap attachment cracking issues.
Baron Flap Track Repair Instructions and
Tolerances HERE (Check
your Bonanza MM to confirm similar instructions)
Flap Cracking Advisory Circular
HERE
MANDATORY SB2460 dealing
with flap cable retainers
HERE
Here is an
NTSB Report on a fatal crash of a Duke, due in part to failure of the right
flap mechanism.
Flap System Components
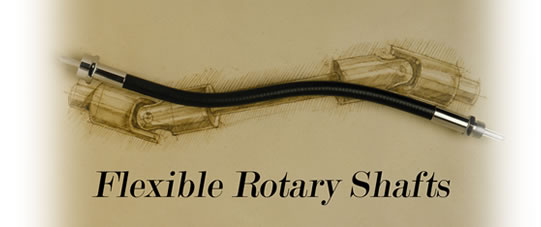
Cables
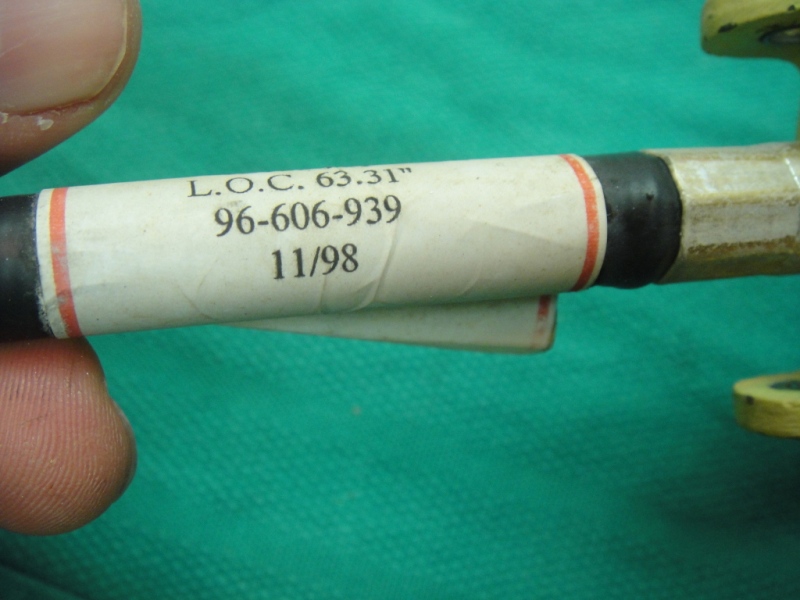
The supplier of the original flap
cables in Bonanza/Baron and Travel Air airframes appears to be
S.S. White Technologies.
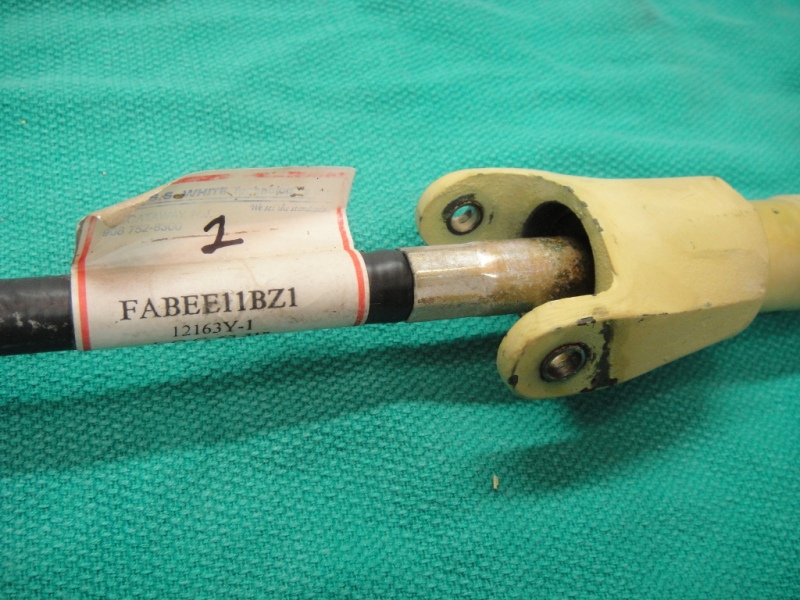
An original factory tag provides the evidence. FABEE11BZ1 might be a workable
number to source, but at this point I'm not sure.
L.O.C might mean "Length of
Cable" (63.31")?:
A SB on some of these cables was
issued. Check it out
HERE
This Mandatory Service Bulletin was issued to inspect for,
and replace as necessary, any Flap Flex
Shaft Assemblies that have a manufacture date between January 2000 and
April 2001, inclusive.
The Flap Flex Shaft Assemblies are identified on the actuator
end with a paper identification label that carries the manufacture date in the
form of month/year (i.e. XX/2000 or XX/00 for year 2000 and XX/2001 or XX/01 for
year 2001).
To place a flap degree deflection decal on your flaps see the
CSOBeech page HERE

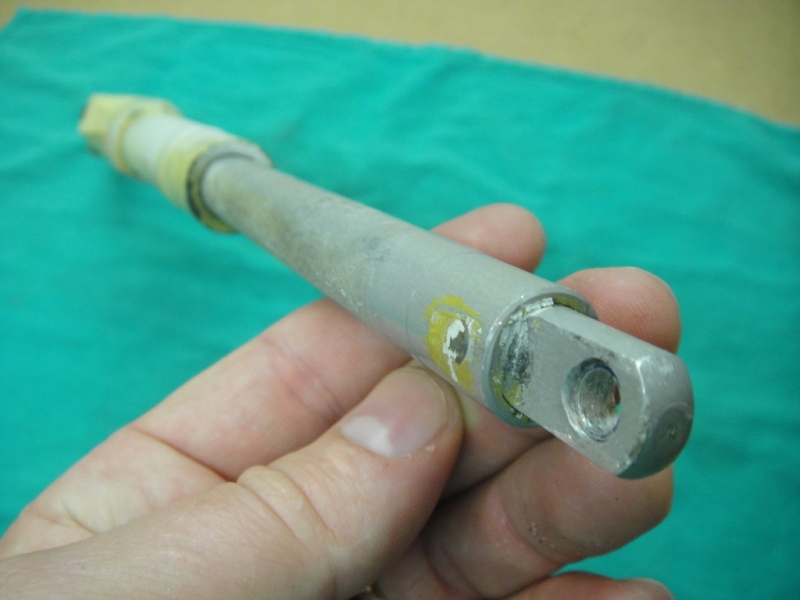
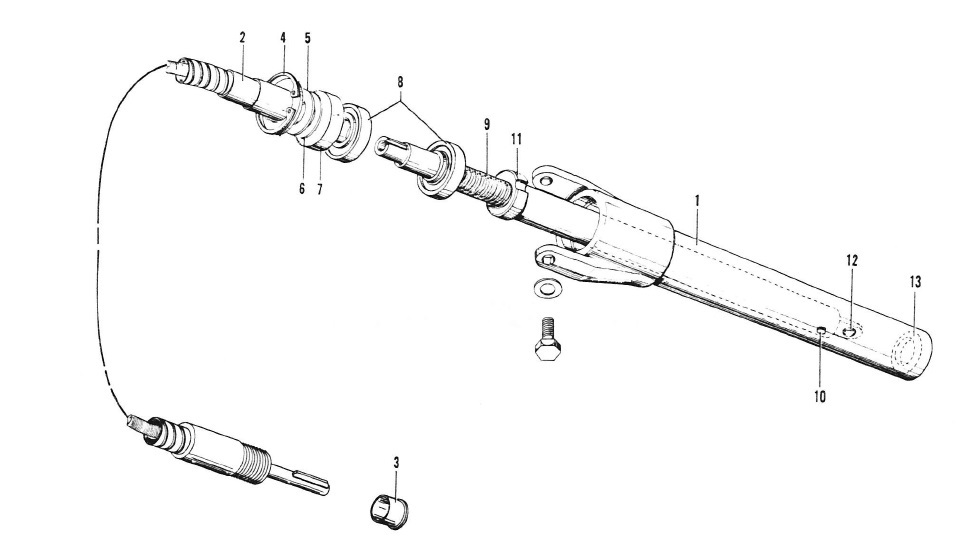
Actuator
Note that the cable is held into
the actuator via a snap ring.

Here is a diagram of the flap
actuator components
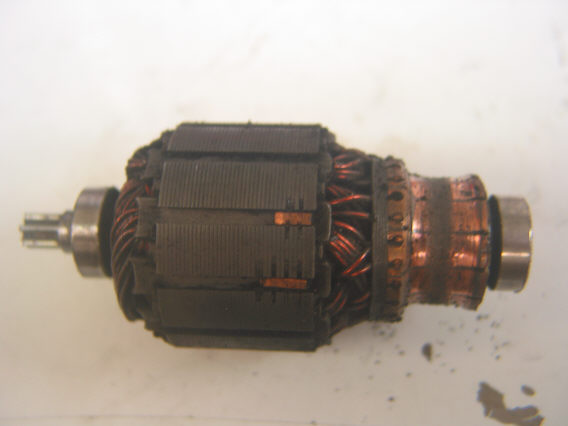
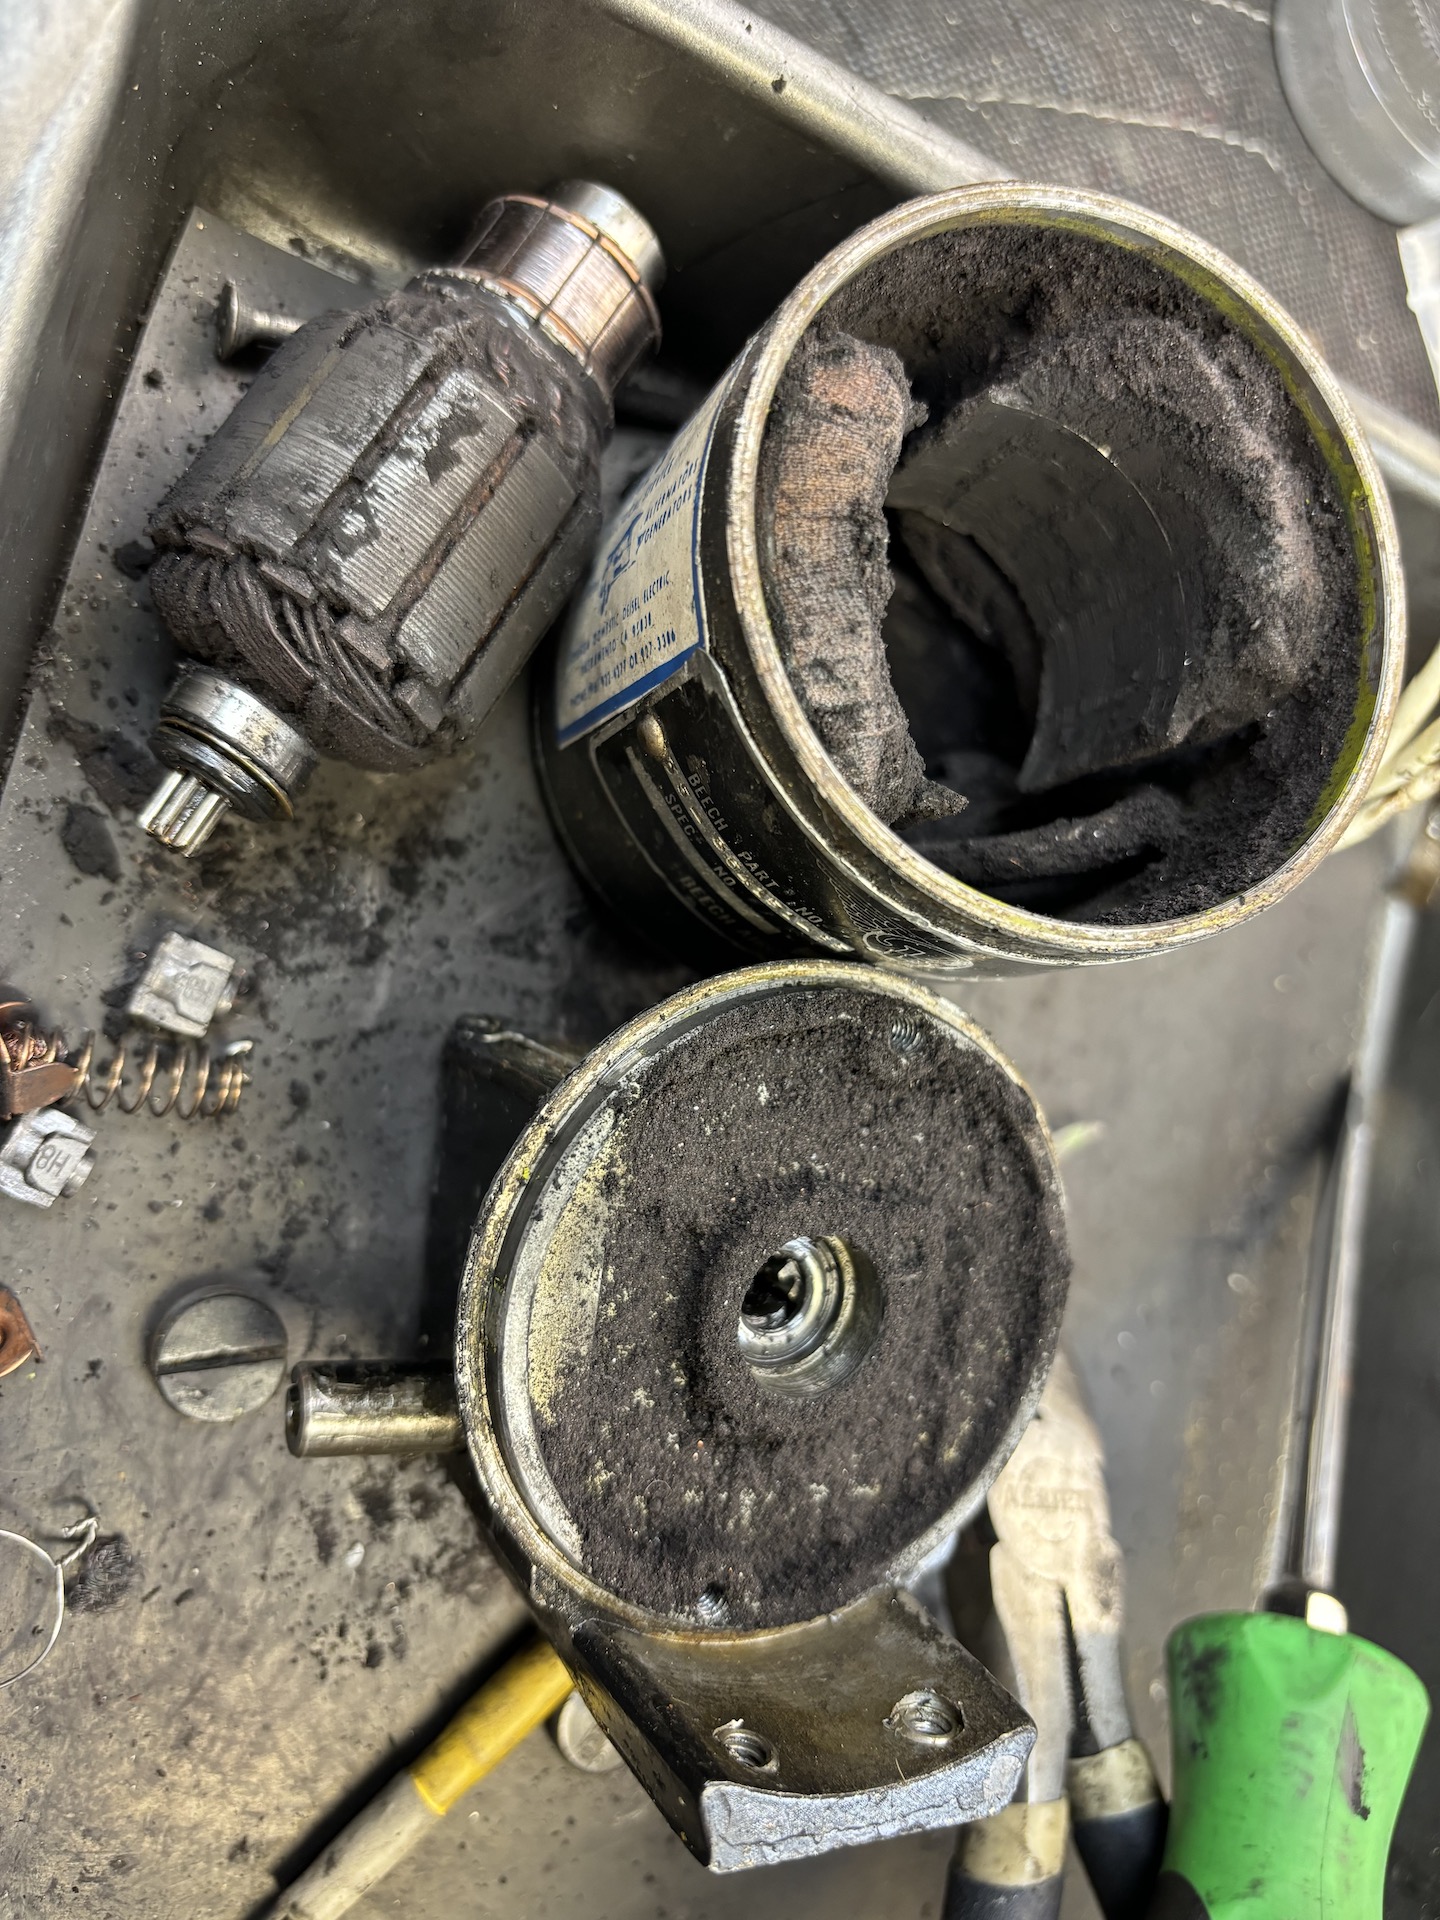
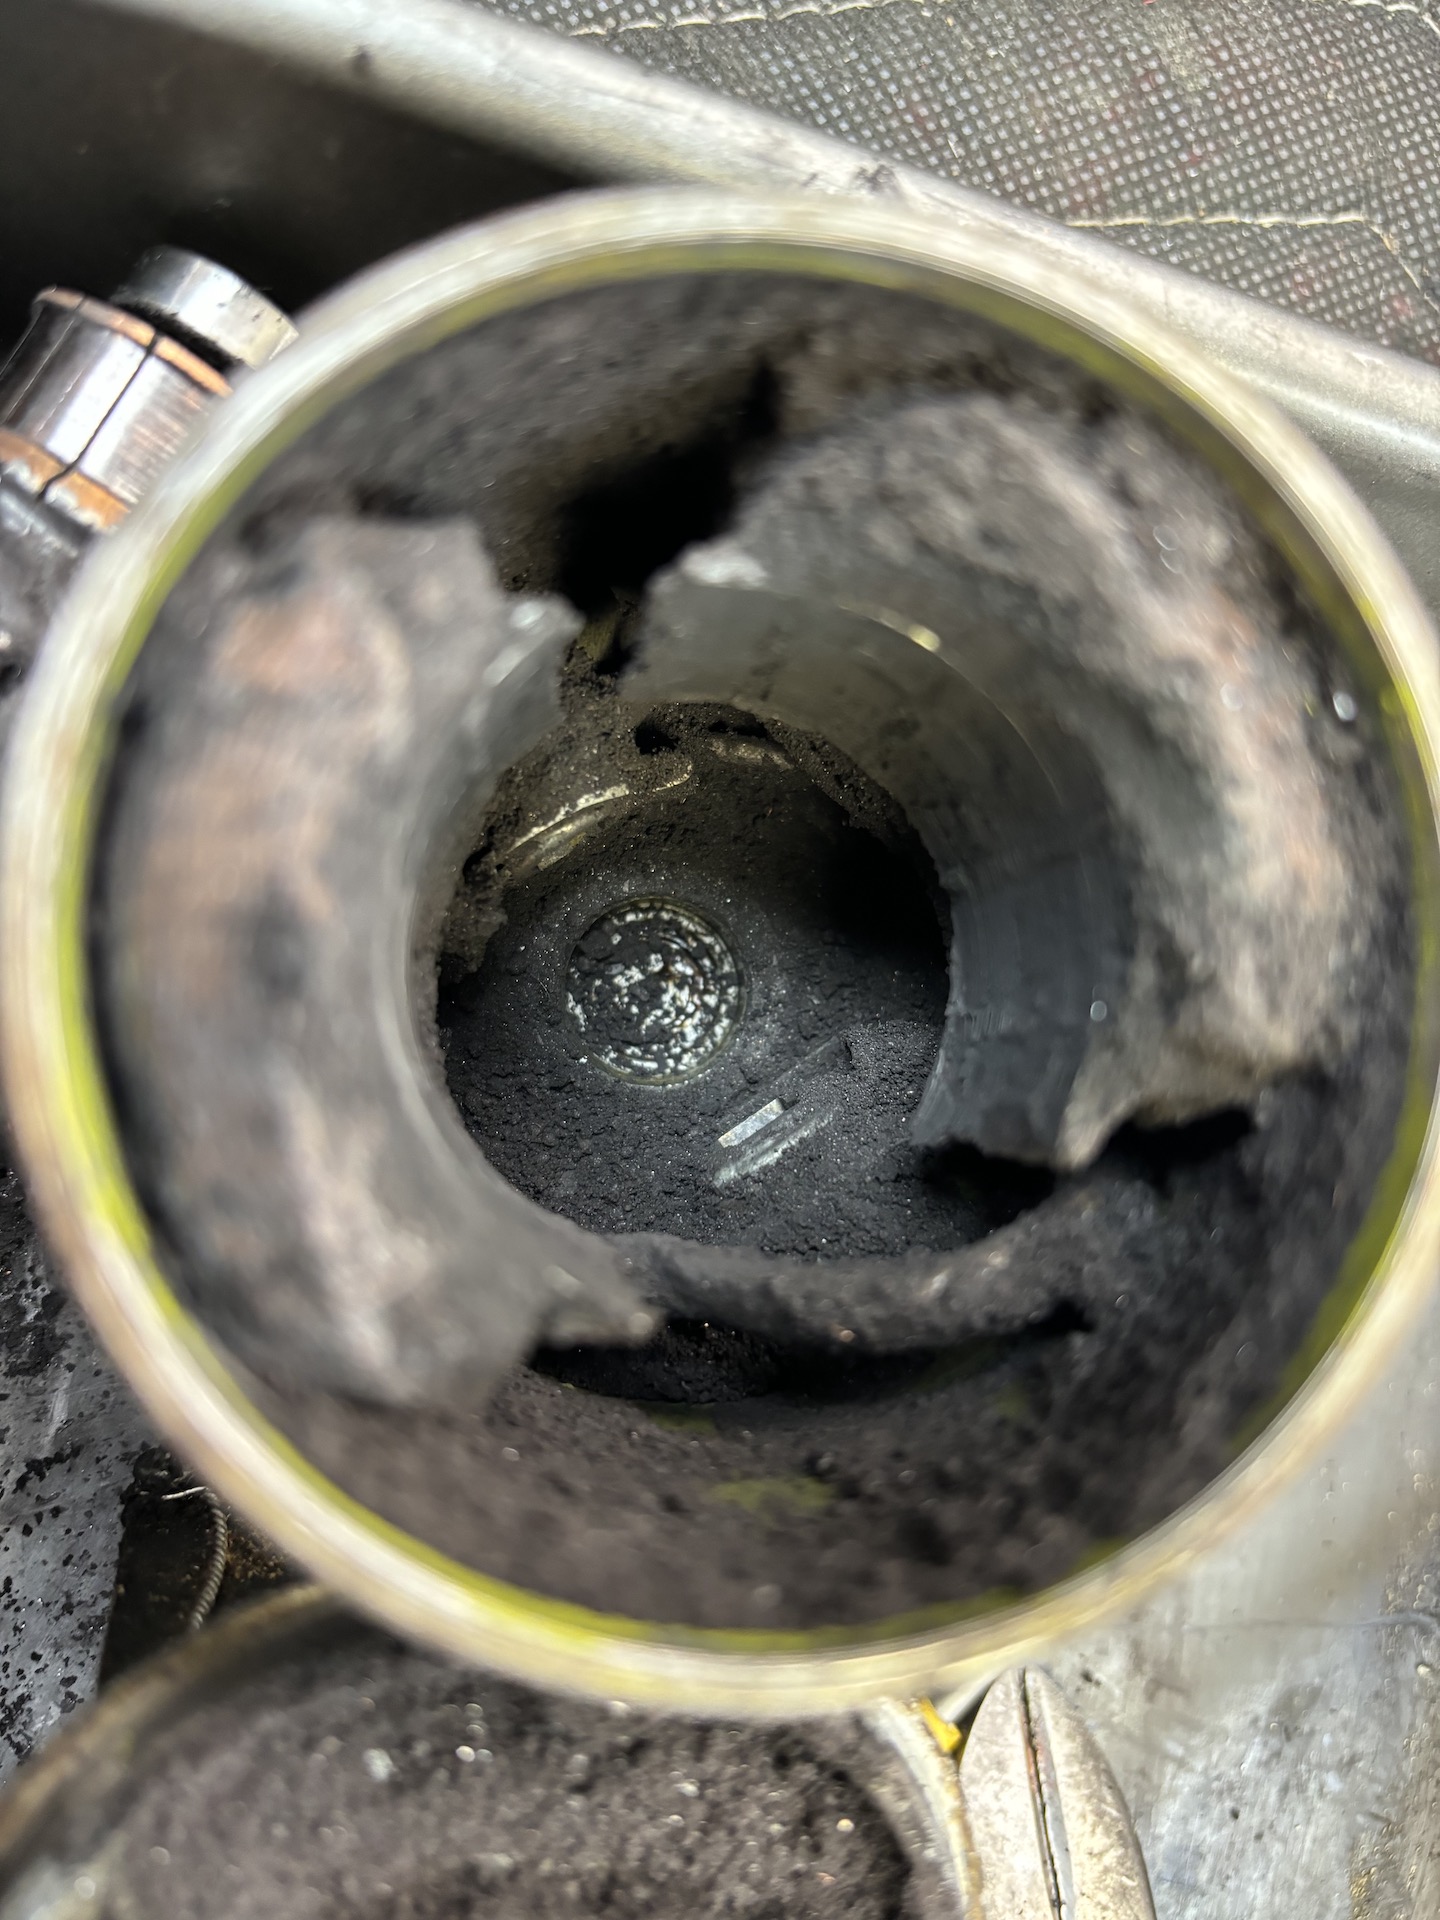
Drive Motor
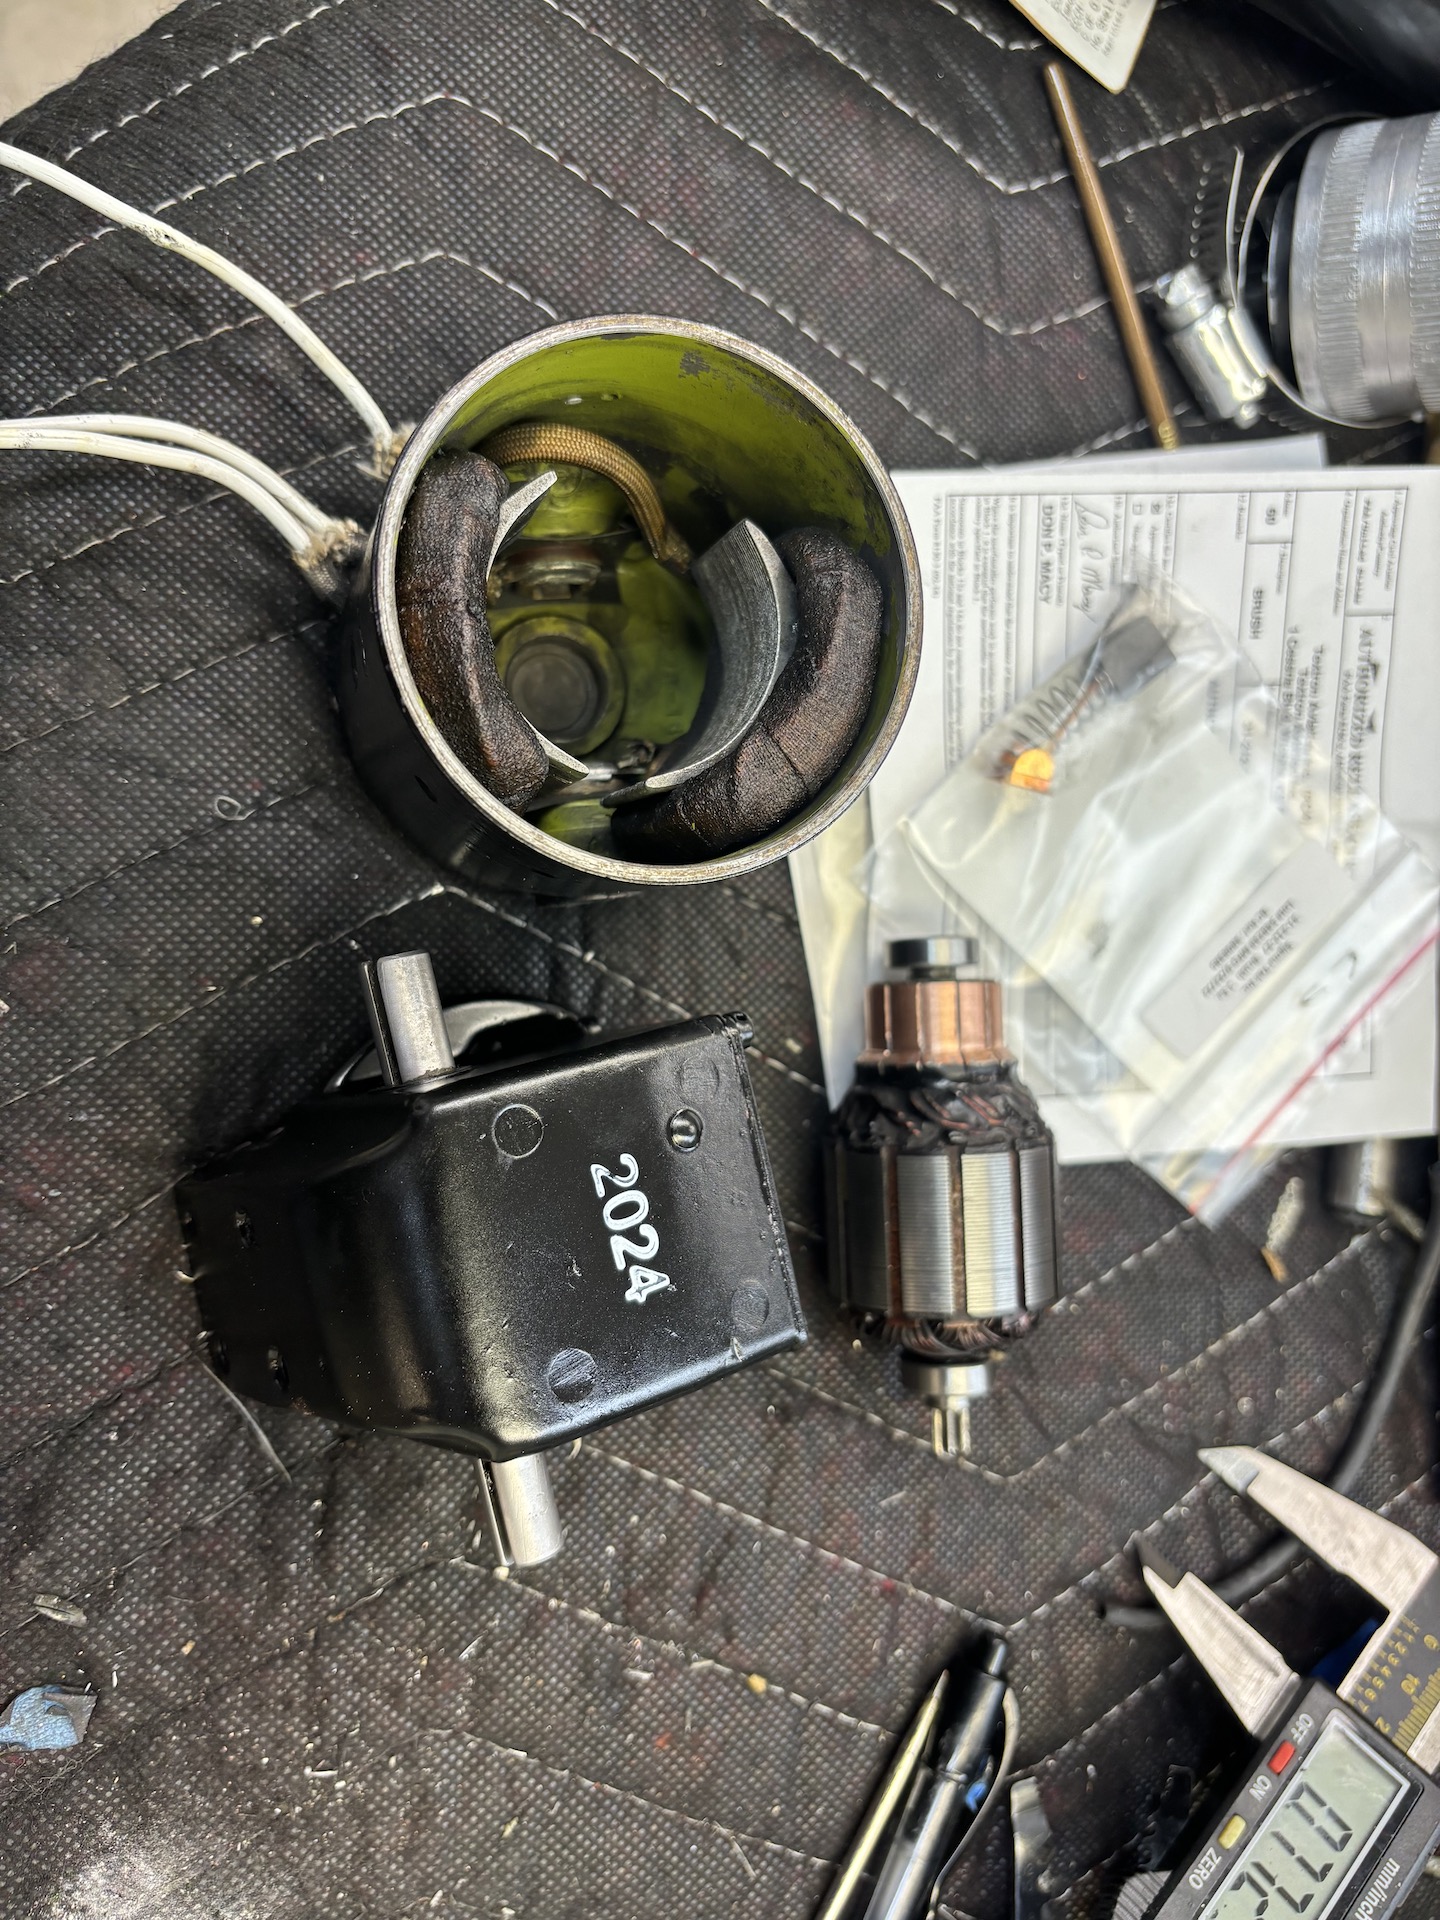
This is what a severely abused flap motor
looks like. Running components like this to failure is really doing a disservice
to the Beechcraft community. It removes a serviceable core from the market which
makes replacements scarcer and more expensive!
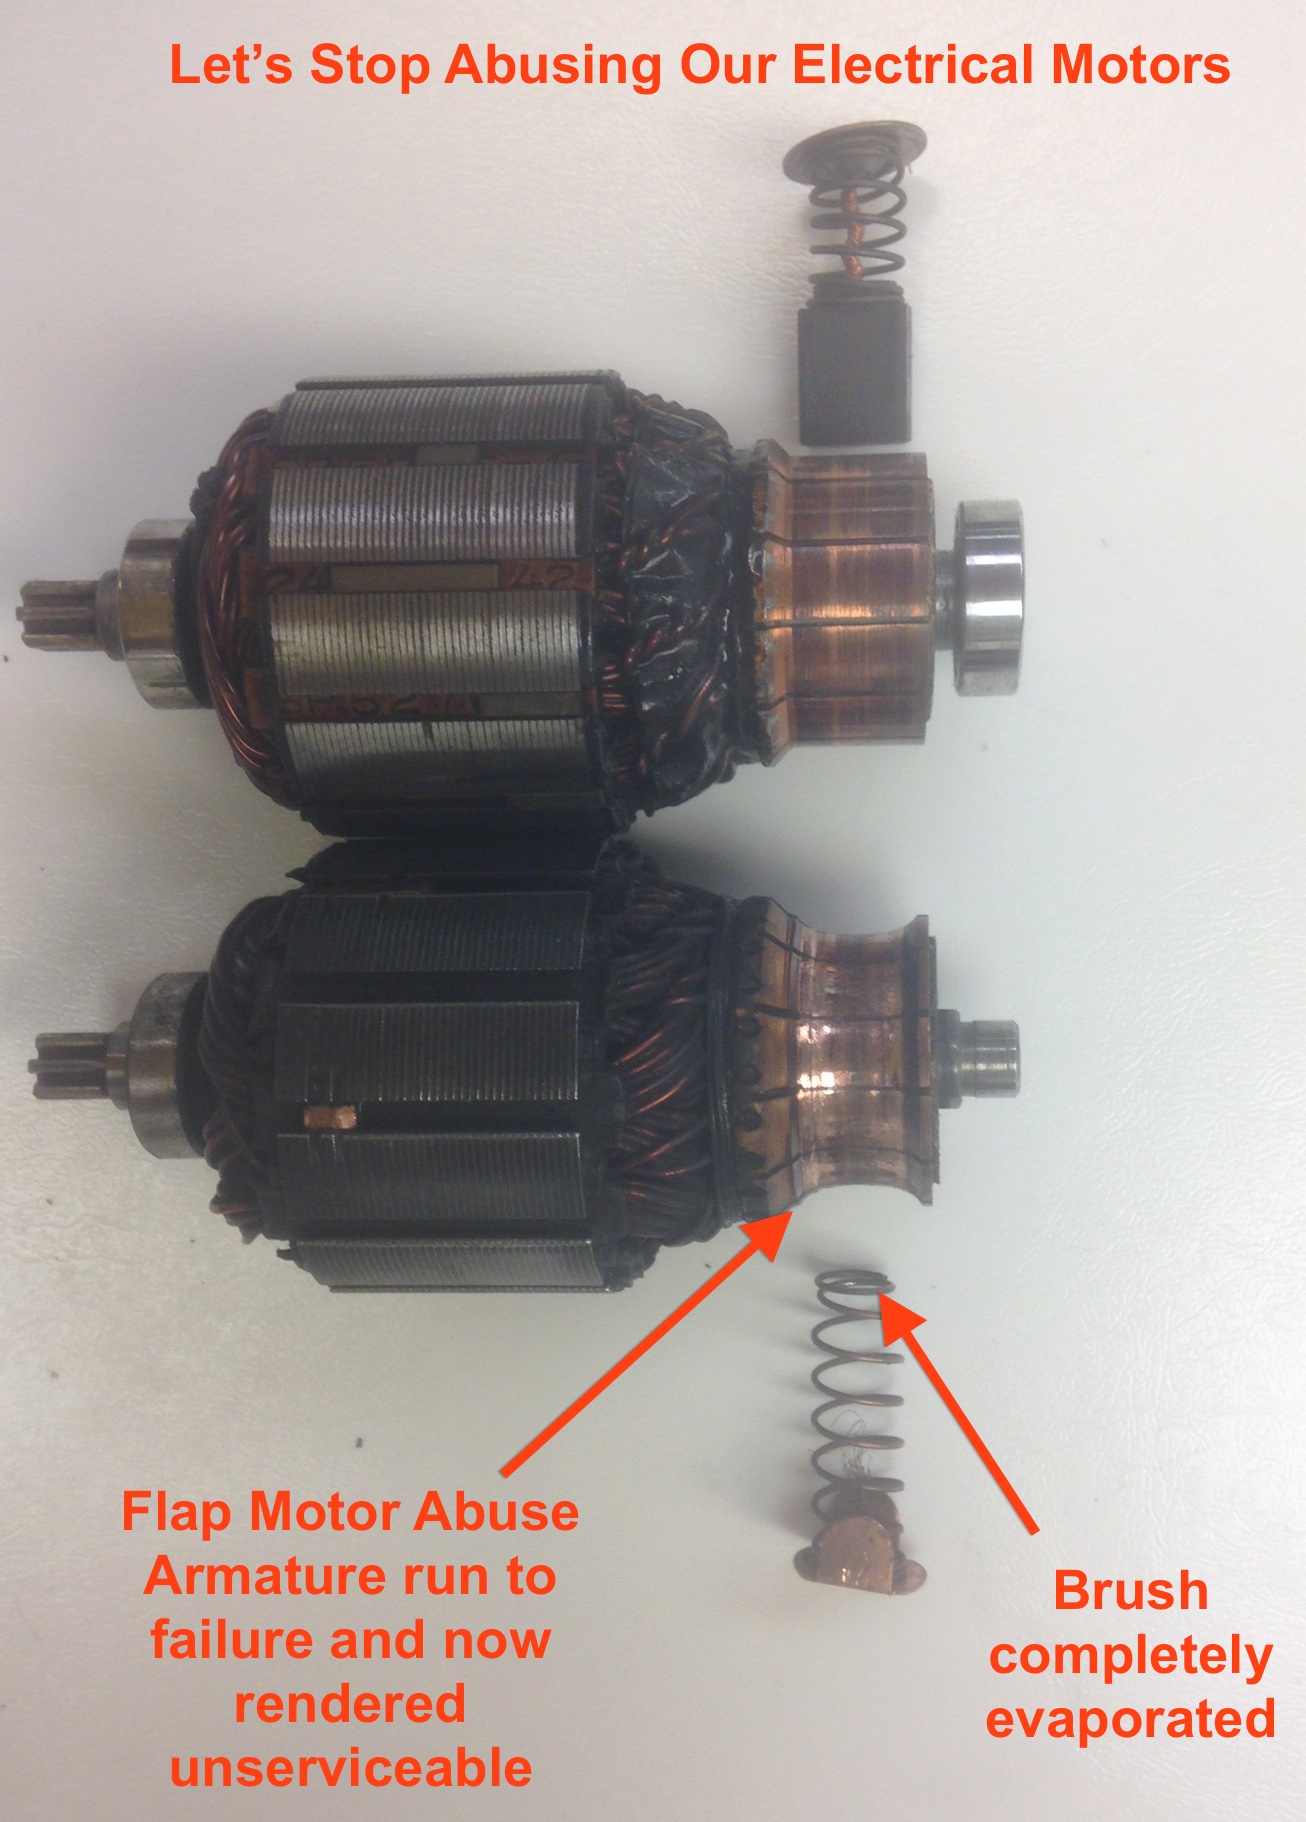
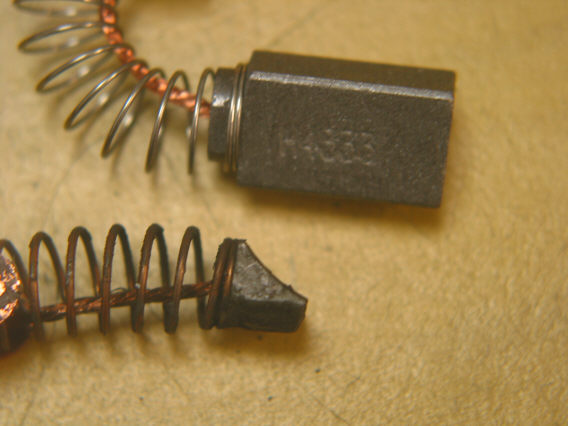
Gear Motor and brushes run to failure - NO,
not mine. Contributor will remain anonymous. I believe the contributor posted
the part TT as in the 6,000 hrs TIS range. Don't be this guy! After 30 or 40
years and 4,000 to 5,000 hours TIS, how much more service does the motor owe
you?
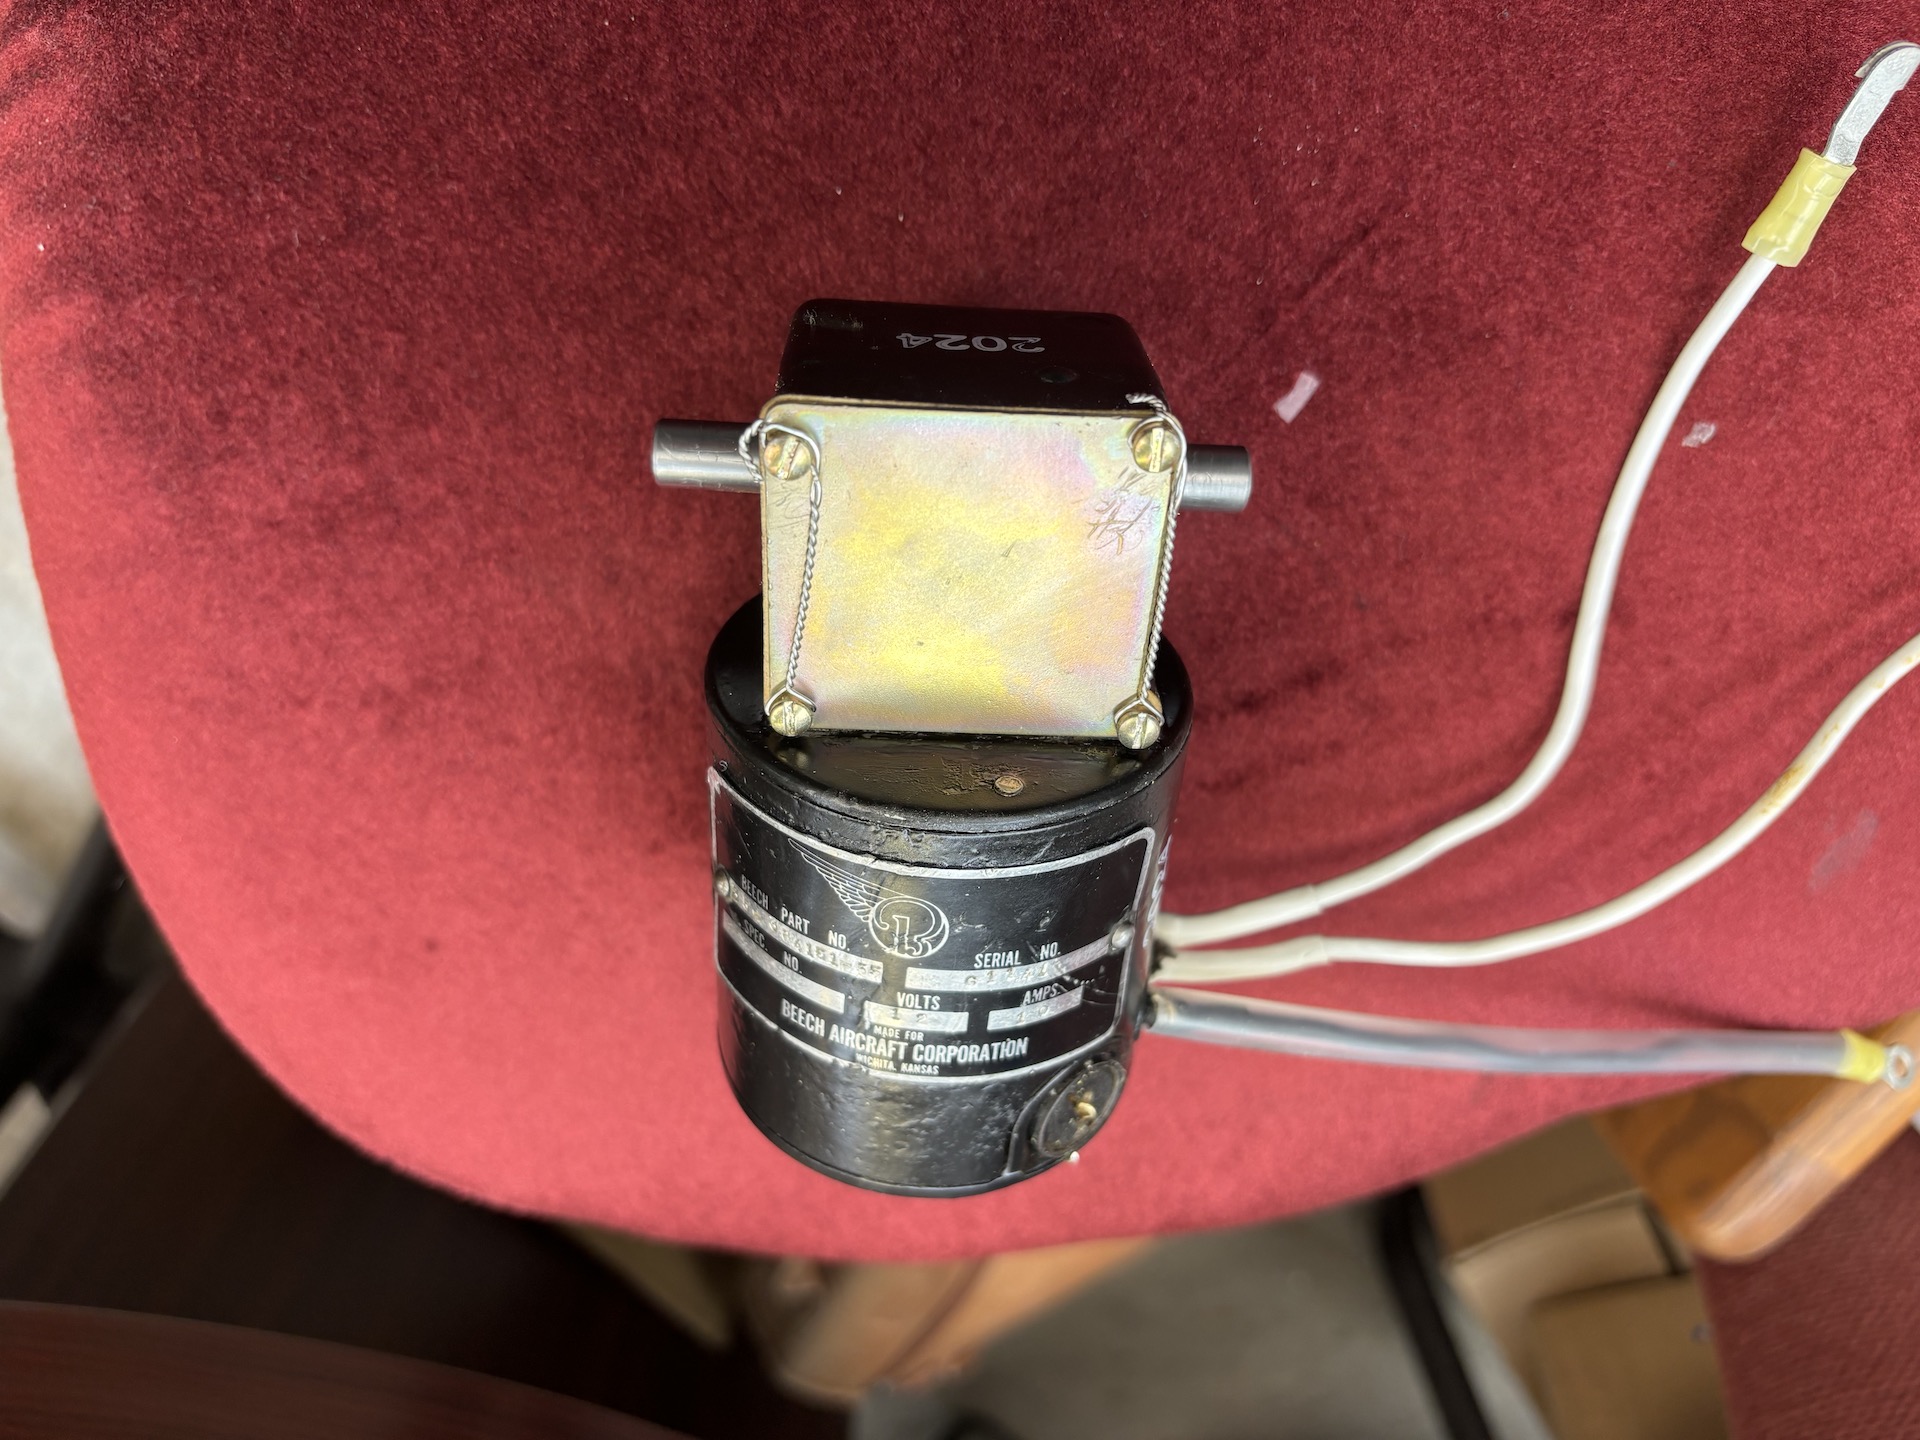
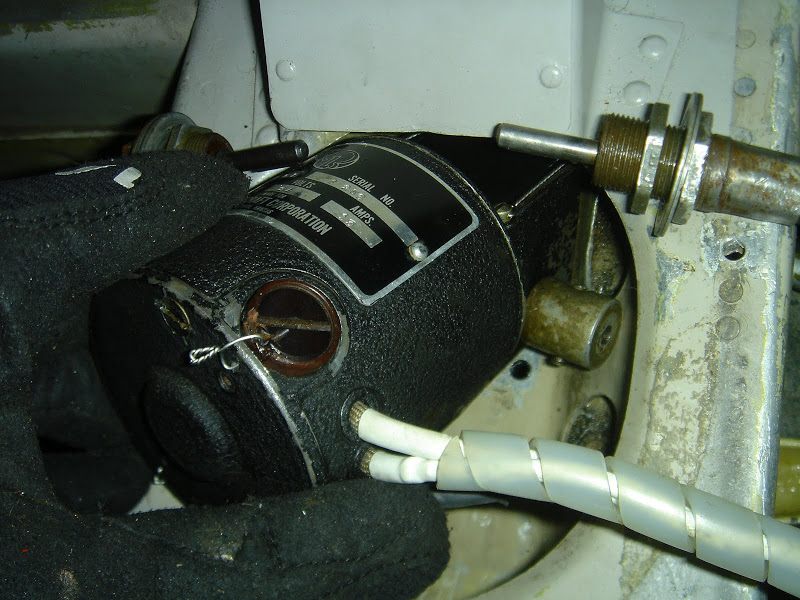
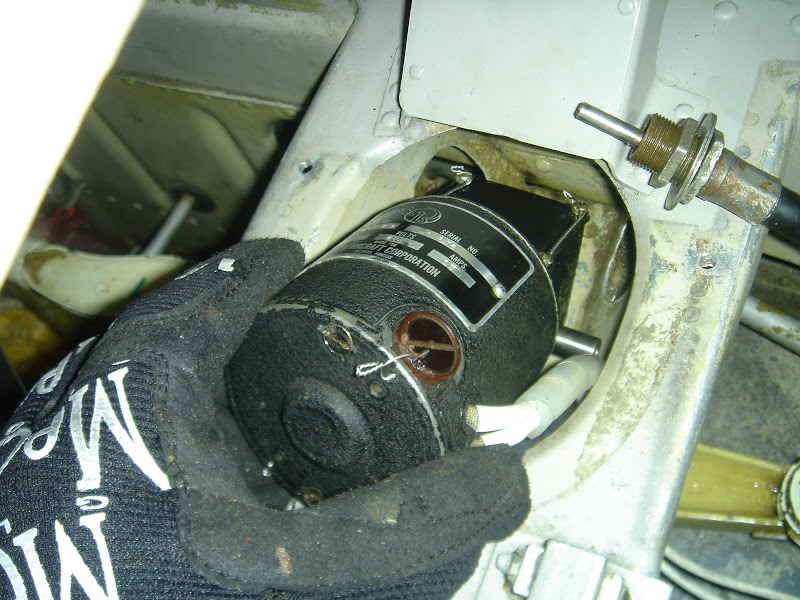
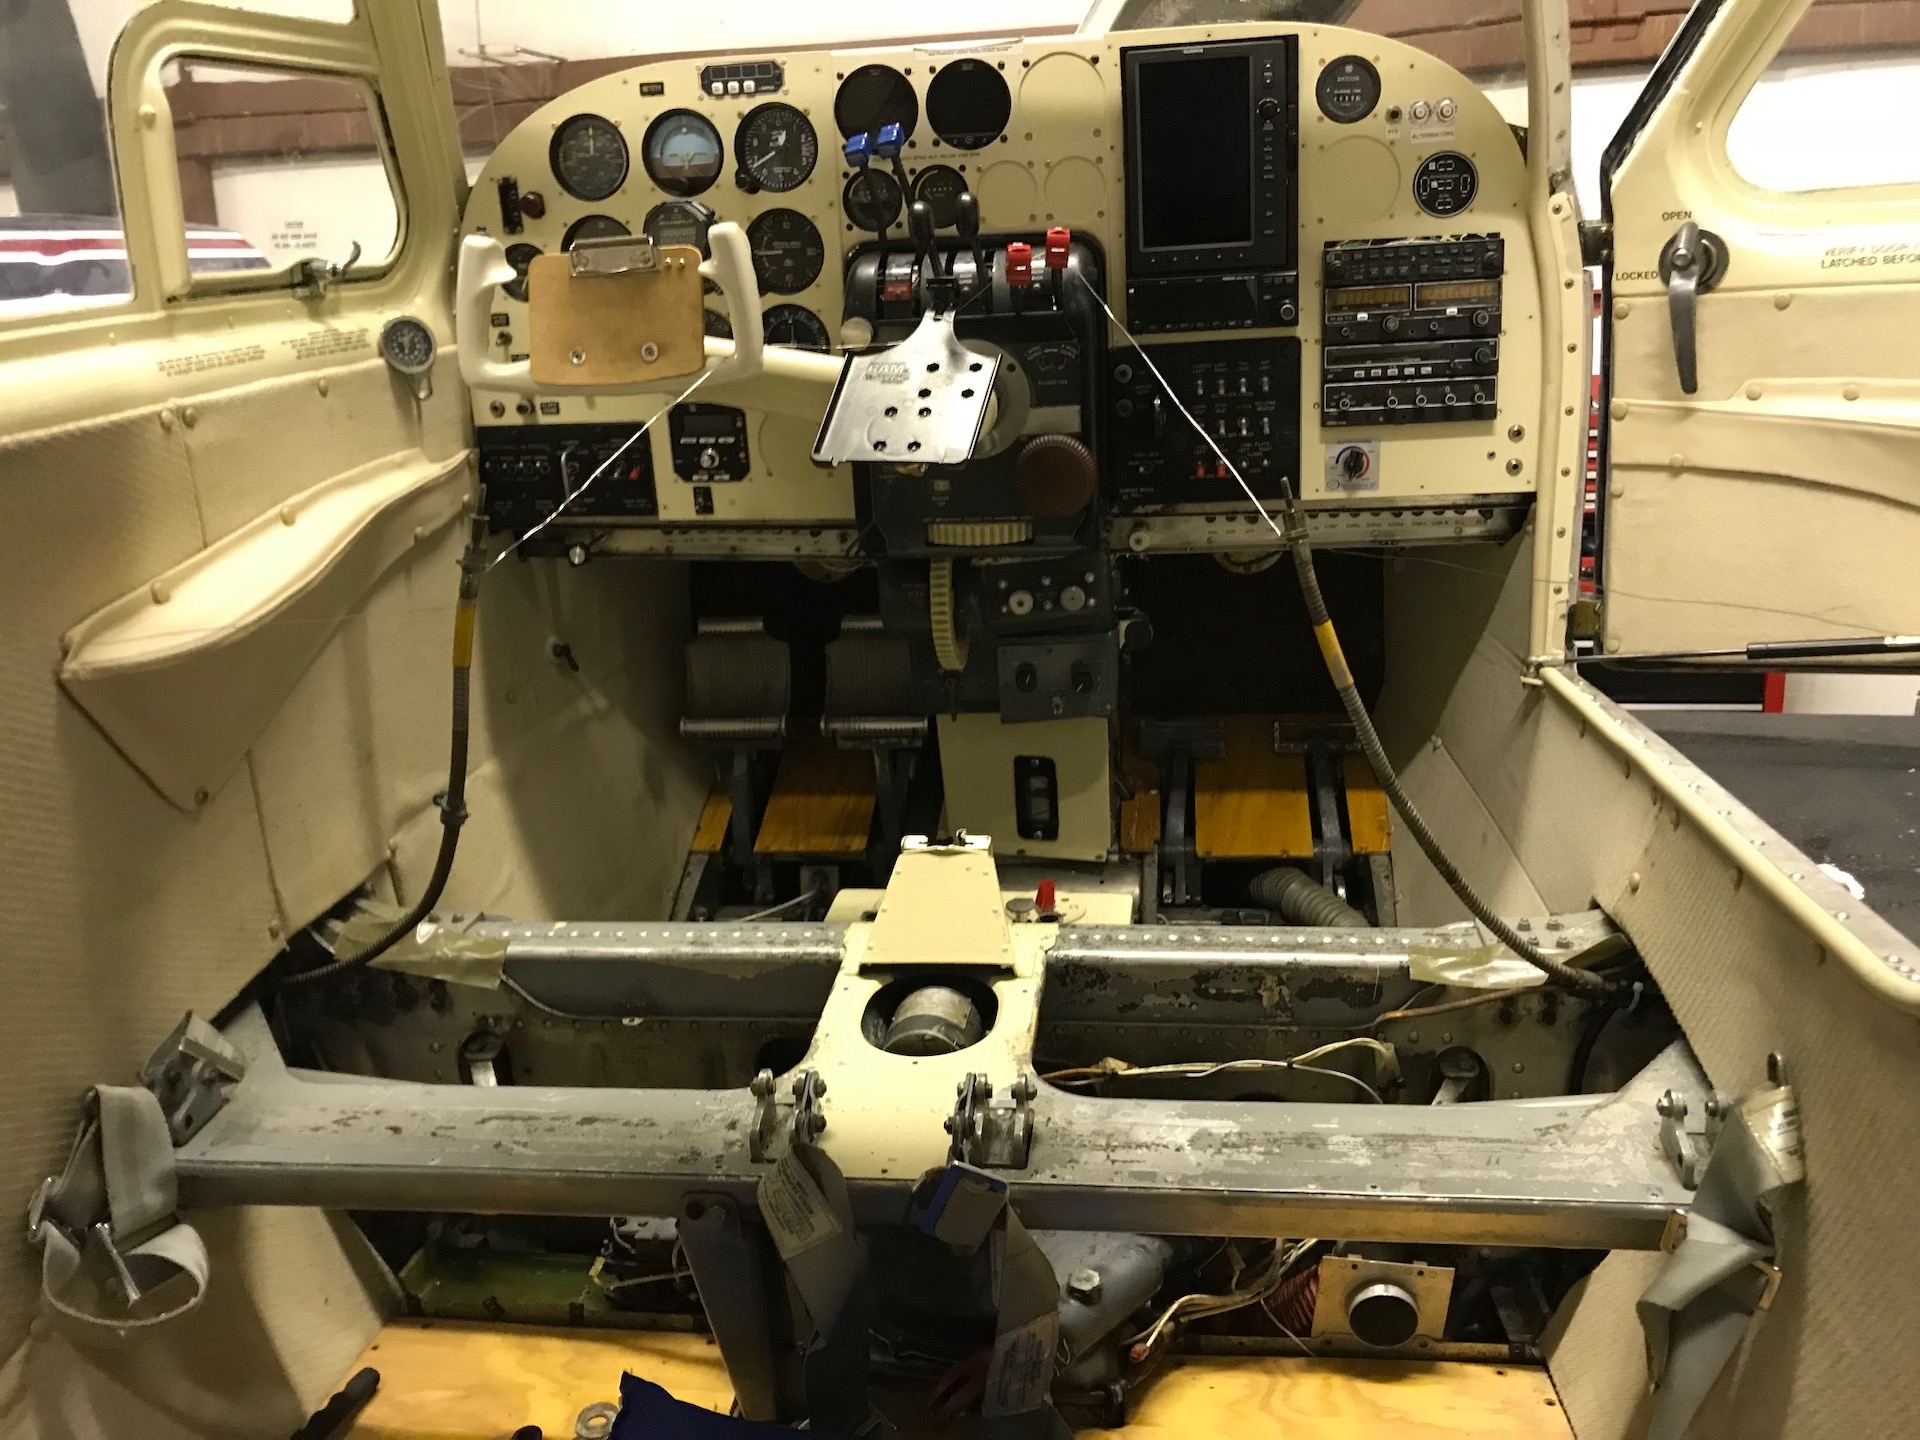
Below are a host of pictures of
the typical Bonanza/Baron/Travel Air Flap motor mounting and my removal of mine
for overhaul replacement after about 4800 hrs TIS.
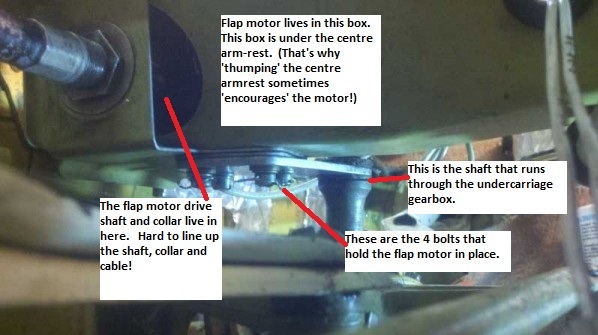
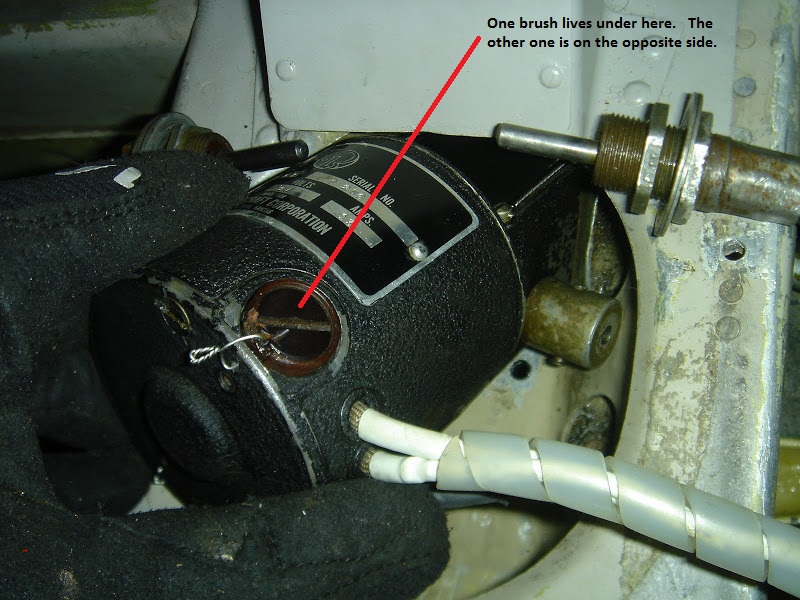
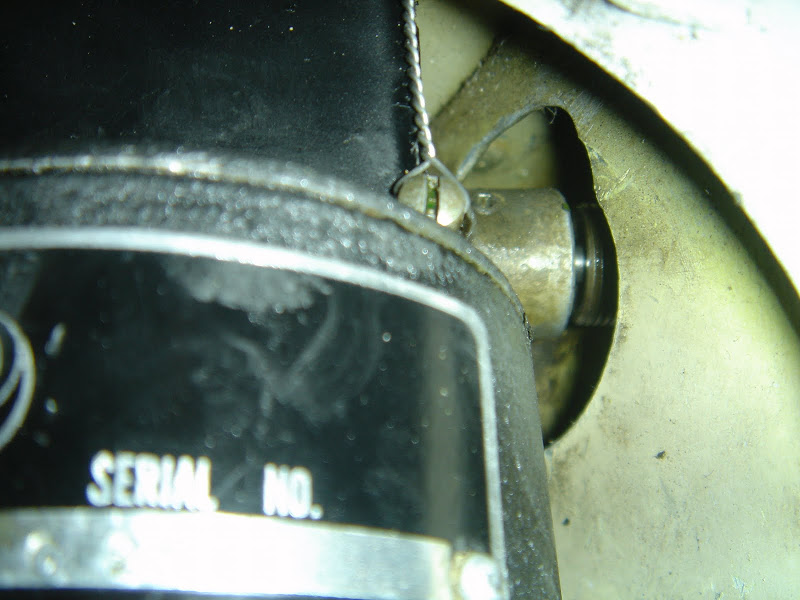
Looking in under the seats at the center console area on top
of the landing gear transmission
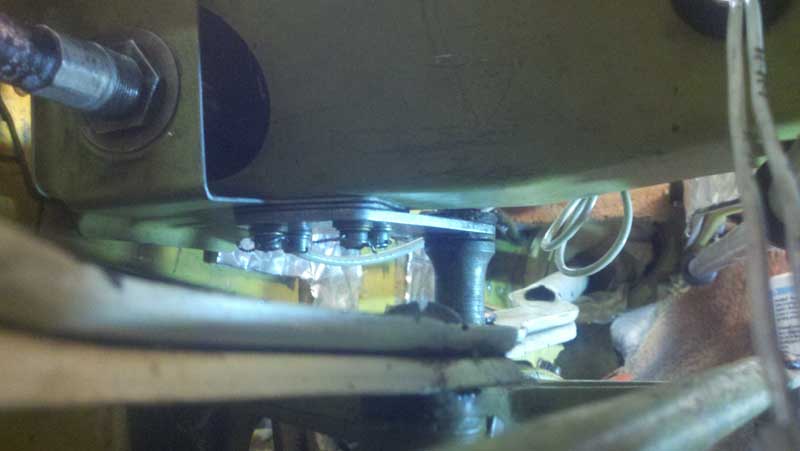
This is the top of the landing gear transmission looking from the pilot side
toward the cabin door.
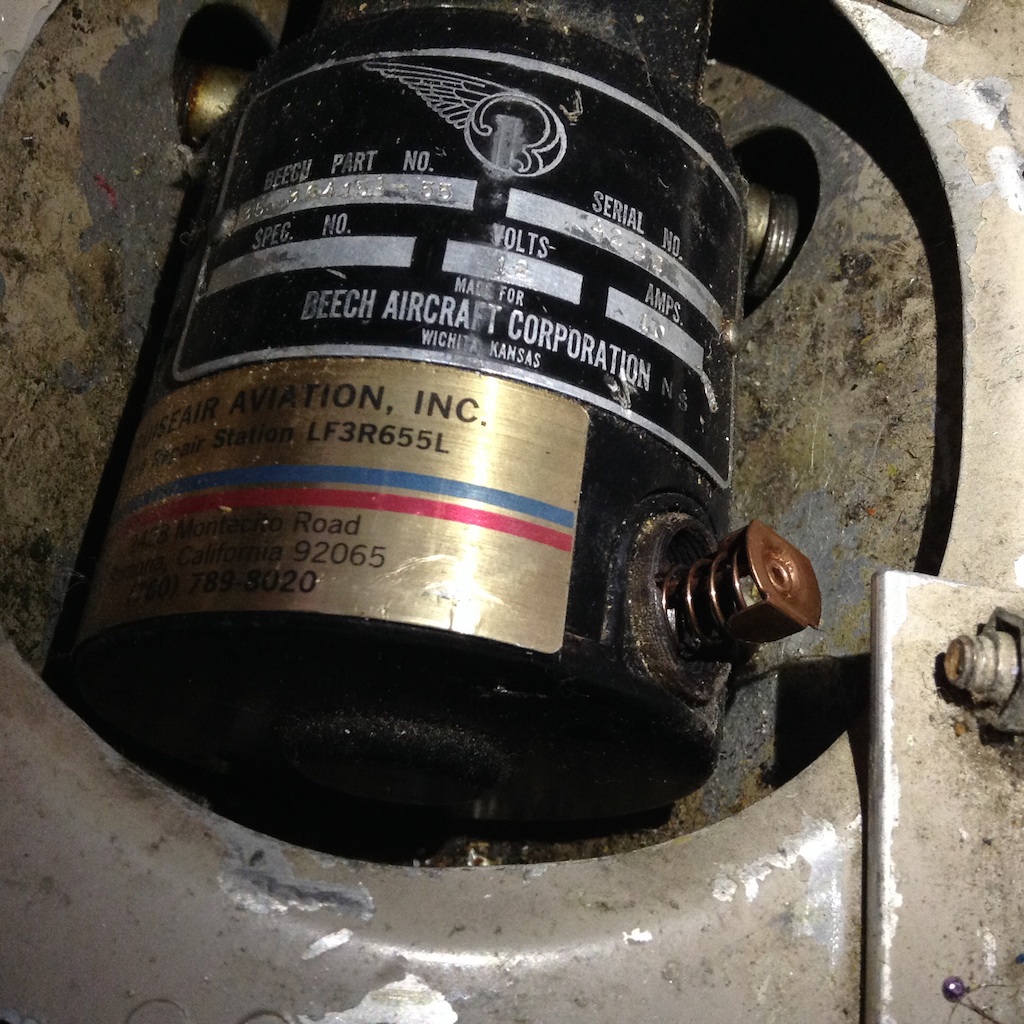
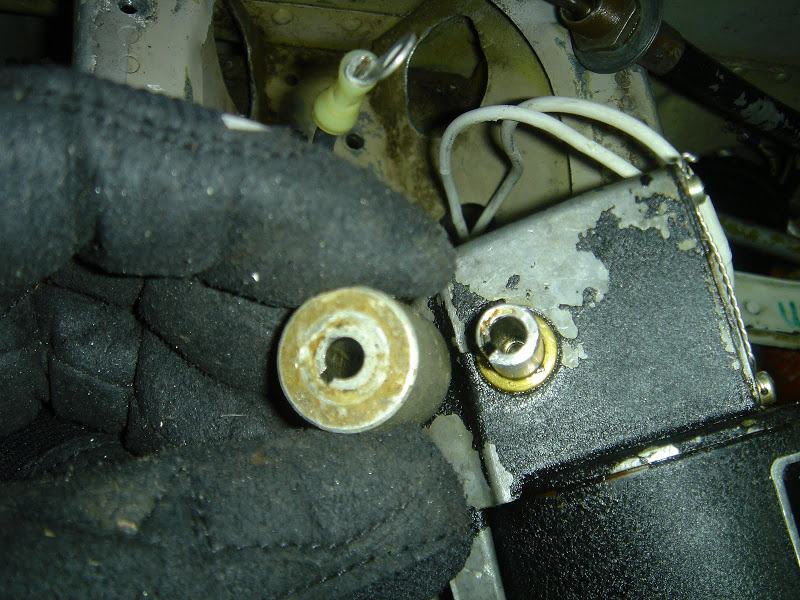
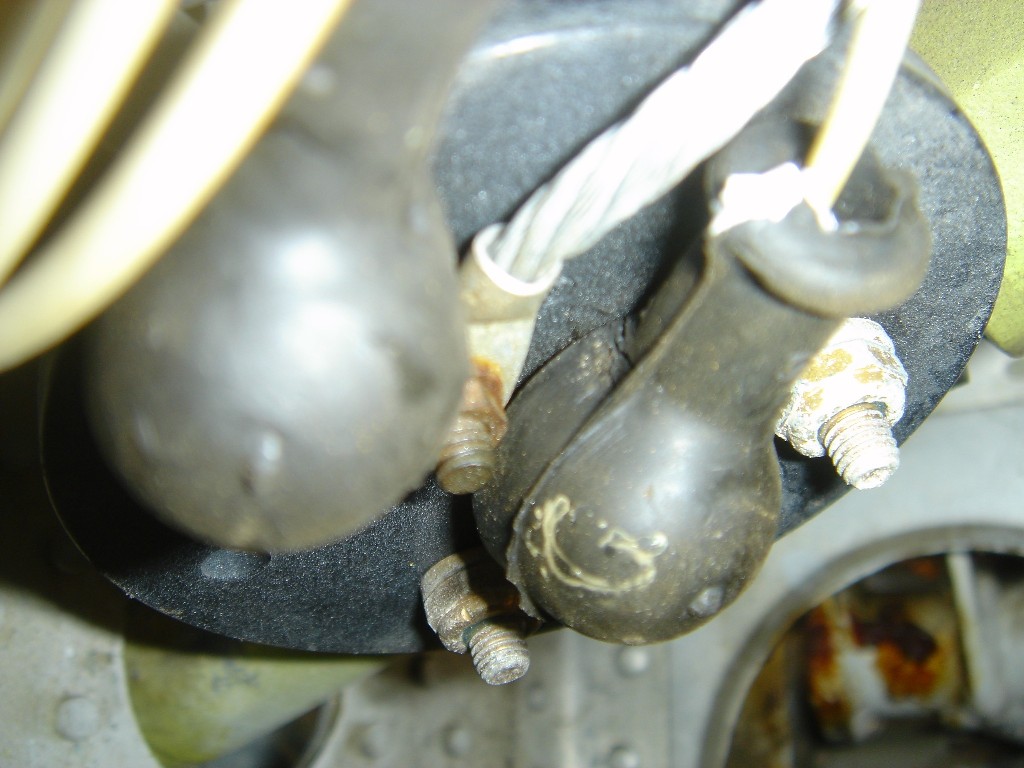
The above picture shows what can happen to the threaded
portion of the brush holder cap if it gets damaged.
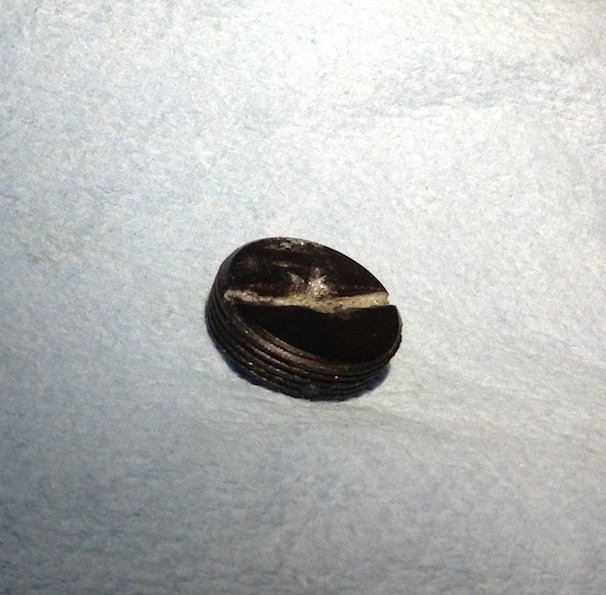
This is the brush cap with damaged safety wire hole
MANDATORY
SB2460 dealing with flap cable retainers
HERE
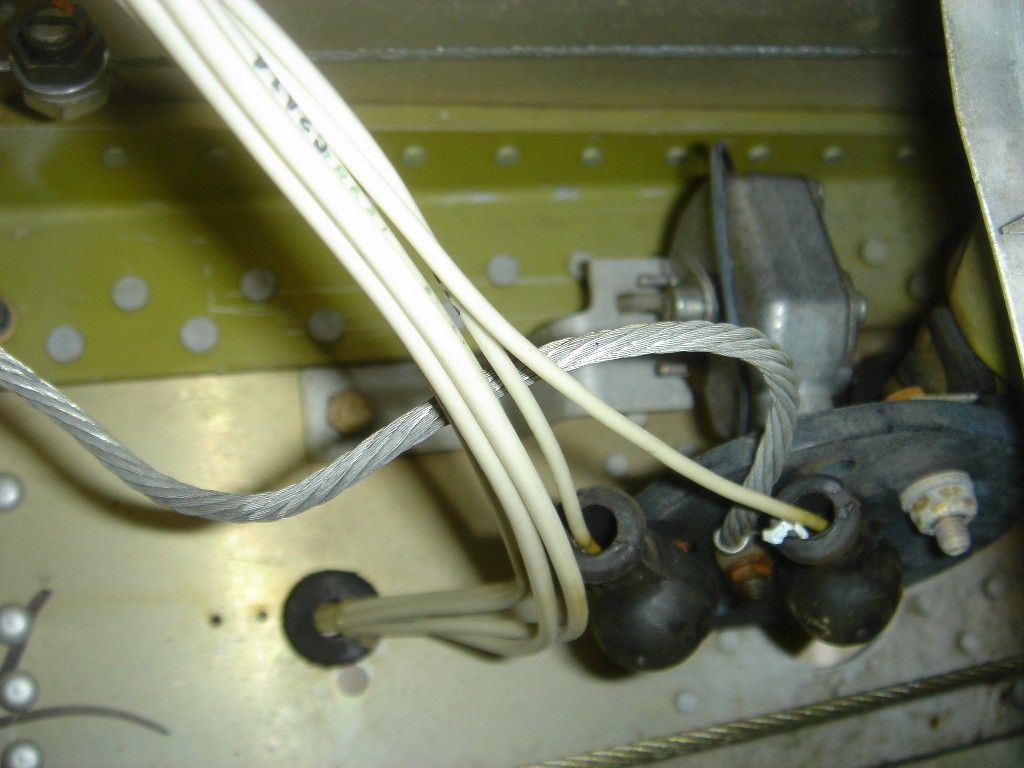
Looking on top of motor at right side cable attachment
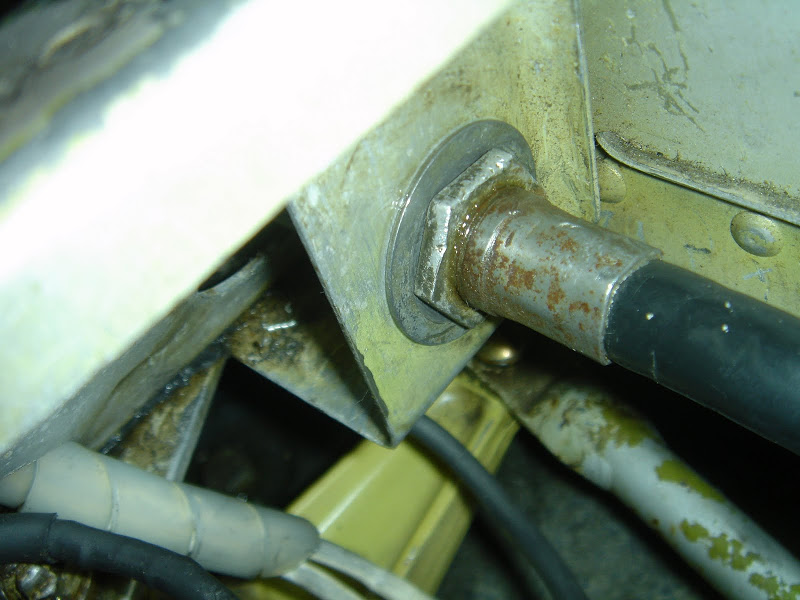
Flap Cable seated and mounted. Note - one 11/16" nut is on
outside and another 11/16" nut is on the inside. A crowsfoot wrench was all I
could manage to insert in there to work the inner nut loose. Liberal doses of
CorrosionX were also applied to assist in this tedious removal procedure.


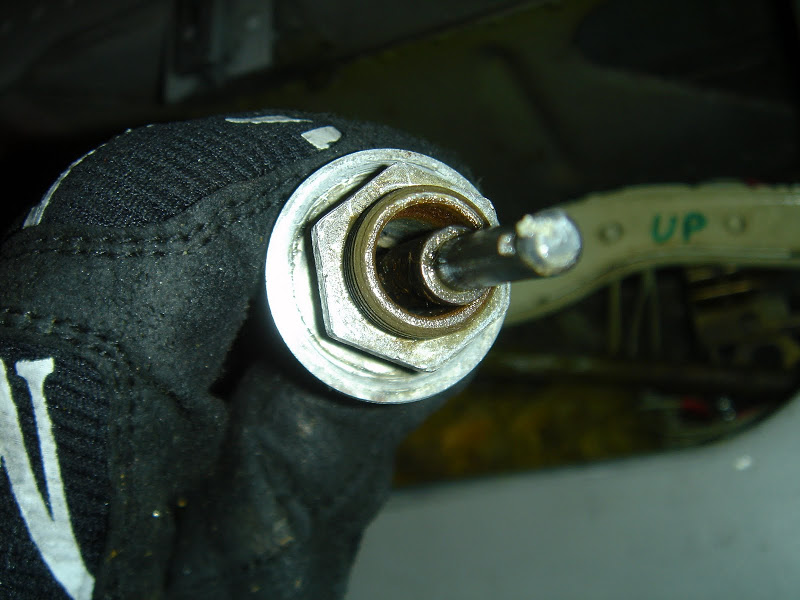
Here the left cable has been extracted showing the inner
second nut that must be removed to extract the cable. The other item that must
be removed first however, are the retaining collars that secure the cables to
the motor shaft by allen set screws. It has been reported that early cables with
a relatively short locking key in the cable drive, utilize the retaining
collars. Newer cables with a much longer "key" lock do not use the retaining
collars.
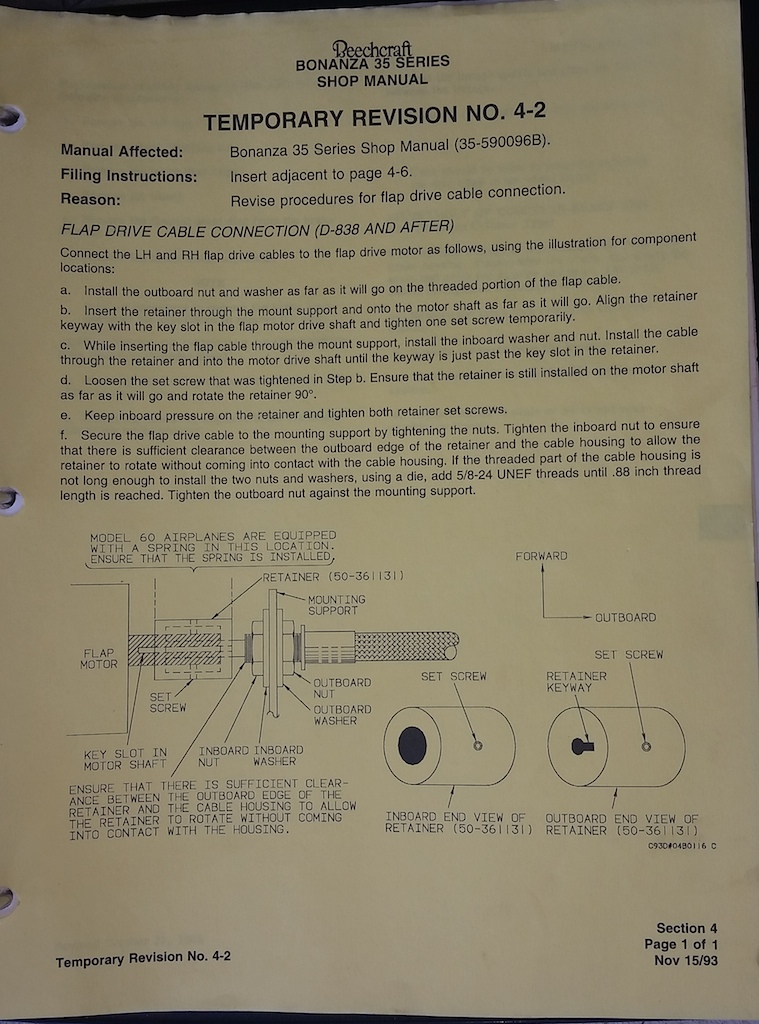
Above is a Beech Flap Connector Temporary Revision No. 4-2
dated November 1993, which revises the procedure for flap cable connections in
Bonanzas SN: D-838 and after.
This is what happened to P35 Bonanza owner, Scott L. when his
flap cable retaining collars were not installed and locked properly causing his
flap cables to pop out on his base to final turn at his home base:
"I was cleared to come in on an extended left base to
my home drone.
Dropped the gear, and then when speed hit 120 the
flaps, and started base to final turn. Flaps were coming down during turn.
Heard a thunk sound, and then slightly faster flap
motor sound. By the time I thought "what was that?" There was another thunk and
flap motor went to high speed, like a sewing machine motor.
Plane continued to roll and I had to hard over the
control wheel and used some rudder to help bring wing up.
I knew instantly what happened. The flap cable popped
out on left side and that side has the limit switch for the flaps. The the right
side continued down until it bottomed out and it's cable pooped out. I knew
there would be no raising the flap when I heard the motor start whizzing.
Was running about 15" or less of manifold pressure, and
didn't want to try and go around and see what would happen under high power. I
kept the control wheel hard over all the way to touchdown and did a decent
landing.
It handled fine in that configuration, and I kept
thinking during the event that Beech must have designed the Bonanza to have
control if this would happen. Don't know if that's true but it did work."
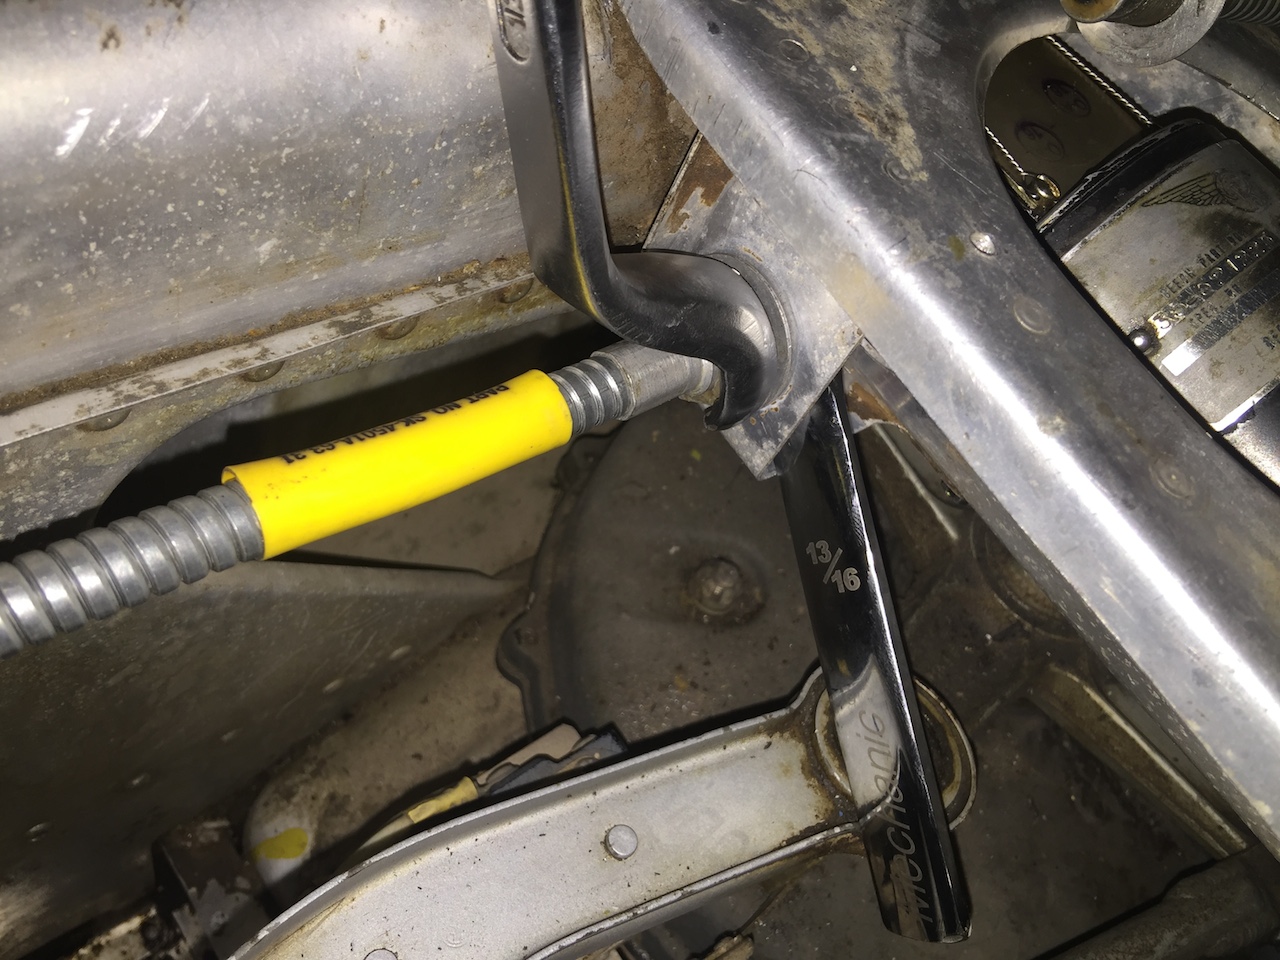
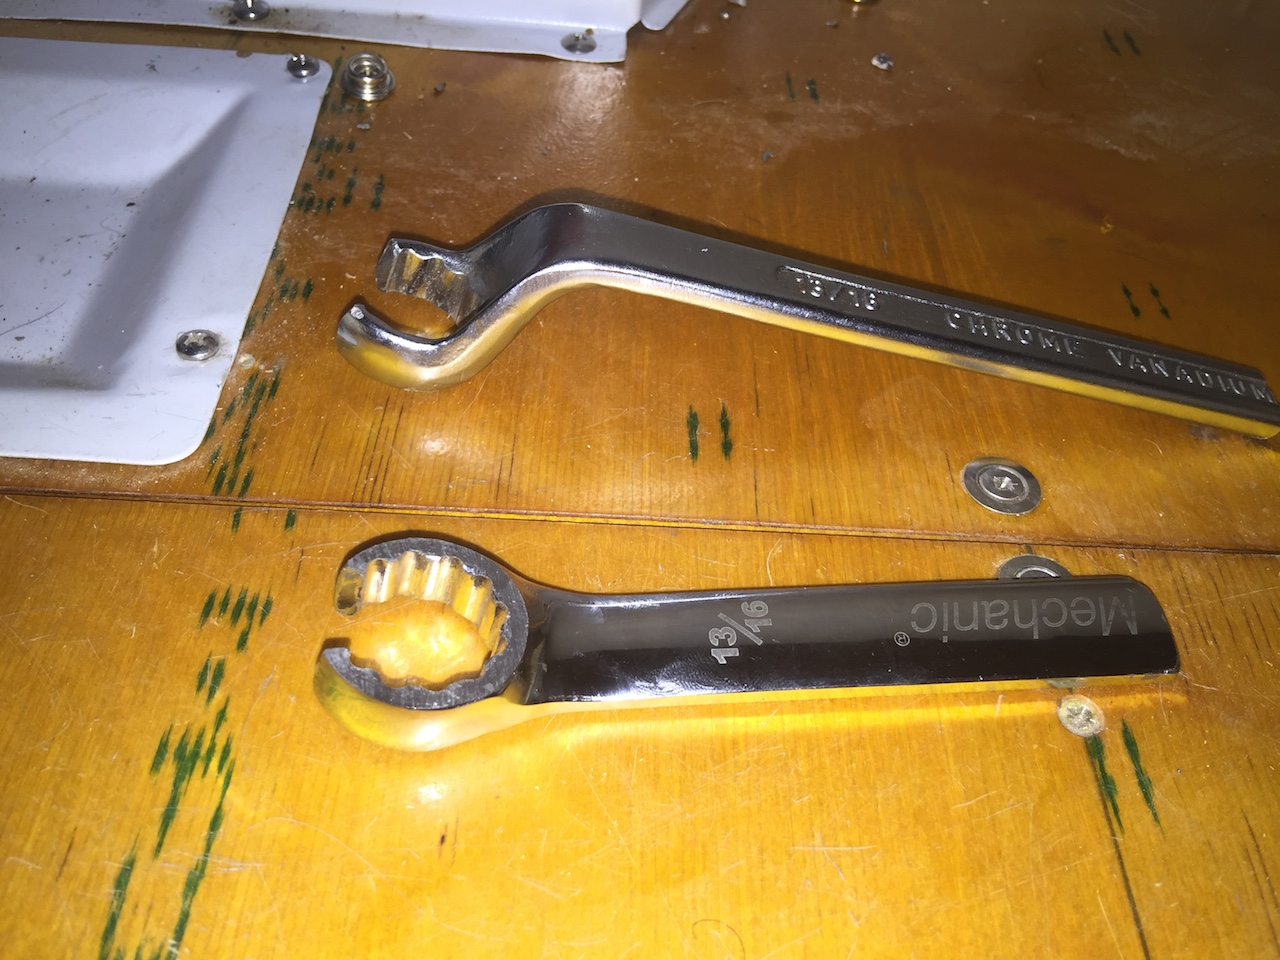
Below are some custom 13/16" wrenches made by John McM. for how
he dealt with the flap cable nuts. John says: " The offset wrench holds the
outboard nut and the flat wrench turns the inboard nut. The cutout lets you get
the wrenches over the cable. The wrenches don't exactly make the job easy but
they do make it less hard."
Thanks for your contribution to CSOBeech John!

Tom P., reports the following pirep relating to his assisting a P35 owner R&R
his flap motor:
1. The flap cables are not connected to the motor via retaining screws.
His cables have a keyed area on the part that fit into the geared portion of
the motor. Just no retaining screws.
2. The crows foot required to remove the cable from the motor was 13/16, in
his Bonanza, not the 11/16 your article mentioned.
3. More interestingly, we first had to back off on the nut on the outside
of the flap area. Then we were able to manually remove the keyed flap
drive cable without any fuss.
Thanks for your contribution to CSOBeech Tom!
Here's a pirep from 1959 Bonanza owner Tom P. on his flap motor R&R
experiences:
"I have enjoyed your articles, hints, suggestions
and CSOBeech web site.
I recently had an opportunity to reread your article in the ABS magazine
about R&R of the Beechcraft flap motor.
My 1959 Bonanza has about 7600 hours on it and is about 59 years old. I
decided that it was time to have the flap motor inspected and overhauled.
Please understand that i have removed and replaced my engine four times, my
gear motor twice, as well as maintained this airplane for about 33 years.
Oh, I am also 6'3" tall and have large hands. So...
I was able to loosen the flap cable nuts, but I was unable to do anything to
the inner nut on the cable. Nor was I able to do anything about the four
3/8 inch bolts that hold the motor in place.
I had to ask my neighbor (who has a P35) to help. He is about 5'8" tall
and has smaller hands.
Removing the motor was not all that difficult. However it took us about
4.5 hours to properly install the motor.
My point is, should you write another article, suggest the owners with large
hands should not consider doing any of the work. I would also
suggest that you emphasize patience.
Oh, one other thing. We found that it worked best to clean the grooves
(slots) on the motor with fine paper and confirm that the cables easily fit into
and are easily removed from the grooved area of the motor, BEFORE the motor is
installed into its space. We also found it best to have the collars in
place before putting the motor in its space.
Some other thoughts about the flap motor R&R:
I would remind readers that they should not be surprised if he/she find that
the flaps no longer are equally up or down. To correct this, examine the
ABS guide to the flaps. It tells you how to adjust the flap's amount of
movement. This will be necessary, should the flap cable be turned to
fit into the grove on the motor.
They might also have to adjust the flaps up and down limit switch, which are
on the left sides because the left flap is the master flap and the right flap is
the slave flap.
If the R&R is in a model of the Bonanza which has flap position pre-select,
then there will be four limit switches to contend with.
Thanks for all that you have written about owning and flying the Beechcraft
Bonanza and Baron."
Tom
PS: I think Tom has XL hands! LOL
Short "key" lock tab of early cables.
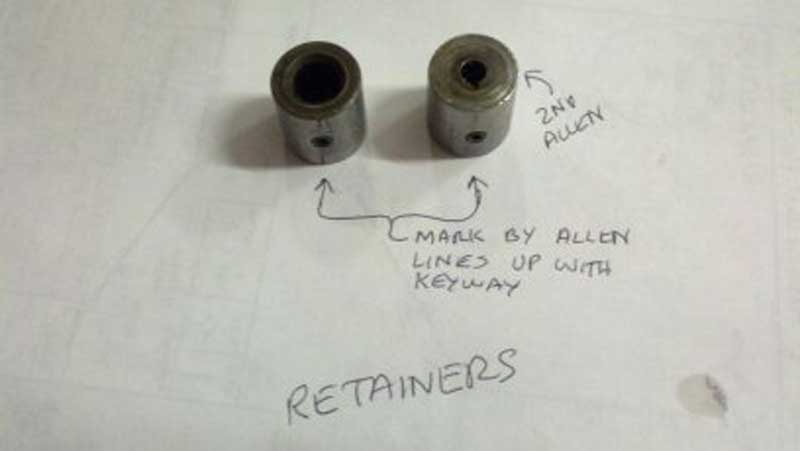
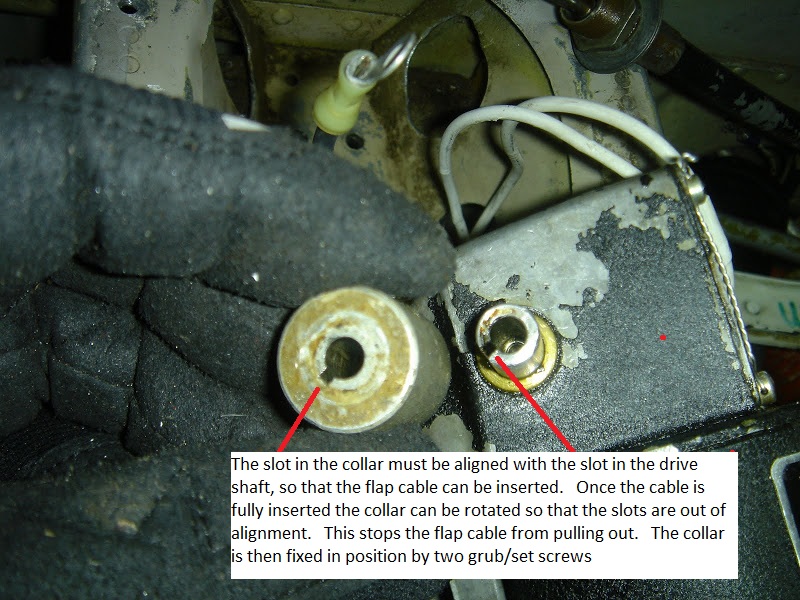
Retaining collar and drive motor shaft. Note the slots in both
items must be aligned prior to removal and reinsertion of the cable "key".
Getting this alignment correct can be quite tedious.
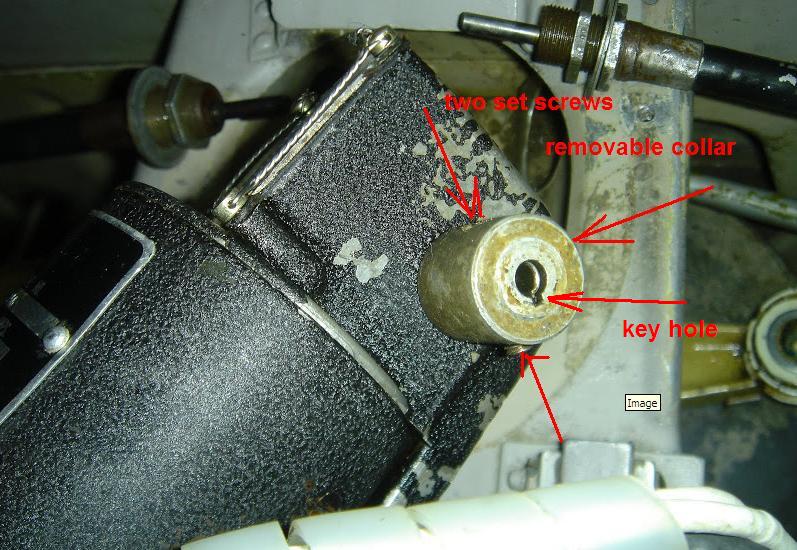
It's pretty tight in there for extracting those retaining
collar set screws. Upon reinsertion of the cable the retaining collar slot must
be aligned with the motor drive shaft slot to insert the cable's "key". Then the
retaining collar is rotated some number of degrees (90?) to insure a last line
of defense "lock" of the cable into the motor slotted drive shaft.
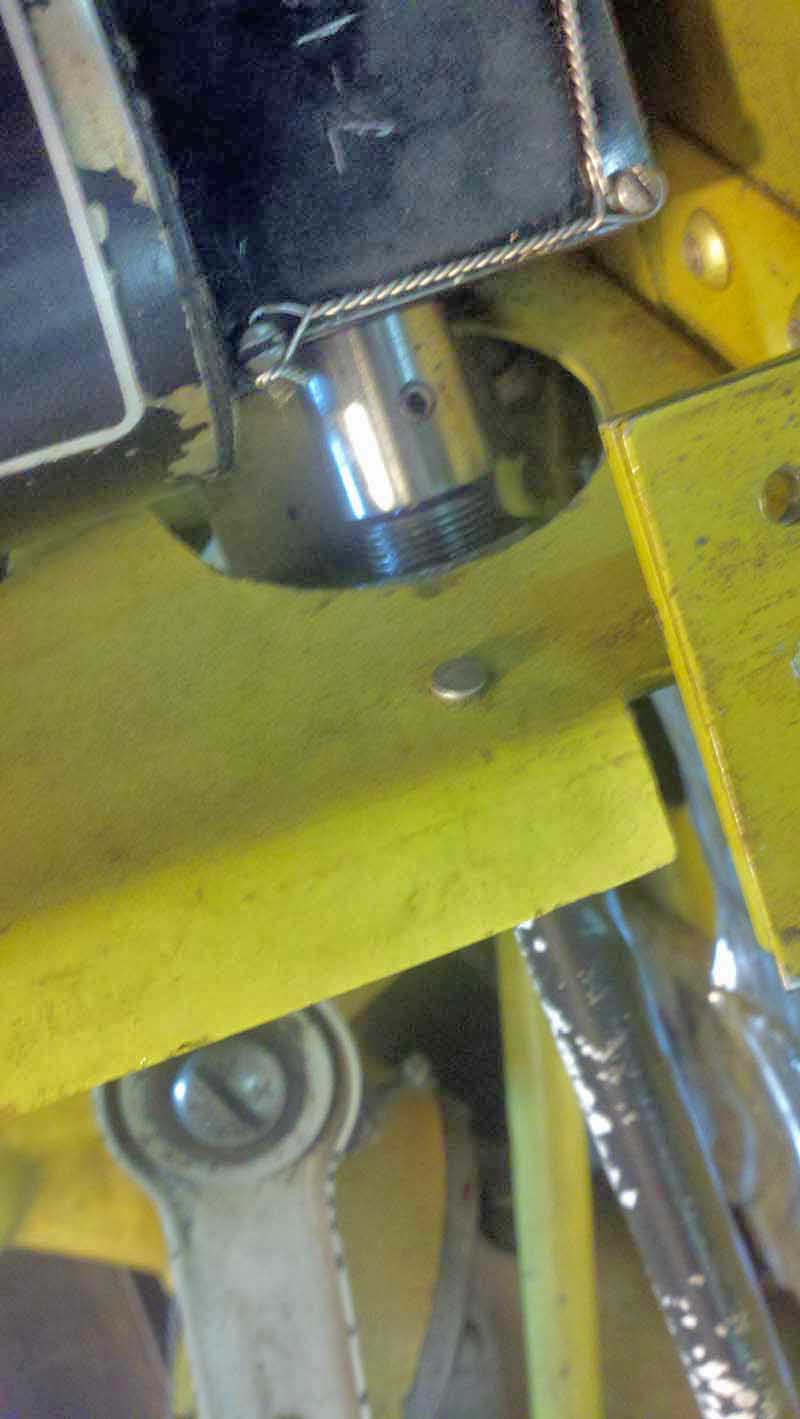
At last, the extraction can occur!
Insertion is the reverse - but definitely a tight space!
The ABS article I authored on Flap Motor R&R is HERE.
Flap Cable Lubrication Pireps
The following is a pirep from Travel Air owner Jeff W.:
IMO it's a good idea to lube then every 3 years give or take. I use whatever 10W engine oil is handy.
Pick
a time you won't be flying for a few days. Put the flaps down and
remove the fabric cover from the inner wheel well so you can see the
actuator. Disconnect the battery or pull the flap CB so the motor cannot
run. Disconnect the cables and tie them up with some wire or string.
Add small amounts of oil to the cable housing with an oil can, it will
slowly drain down. Do this until you start seeing some oil leaking out
at the actuator end - might be a couple of hours, might be a couple
days. Reconnect everything. Use a mirror with a light to help you see
where the gearbox expects the key on the cable to be - somehow even
though nothing has moved it always seems to require some slight twisting
of the cable housing to get it back in. You'll probably need to bend
and grind a couple of cheap open-end wrenches to get to the huts on the
cable retainer.
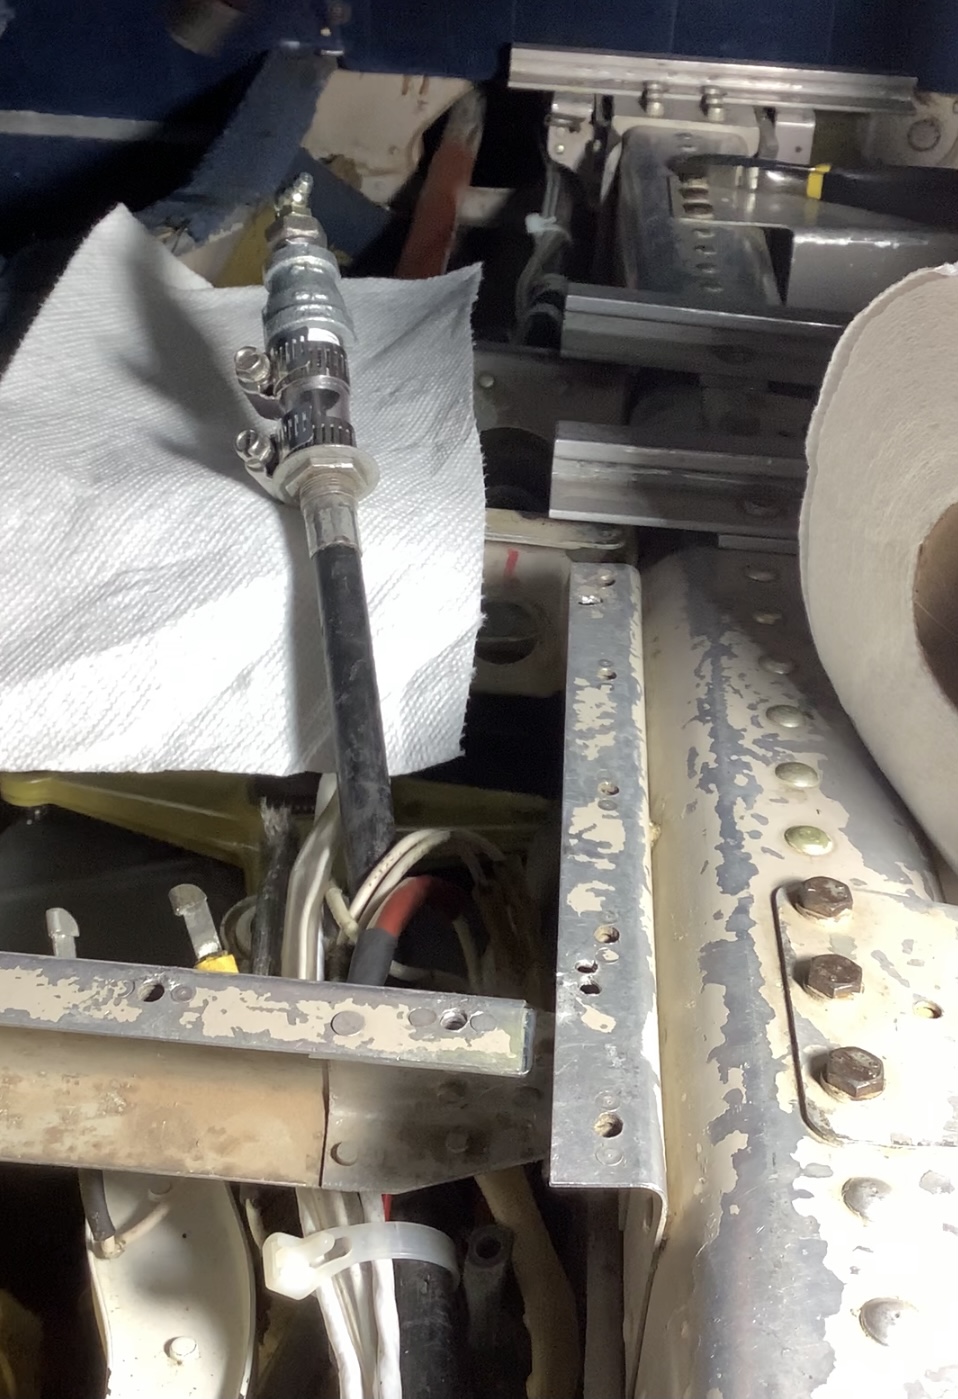
Mike B., an A36 owner offers the following pirep to aid in flap cable lubrication:
"I
chose to go the more locally available McGyver route. Hopefully the
below photo will provide a clear reference for those who wish to do the
same.
My
local hardware store had a galvanized bushing that was threaded to
receive both a grease fitting and a reducer coupling. I then added the
appropriate nipple to the opposite end with a clear flexible hose. The
only thing different that I will do next time is to use two narrower
hose clamps, one in each direction, instead of the single wider one that
I used on the flap cable fitting."
Contact Kevin O.
HERE for info on how he can help you with flap motor repairs.
See Kevin's refurb process
and equipment HERE .
Thinking about just slamming a new pair of
brushes in that motor and keep on going?
Well here's
what happens when folks do that:
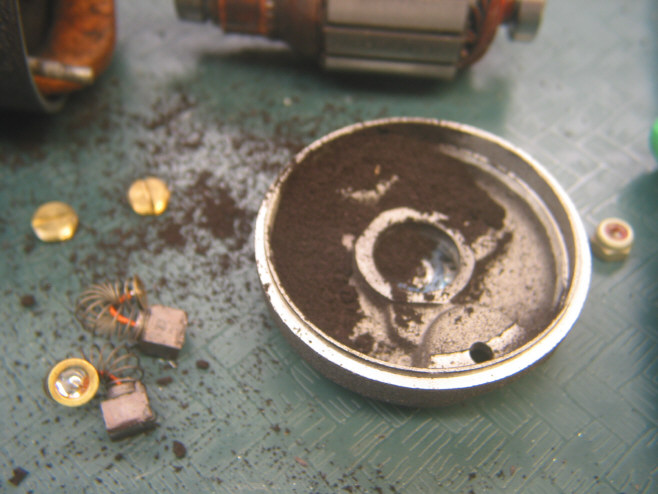
Below is the champion of flap motor abuse and neglect!
......plus the brushes should really be
properly "run in" to seat properly.
Below is the flap motor after Kevin O.'s "treatment"
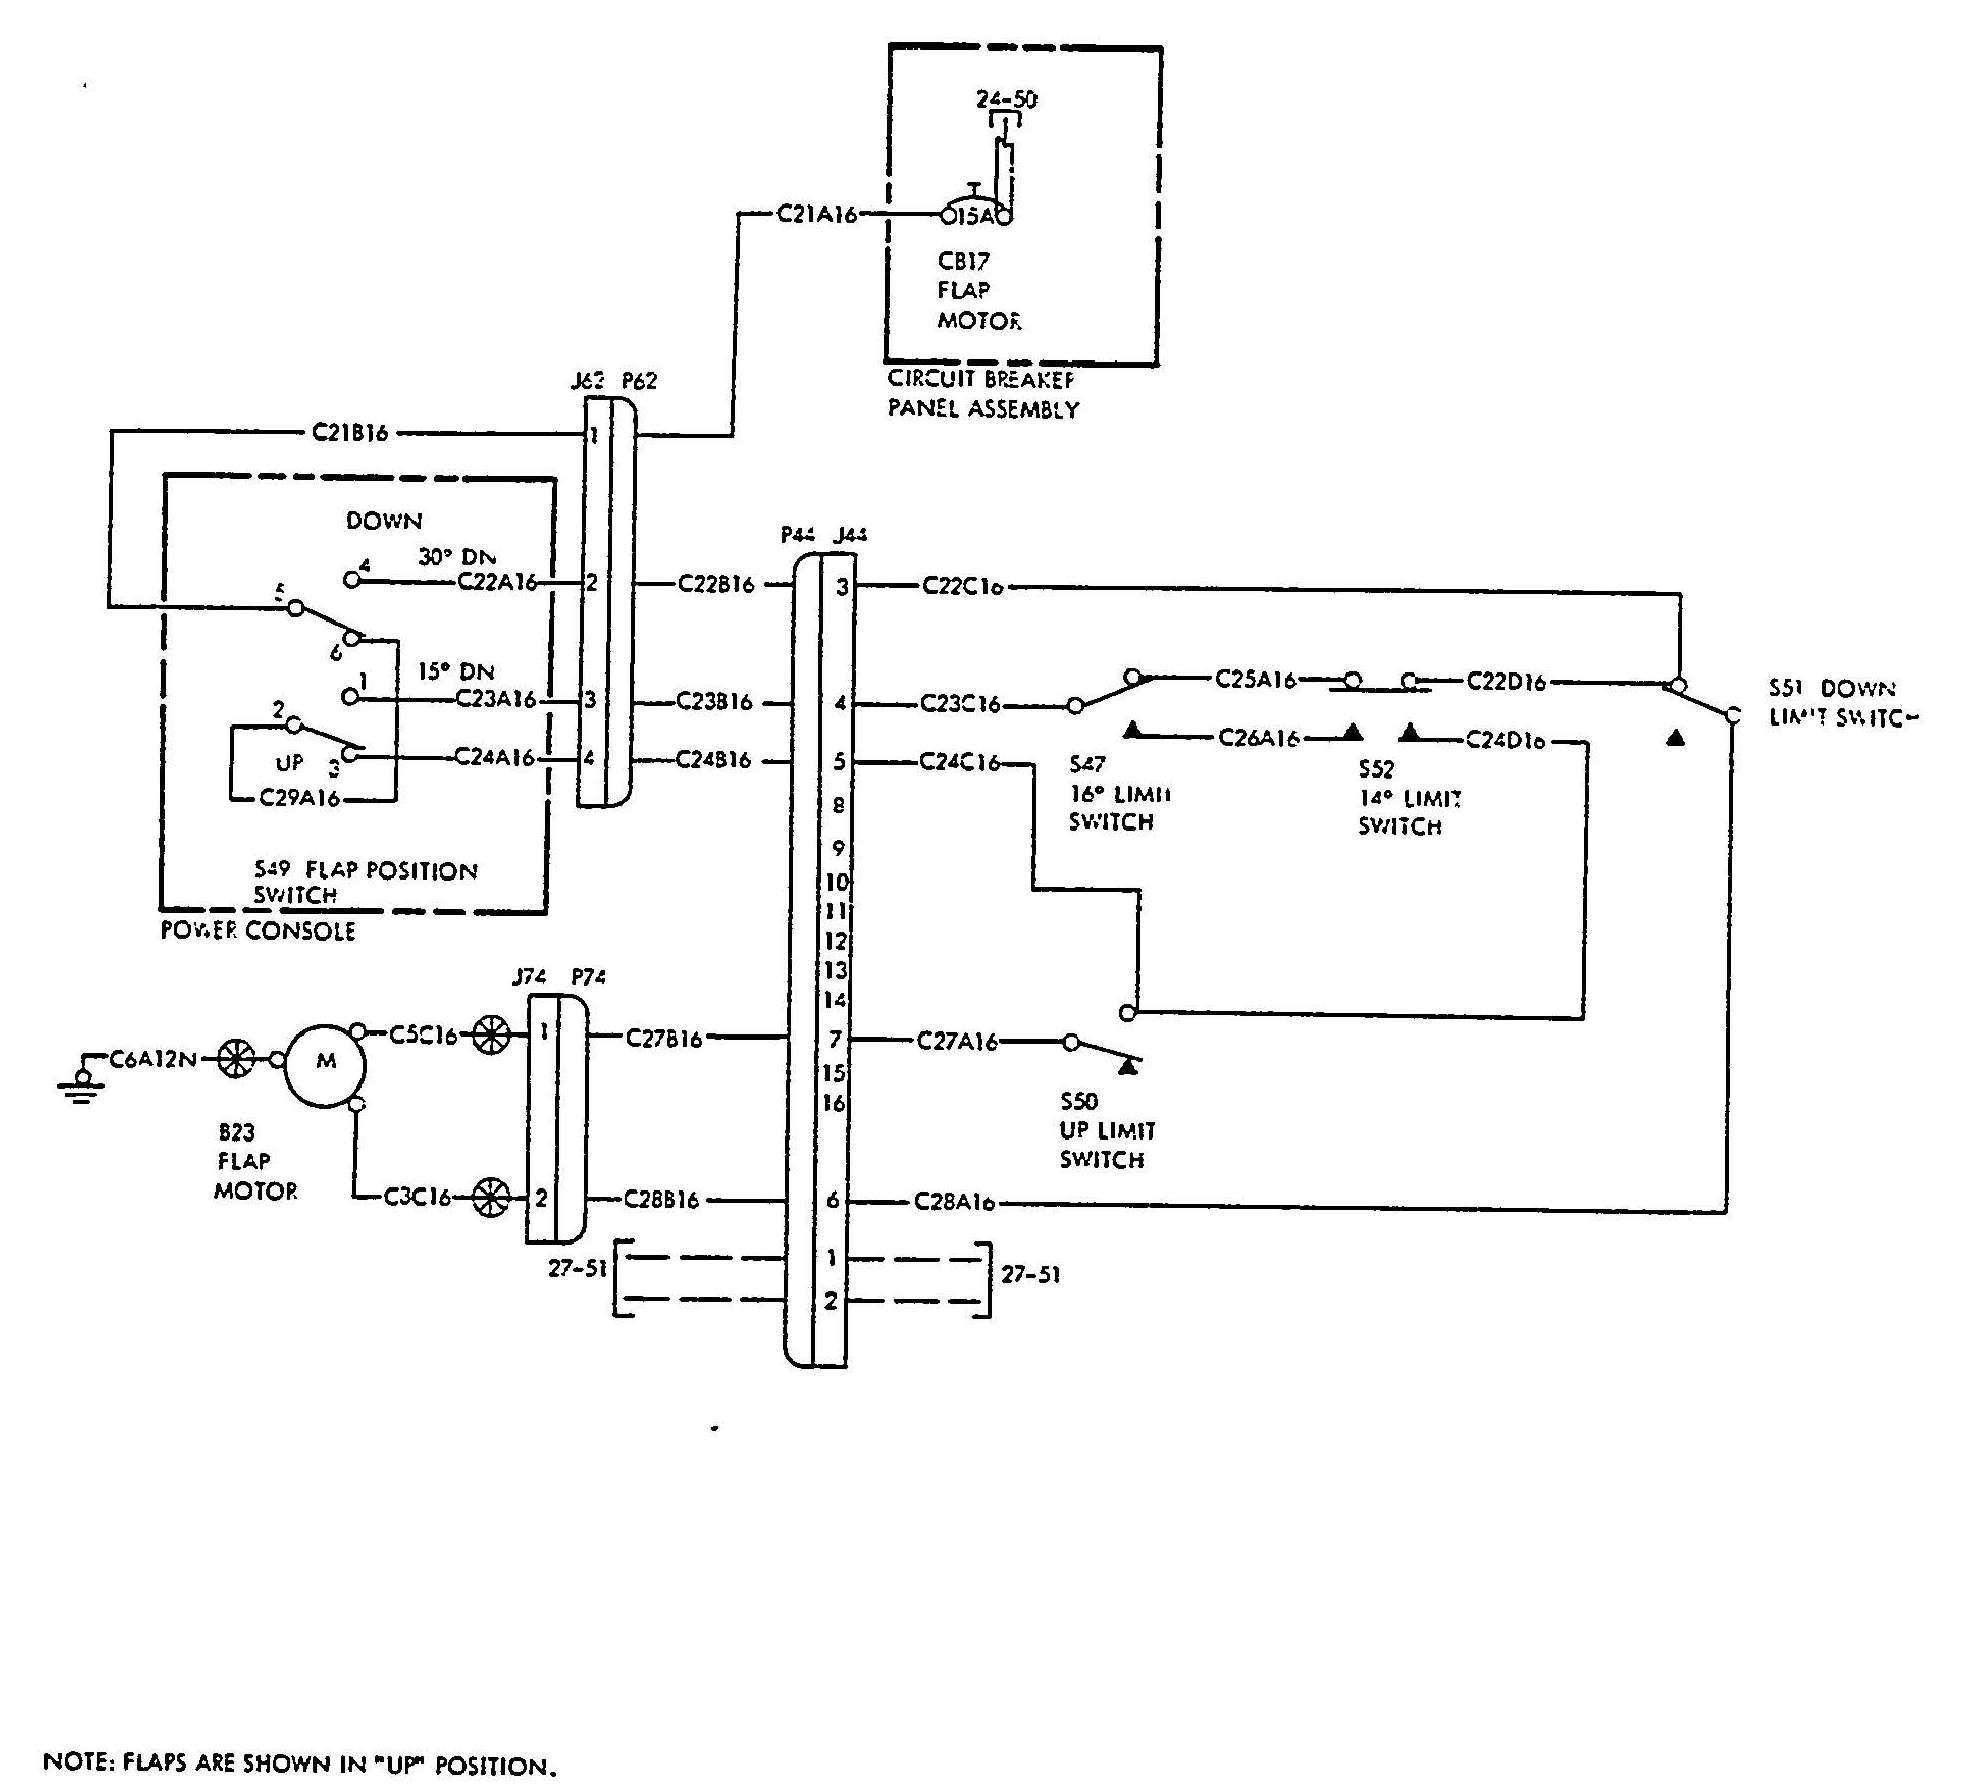
Baron Flap Motor Circuit Parts Diagram pdf Extract
(Bonanza MAY be similar)
HERE
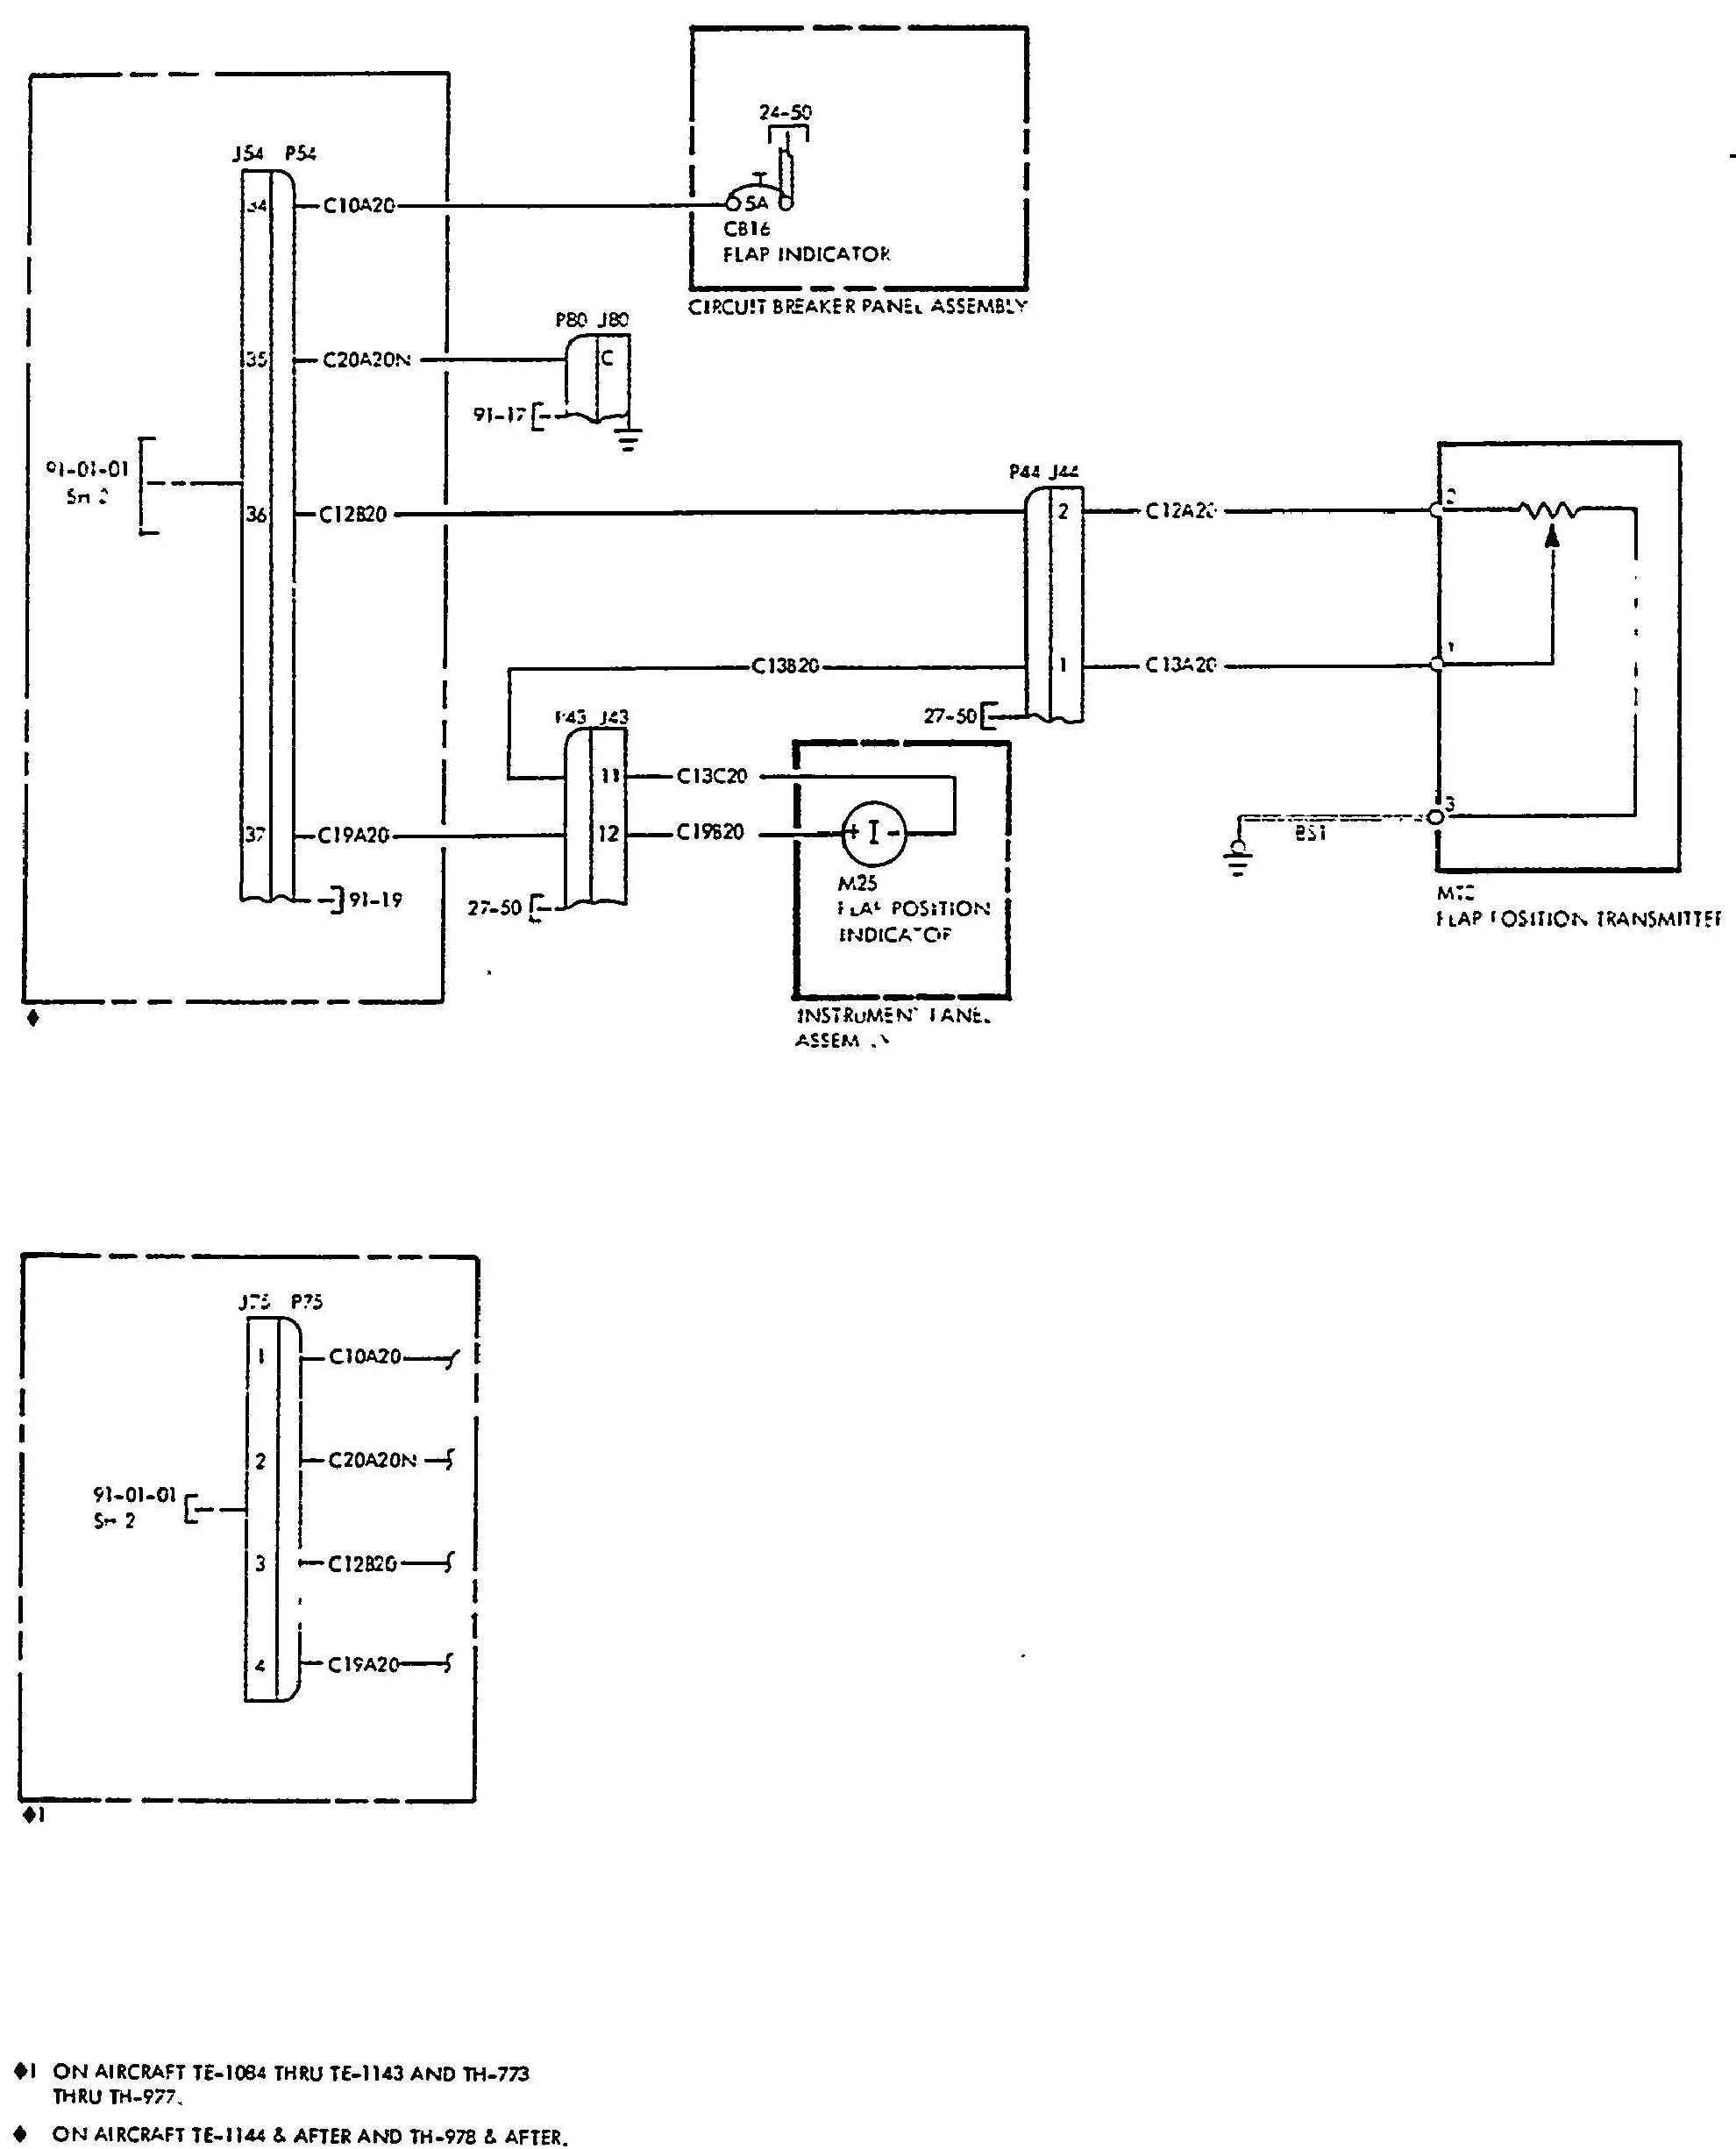
Baron Flap Indicator Circuit Parts Diagram
pdf Extract (Bonanza MAY be similar)
HERE
Flap Indicator Sensor mounted in the left
wing. Very much like the wire wound resistance type fuel level sensors.
Click
HERE for flap degree
decal info.
|