|

If you're simply unwilling or unable to spring
for the incredible powered Sidewinder towbar from
Redline Aviation,
worry no more. If you're willing to spend some sweat equity quality fabrication
time in your garage or hangar, you can achieve some pretty impressive results.
Here we will highlight some CSOB Member contributions
to the quest of a low cost powered towbar. If you have a CSOB-worthy powered
towbar design,
 it to me and I'll get it archived here for all
your fellow CSOBers.
it to me and I'll get it archived here for all
your fellow CSOBers.
Here is David F.'s contribution to CSOB-ness!
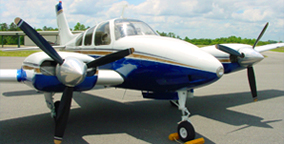
So far, I have used it a handful of times and it has worked well to turn the
airplane around, push it up a slightly inclined ramp and into the hangar, then
pull it back out for the next flight. The advantages of this design is that it
can use any 12v power source you might have handy - for instance, located in the
nose baggage compartment.
It weighs around 18 lbs everything included, and folds
up easily, so you can take it with you. There is plenty of grip and little or no
slippage on the nose wheel with just moderate pressure on the tow bar (at least
when dry).
Here are the ingredients:
a) 12v Winch: $60 on sale
https://www.harborfreight.com/2500-lb-el ... 61297.html
b) Two 5" solid rubber wheels: $7 each
https://www.harborfreight.com/5-in-solid ... 69852.html
c) Manual Tow Bar. Pretty much any tow bar can be used or adapted. I happened
to have one of these lying around, so used it: $59
https://www.aircraftspruce.com/catalog/ ... bars18.php
d) 8" of 1 ½" x 1/8" Aluminum U-channel for winch mount (makes two 4"
pieces): $4.36
https://www.onlinemetals.com/merchant.cf ... top_cat=60
e) 9" of 1 ½" x 1/8" Steel angle (makes two 2 ½" pieces and one 4" piece):
$9.47
https://www.homedepot.com/p/Crown-Bolt-1 ... /202183526
f) 1’ of ¾" x 1/8" aluminum bar stock to make spacers (alternatively, you
could just stack some washers): $5.72
https://www.homedepot.com/p/Unbranded-3- ... /204273967
g) Some suitable spray paint
h) 4 bolts 3/16" x 1 7/8": $1.48
https://www.aircraftspruce.com/catalog/hapages/an3.php
i) Optional: butt splices and misc. wire for 10 gauge
j) 2 M8 bolts
Here is what I did with the ingredients:
1) Remove the cable from the winch
2) Remove the spindle from the winch
3) Using a hole saw, drill out the wheels (b) to match the diameter of the
winch spindle
4) Cut the wheels (b) in half
5) Put the wheel halves back together around the spindle and drill four holes
(two per wheel half) through the wheels and the flange of the spindle. Insert a
bolt and locknut through each hole. This results in two wheels locked into
position around the spindle, held in place with the four bolts.
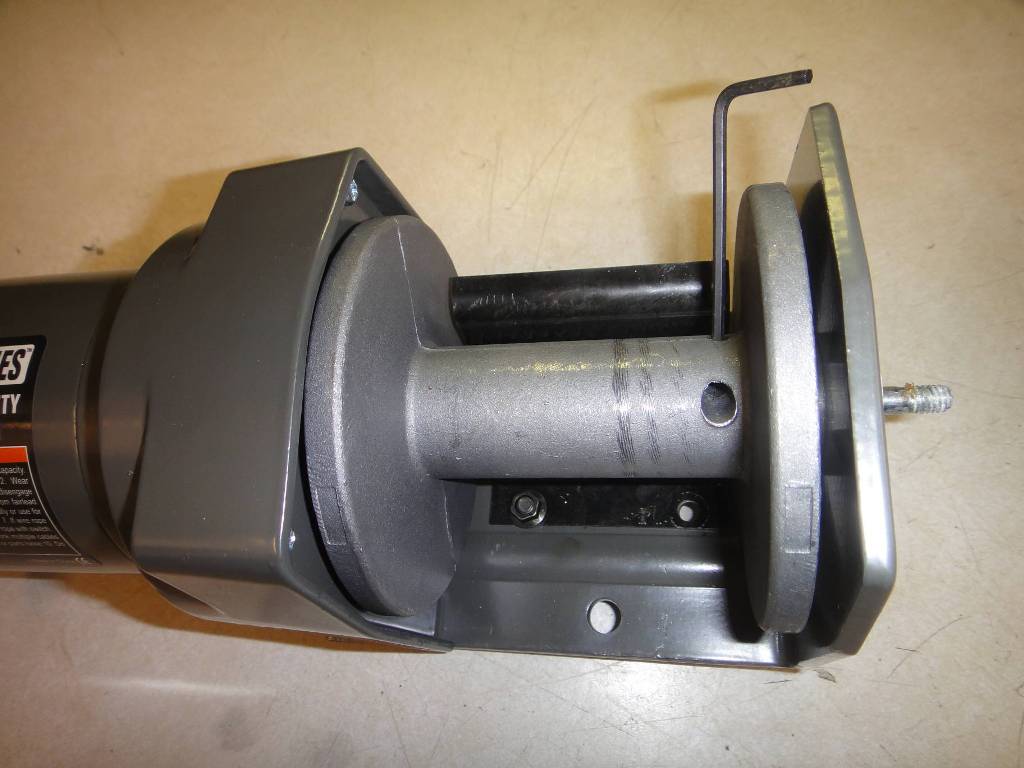
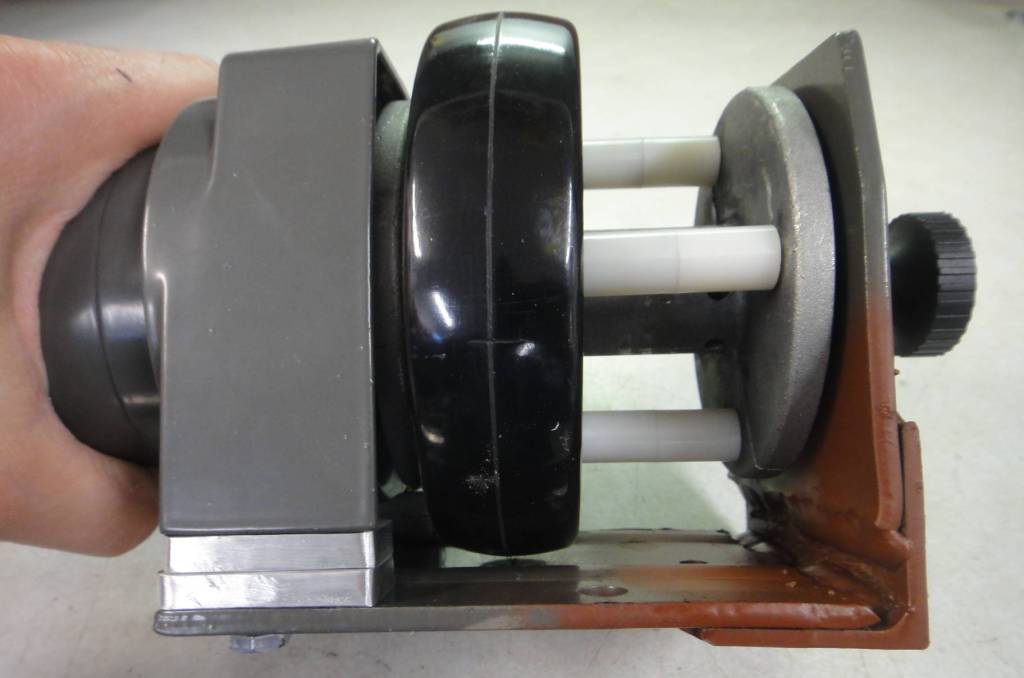
6) Place the wheel/spindle assembly back onto the winch and notice the wheels
stand proud of the winch body. This means the original steel bracket on the
winch will not fit. Use the aluminum bar stock (f) to make shims so the bracket
will sit above the wheels. Adding these shims means that the original bolts will
no longer be long enough, so you will need to replace them with two longer
bolts. IIRC, they were metric 8mm, but I don't recall the length. Notice that
the "axle hole" of the bracket now no longer lines up with the axle of the
wheel/spindle assembly. To make it line up, cut the original steel winch bracket
and splice in 4" of the steel angle (e). I used a mig welder to do this.
7) Paint the welded and spliced bits and reassemble the winch.
8) As supplied, the winch has short wires from the control unit to the winch
and long wires from the battery to the control unit. This is so that the control
unit can sit close to the winch. I wanted to have the control unit sit out of
the way in the nose baggage compartment, so this required cutting and
reconnecting wires so that there are short wires from the battery to the control
unit and long wires from the control unit to the winch.
9) Cut the aluminum U-channel (d) into two 4" lengths and bolt them to the
winch bracket.
10) Cut the steel angle (e) into two 2.5" lengths (short enough to fit
between the bolts on the aluminum U-channel) and weld them to the tow bar.
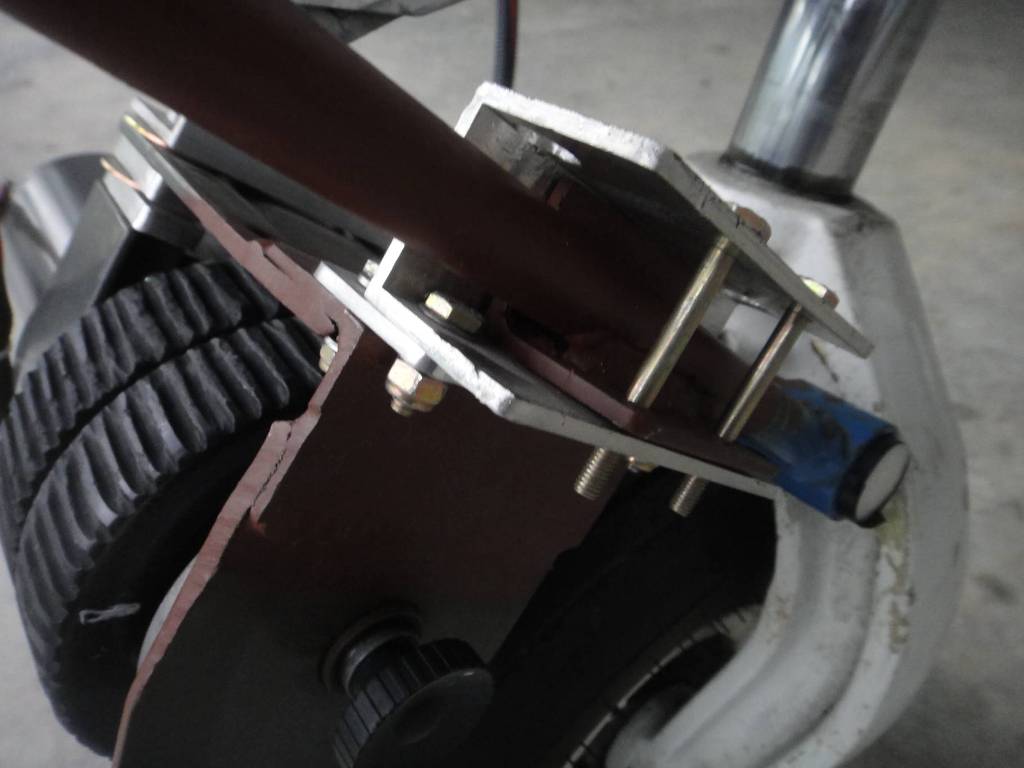
11) Place the tow bar with the steel angles into the U-channel and Drill
3/16" holes through the aluminum U-channel (d) and the steel angle (e). Use the
bolts (h) as pins to lock everything together. You may want to drill the holes
slightly larger than 3/16" so that the bolts will easily drop in and out. The
purpose of these bolts is to act as pins to help hold everything together when
connected to the airplane (no nuts on these bolts - they just drop in and out).
12) Paint the welded bits on the tow bar.
13) In my case, because the tow bar was designed originally for a different
airplane, I used some uhmw rod like this stuff
https://www.usplastic.com/catalog/item.a ... rchresults
to fit inside the tow bar ends, and then drilled the rod to match the tow pin on
the airplane. If I had started with a manual tow bar for a Baron to begin with,
I wouldn't have had to do this.
14) Using an angle grinder, cut a tread pattern in the rubber wheels. This
will make it grip much better against the aircraft nose wheel than it will when
it is smooth. Note: Do this part outside and wear a dust mask. You’ll get rubber
dust everywhere.
Tools Required:
- Hand tools
- Drill and suitable bits
- Hole Saw for drill (to cut the axle holes)
- Angle Grinder with cutoff blades (cutting metal and the tread pattern)
- Wiring/crimping tools to modify the length of the wires.
- Dust Mask
- Welder (or a friend who has one)
Other Notes:
i) The winch requires a 12v source of power. One convenient way to do this is
to set a small motorcycle battery in the nose baggage area of the plane. An
enterprising person might notice that there is already a 12v source of power in
the nose of a Baron. Your mechanic may or may not have an opinion on this.
ii) If you don't want to set the battery and winch control box in the nose
baggage area, you could either have an assistant hold it, or set it on the floor
with long cables, or build a bracket on the tow bar to hold the battery. This
latter idea might be doable, especially if you used a small, light weight LiFePo
battery, but they are a tad expensive, which might defeat the whole idea of
building a cheap powered tow bar.
iii) The manual tow bar can be used with or without the winch (just pull the
pins). This means that if you already have a manual tow bar lying around, you
can adapt it to the winch and still use it as a manual tow bar if you prefer.
iv) Depending on the tow bar used, it may be necessary to add an aluminum
spacer plate to move the channels further apart. This may be needed so that when
the tow bar arms are fully closed, they are tight against the aircraft's tow
pin.
Start with the winch
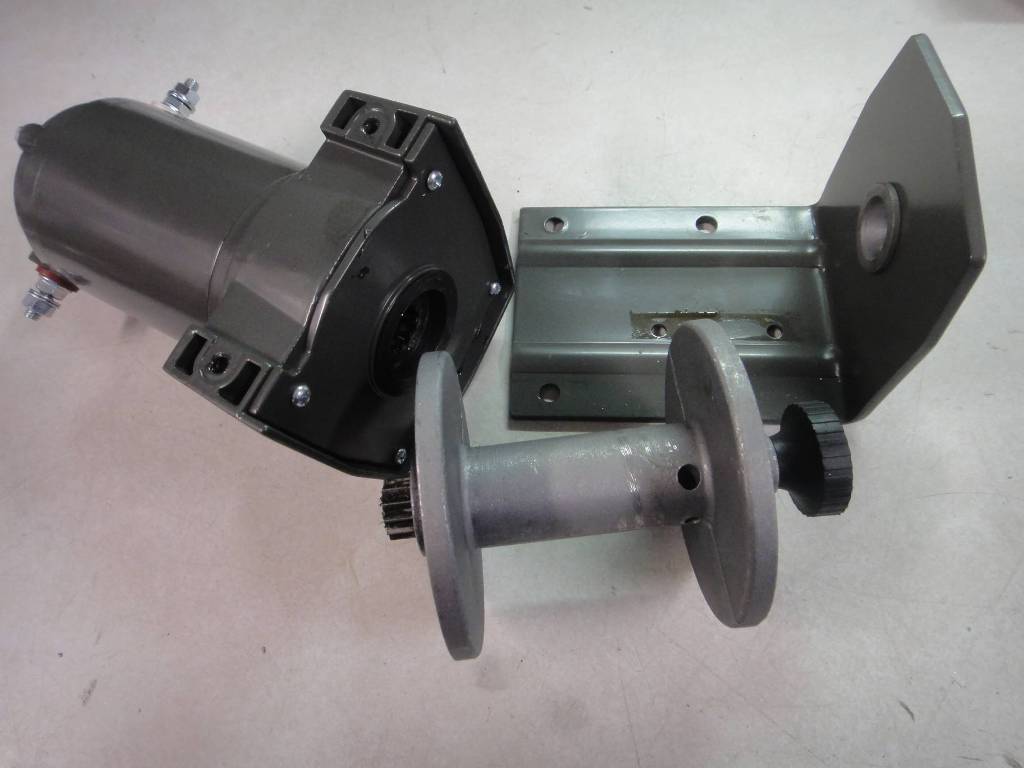
Disassemble the winch
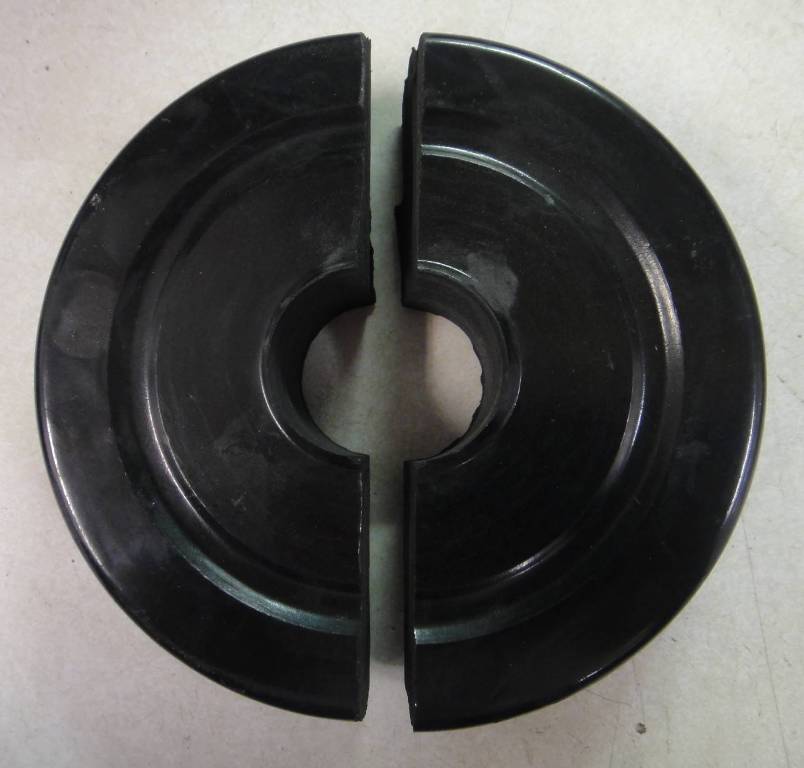
Cut the wheels in half
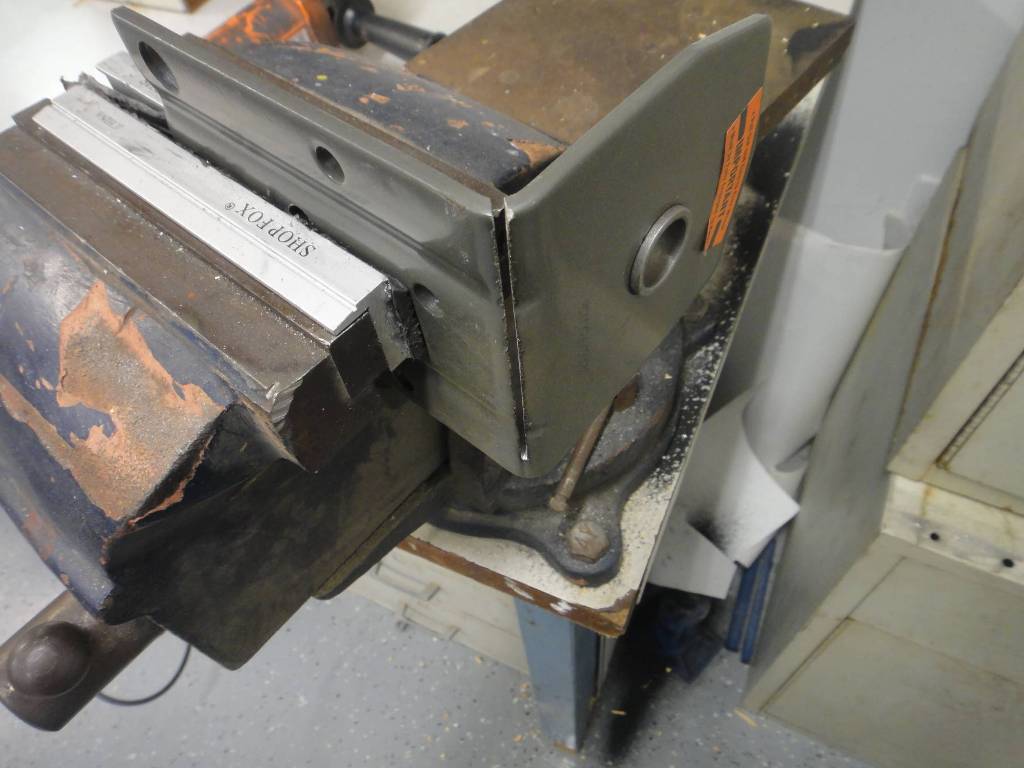
Custom sizing the winch frame (Step 6)
Frame completion
Winch and frame mounted to towbar
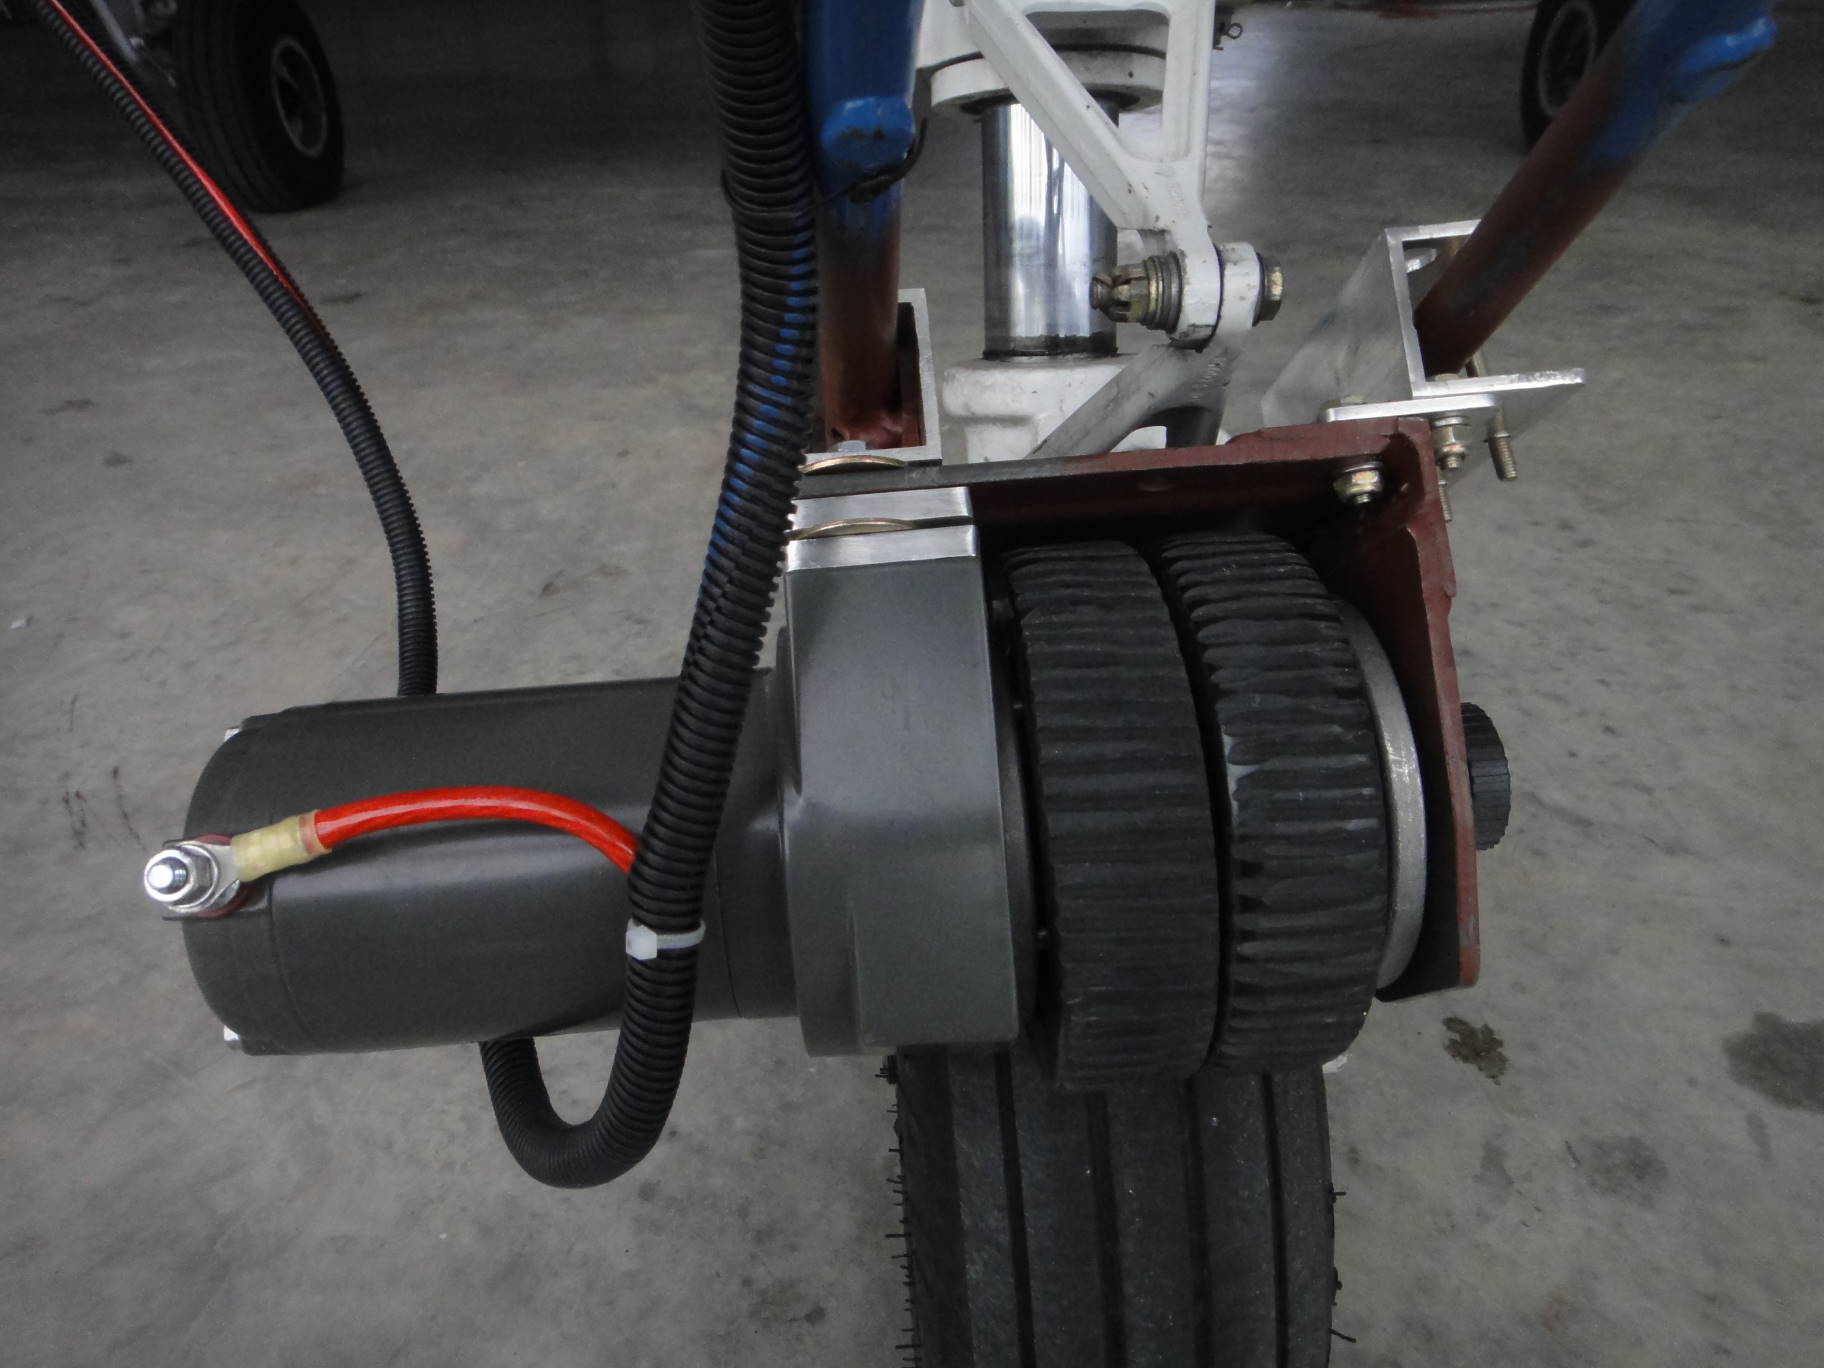
Mounted on nose wheel
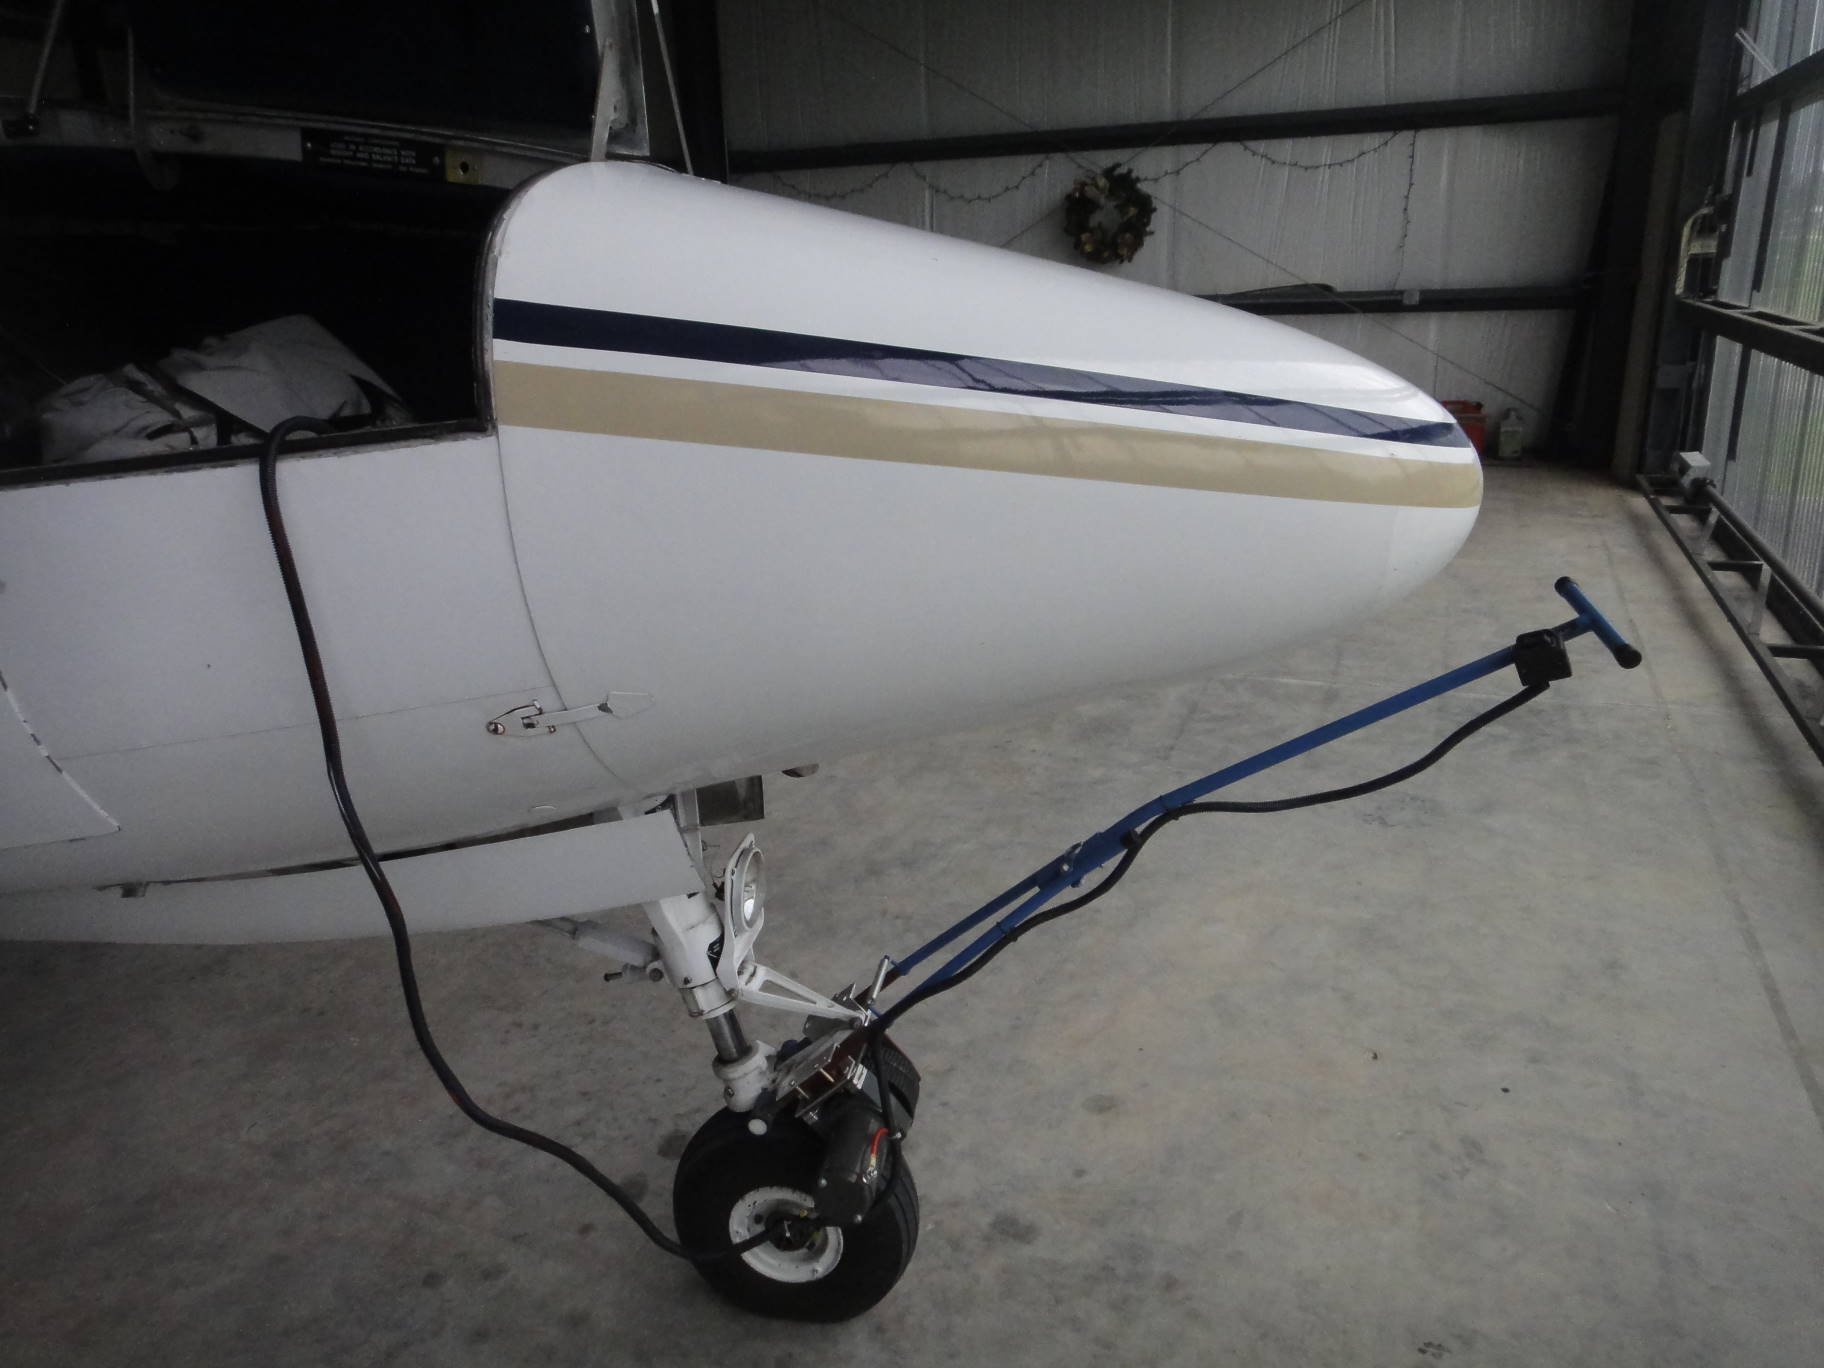
As mounted on Baron airframe - ready to go!
Outstanding demonstration of what CSOB-ness is
all about! Innovation and hands-on work creating value.
Great job Dave!

HERE is a pirep document narrative by Debonair Owner, Adam Y., outlining his take on how he went about the CSOB towbar build.
Great job Adam!
|