|
Rebuilding Your Brake
Master Cylinders
By: Arky Foulk
THE SYMPTOMS OF
LEAKING BRAKE MASTER CYLINDERS ON BONANZAS
AND
BARONS ARE:
1. Parking brake
will not hold.
2. Brake fluid on
belly of the airplane or puddles fluid under floorboards.
3. Fluid puddles
on top of Master Cylinders.
I have been able
to rebuild almost all master cylinders without removing the master
cylinder from the
airplane using the following procedure:
-
Open the
engine cowling and find the brake fluid tank on the fire wall. Follow the
brake line down to the top of the nose wheel tunnel. If the parking brake
valve is mounted on the wheel tunnel, proceed as follows.
-
If
the airplane has the late-style parking brake valve mounted beneath the
floorboards, it will be necessary to drain the brake fluid tank. Unsnap and
remove the front carpet and carpet pad. (Do not remove the
floorboards. Use
a rag or shop towel and pack around the rudder pedal to prevent dropping
tools or parts under the floorboards. This also will catch any excess brake
fluid.
-
Behind the
rudder pedal, remove the bolt, nut and washer where the brake
master
cylinder clevis is secured to the rudder pedal.
Wipe off top of master cylinder. Using snap ring pliers, remove the snap
ring from
the top of the master cylinder.
Click HERE to
read about a modern synthetic, flame resistant alternative to
5606 hydraulic fluid that is used by the military, MIL-H-83282.
Click
HERE to
view the Cleveland Master Cylinder parts catalog to identify
o-rings and other components in the Master Cylinders.
Click
HERE
for the Parts Catalog extract for the Beech PN: 169-380100-3 Master Cylinder
___________________________________________________________________
Below is an IPC Extract for the VV15-625 Master Cylinder
Click
HERE
for a narrative on Rebuilding the VV15-625 Master Cylinder
Need Master Cylinder Repair Kits?
Check Out

Supporting Site Member
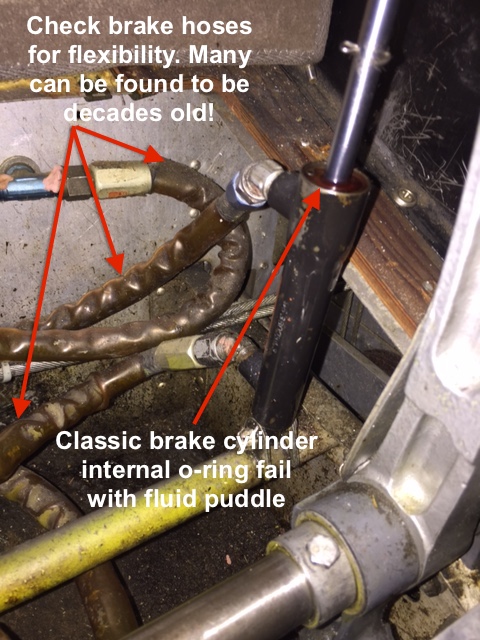
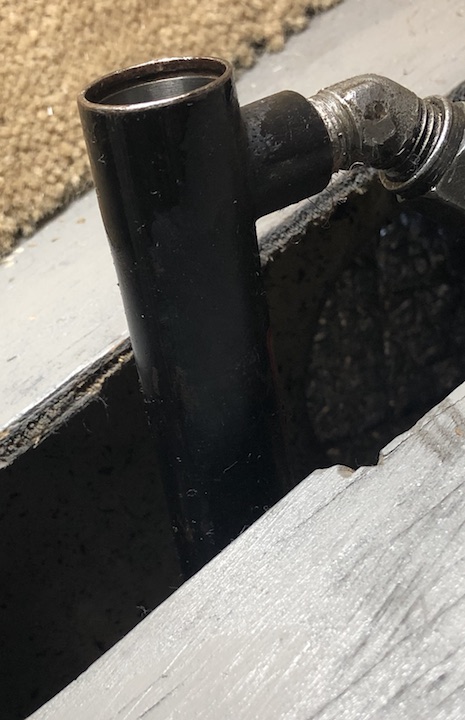
Goodyear Master Cylinder Fail and Deconstruction
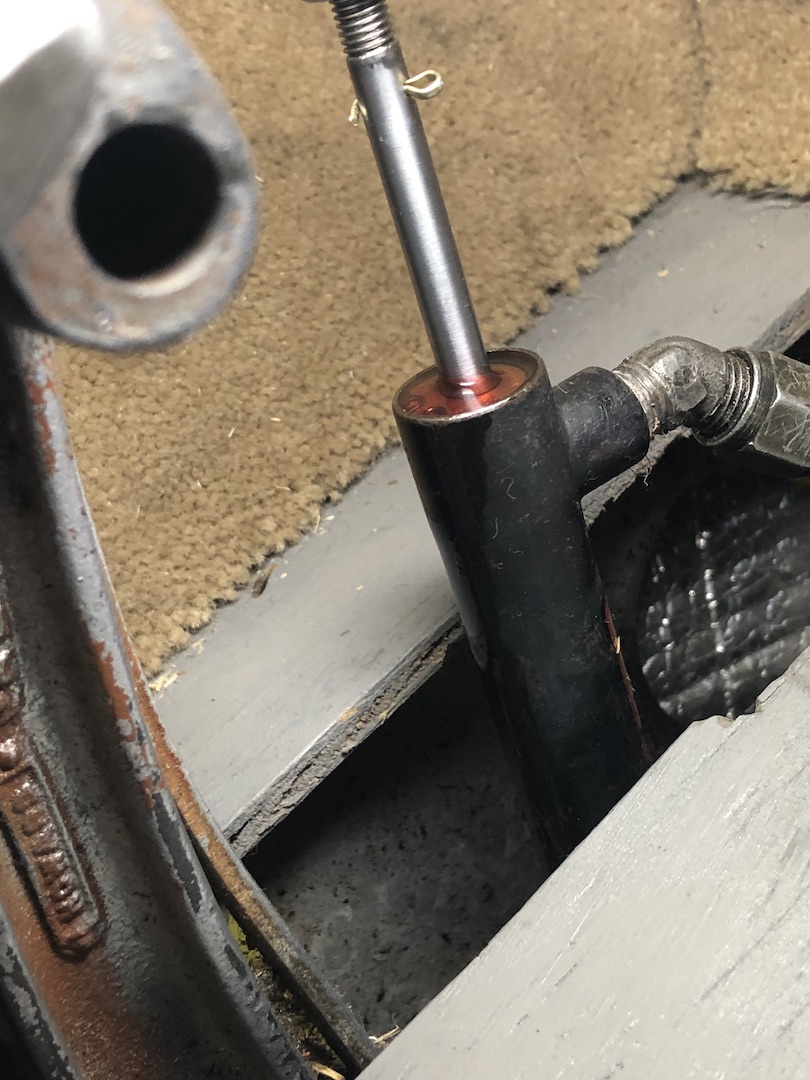
After snap ring removal, the whole
plunger/shaft body is extracted. Replace 2 O-rings, fill with 5606 or
THIS flame resistant alternative, reverse
bleed from caliper then test with A&P.

Mysterious Brake
Pressure Failure After Multiple Bleeding
Below is a pirep from F33A Bonanza owner, Greg
S., regarding a continuous mysterious brake pressure fail that would not resolve
after numerous brake bleedings.
"I chased this problem for 11 years in my 1992 F33A with my left brake, and
occasionally the right brake. The problem kept getting worse over time. Numerous
well known mechanics chased this problem all those years and never found the
problem, just kept bleeding the brakes. It got so bad at the end that
re-bleeding the brakes was futile. Could get the brakes to firm up for maybe one
flight.
Actually replaced all 4 master cylinders, that didn't solve the problem.
3 years ago based on the advice of Bob B, I ordered all 12 brake line hoses
from PHT.
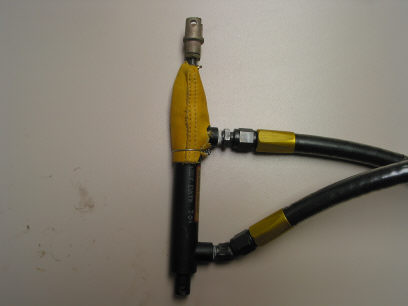
Upon replacing the hoses one at a time, we found the left brake problem main
culprit was the upper hose going to the pilots side left brake master cylinder.
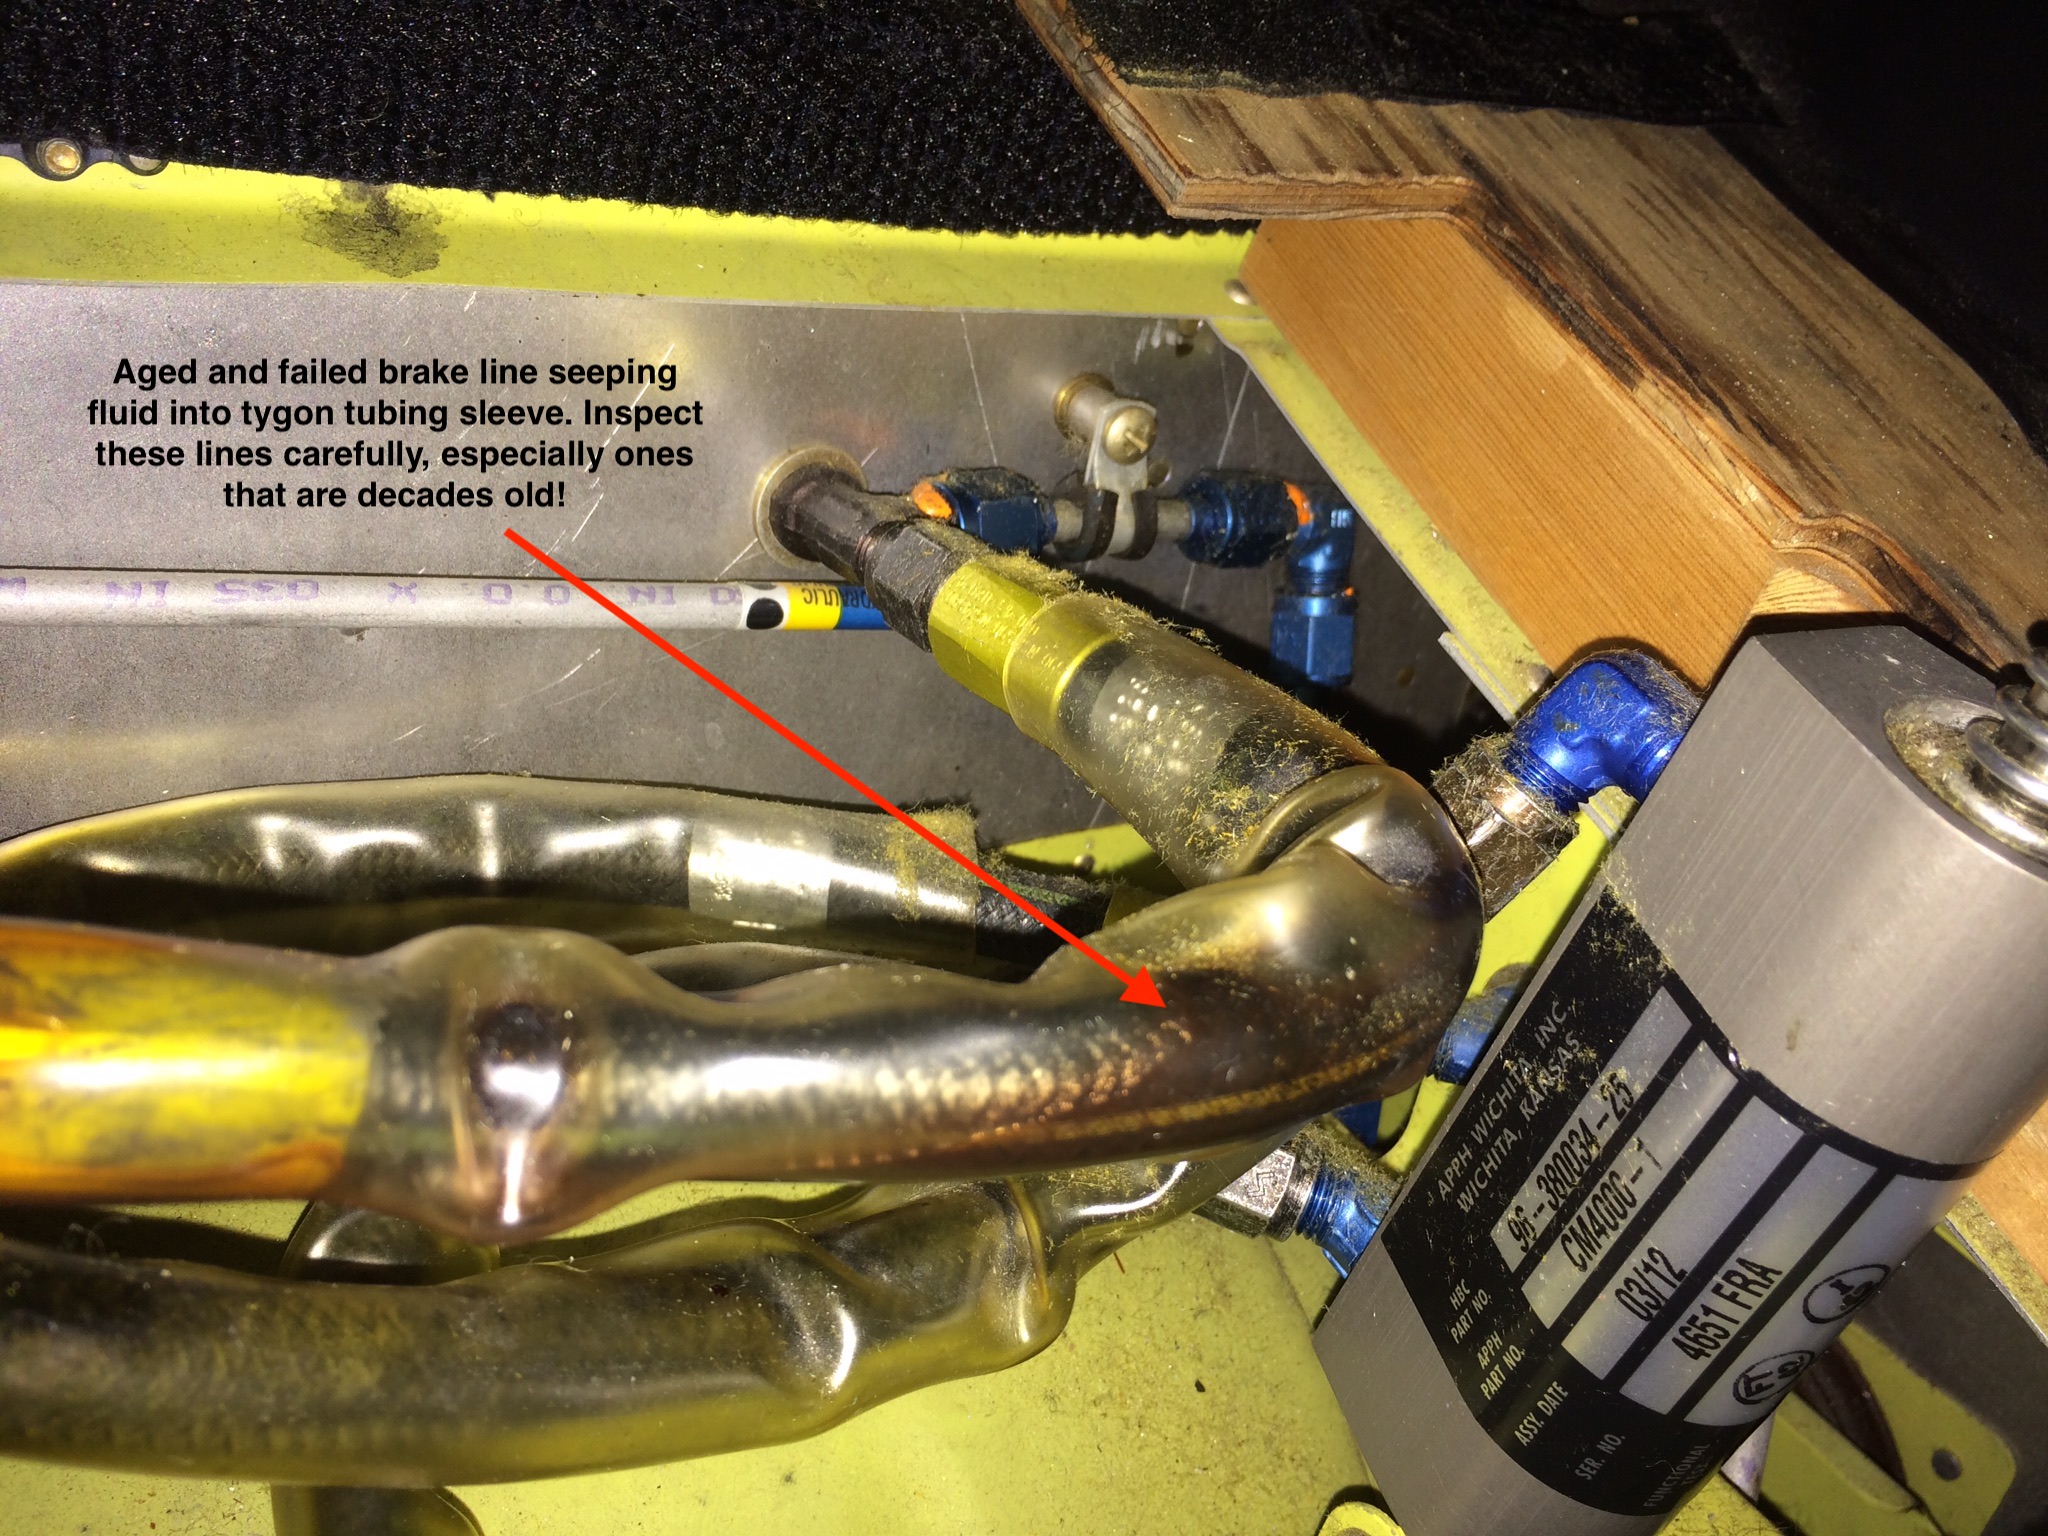
It was completely saturated with brake fluid on the exterior. The reason we
hadn't suspected any of the brake lines was that the clear tygon tubing sleeve
that the brake line is in was catching the fluid, then apparently evaporating,
so it never dripped onto the belly. It was real visually apparent after we
actually removed it from the plane.
While we had all the brake fluid drained to replace the hoses, thought we
might just as well rebuild the parking brake valve. Sure enough, the exterior of
the parking brake valve was all sticky from brake fluid residue. Those o-rings
are stone simple to replace.
So, 12 new brake lines and 7(?) new o-rings later, 3 years of totally trouble
free brakes!!!"
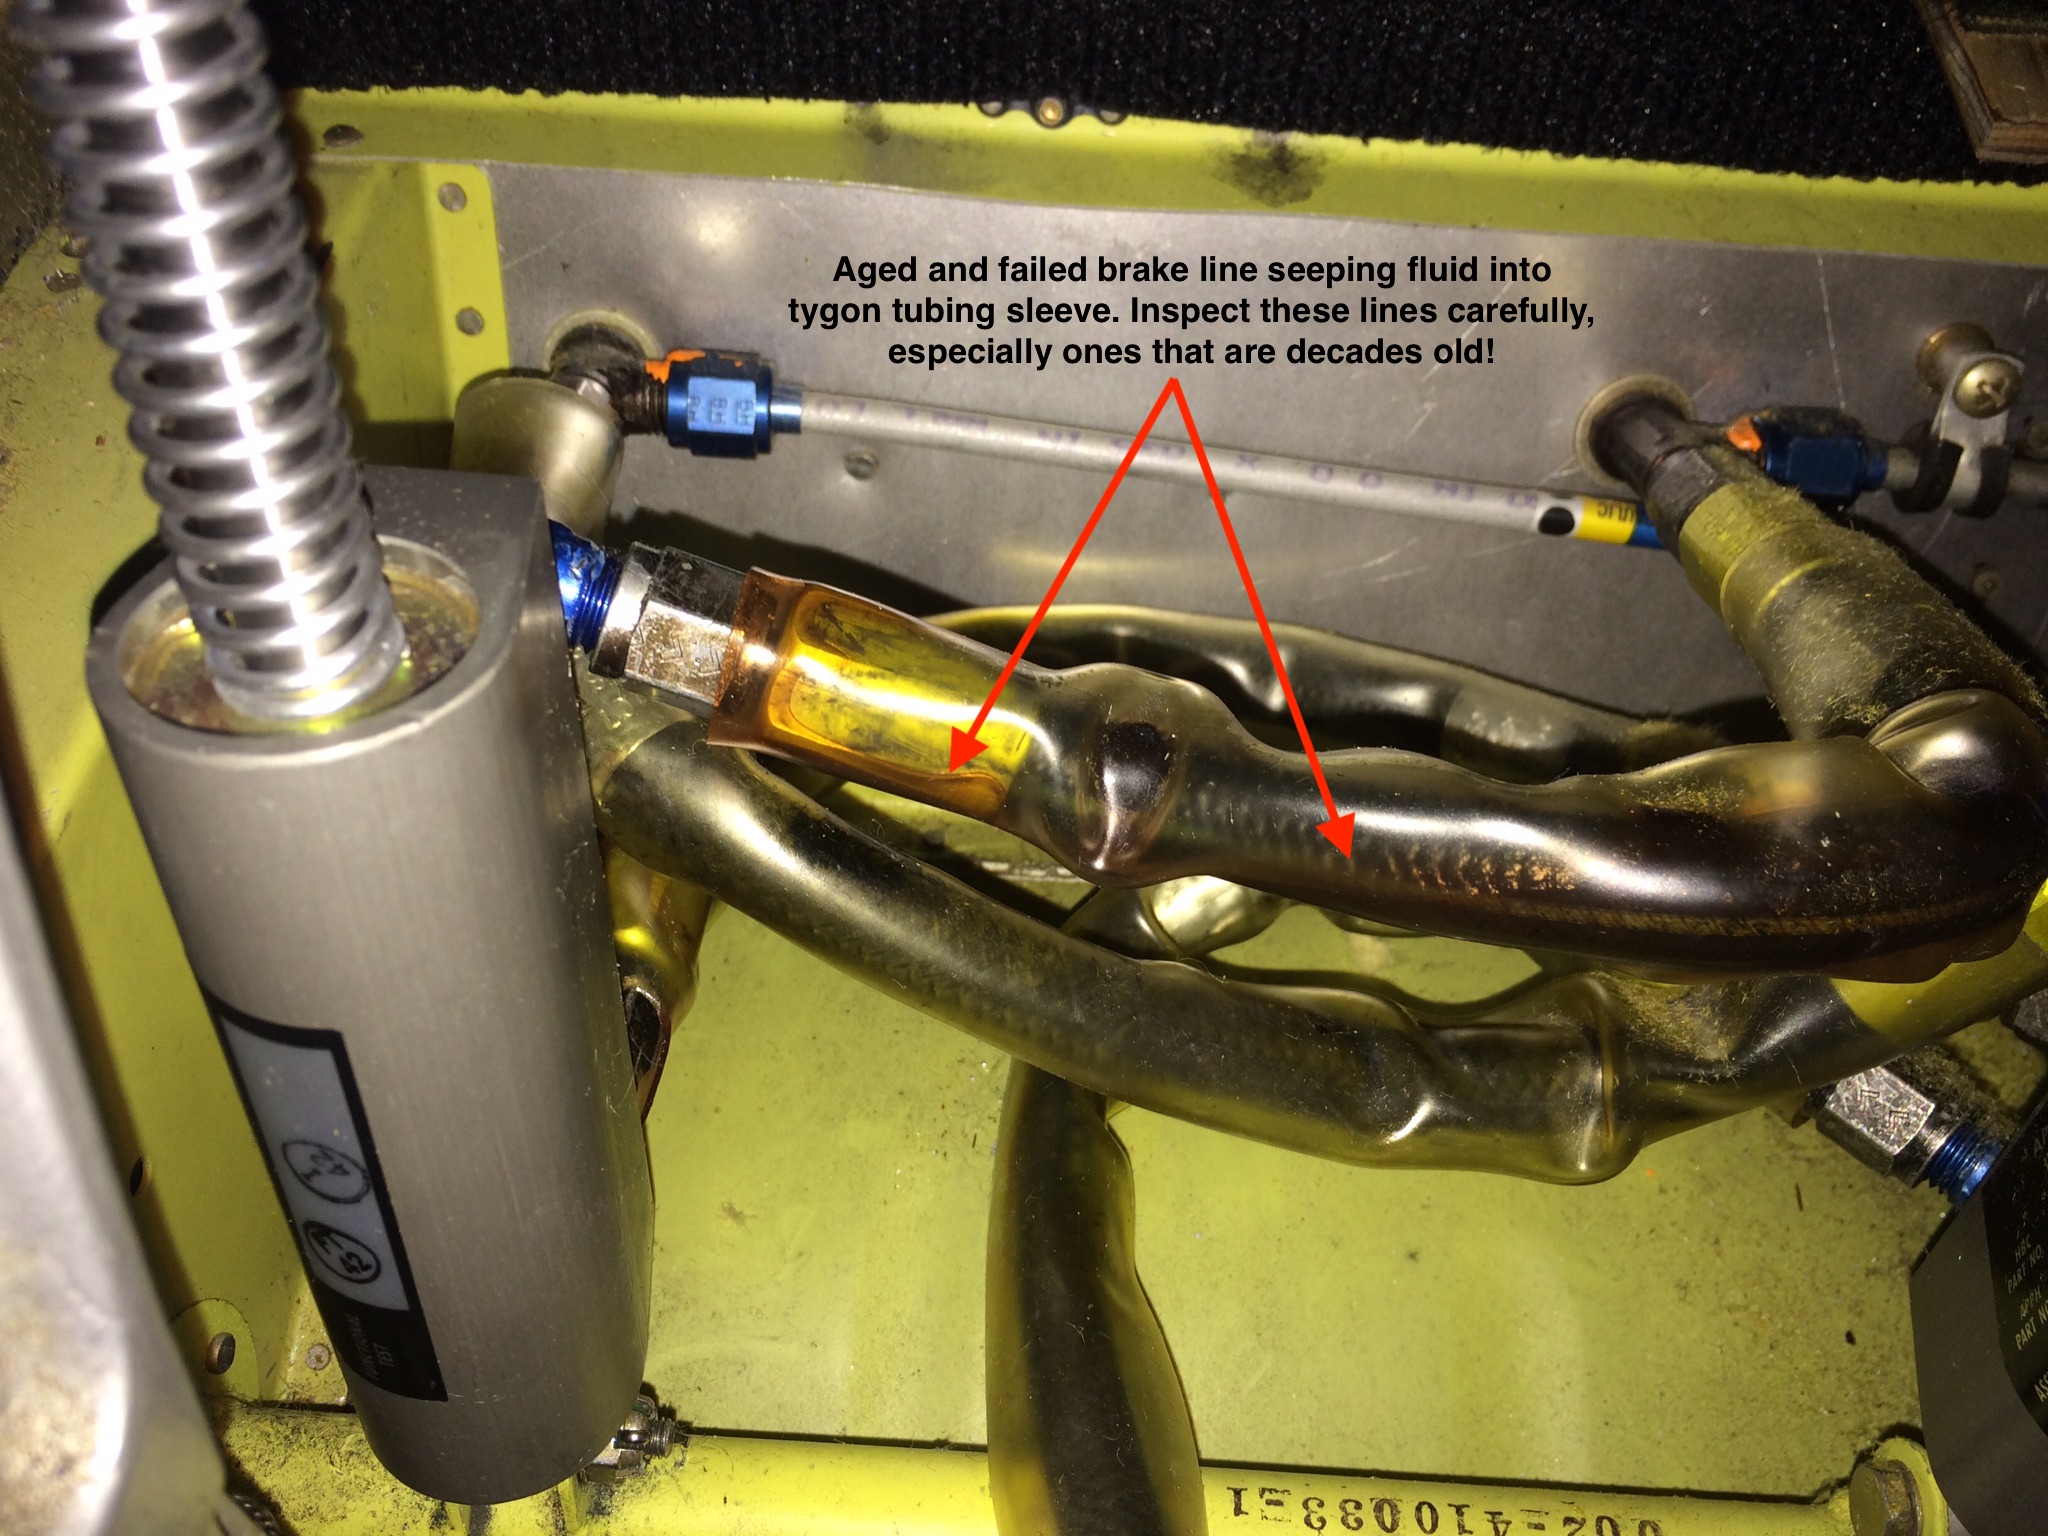
In the '50s they started with the tygon. Not much
chafing, but a reasonable idea. On the later ones the plumbing was changed
rather dramatically when the dual brake option went to series rather than
parallel; on those, the tygon is a must.
See the complete thread discussion
HERE at BeechTalk.com
HERE is a part diagram of the Paramount PN: 96-380034-1 Master Cylinder showing the shaft O-ring (#12) as a -008.
Below is a pirep from Leo regarding his Gerdes
Master Cylinder replacement experience:
"I just replaced the right side Gerdes on my Citabria. Could not find
mechanical parts. Decided to R&R left side as well. It turned out to be a
Cleveland 10-54. It was working fine when removed. PM me and I can supply more
info and be willing to sell the removed cylinder. Also have the pieces from the
Gerdes if that will help. Rod is not in good shape with pitts etc. I suspect
that is why it failed, finally ate the O ring.
The Gerdes just started leaking. It was dated 1973, IIRC the Cleveland is
2006 vintage.
Bought new cylinders from American Champion, which are manufactured by Grove."
HERE is an
OUTSTANDING narrative from Debonair owner, Fernando E. on his master
cylinder o-ring replacements to knock out his leaks! Don't stop there, check out
the rest of the page for more insight into this area of your Beechcraft.
An
experienced Beech Lister, John F., who also happens to be an A&P, offers
the following additional thoughts:
"......recommends
not replacing that molded "O" ring at the bottom.
The valve piston as Arky calls it.
I can't recall one ever going bad. If you must, you can
also carefully unfold the brass around the
"o" ring, and replace just the "O" ring, and
fold the brass back, and not replace the whole mechanism.
I have had good
luck just using regular "O" rings from the local Nat'l
Air Parts Association Store (aka NAPA....LOL)."
Here are some thoughts from Beech Lister and A33 owner John
P., who had a pretty surprising experience with the "valve piston":
I did have one of these valves go bad about a year ago! The
O-ring had popped out of the crimp when I set the parking brake during an engine
run-up prior to take off. The result was it trapped all the pressure in the line
and locked the brake up. Had to shut down, open the bleed valve at the brake to
relieve the pressure to taxi back to the hanger.
When I got a rebuild kit from Johnston's Aircraft in Tulare,
CA ($68ea, don't have the part number here at work) it came with a different
style valve. There was "NO" O-ring...just a flat piece of gasket material glued
to the valve. Sorry I didn't get a picture of it!! Anyway, to me it seems like a
much better design that would prevent a failure like I experienced.
During my T-34 days with the Navy part of our landing checks
were "Brakes Pumped Firm". If this o-ring fails airborne from pumping the brakes
like this, or even after take-off to stop the mains prior to retracting the
gear, one would sure be in for a surprise at touchdown!!!
Beech Lister, Stan S. offers
the following comments from his experience:
"We are in the process
of re doing three master cylinders. Thought we could do them in place but
can't push the piston rod assembly down far enough to install the snap rings
in place because there is not enough room to do it in place, so we removed the
master cylinders. Avstat has overhaul kits for various master cylinders that
cost us about $56 each, and consist of 100% RAPID documented parts, even the
o-rings. The kit includes the o-rings as well as a wipe and another part that
I can't remember the nomenclature.
Avstat's kits did not
include new snap rings. Also recommend you get covers for the brake line
coming down from the reservoir, the upper line going into the master cylinder,
so the fluid doesn't all leak out while the master cylinder is removed. If you
use new snap rings be certain to use genuine Truarc,
we got new snap rings (not Truarc) that are plated and .37 thousands in
thickness and the Truarc are .32 thousands. Truarc snap rings are steel, and
not plated. After we finished up and started bleeding, a snap ring came off.
Now we have to remove the three master cylinders and install the thinner
Truarc snap rings. If you don't hear the snap rings snap into the grove nicely
when installing it, the snap ring you are using may be too thick and can come
off. This would not be a good thing when operating your airplane.
I recommend replacing
everything in the master cylinder, which you get with Avstat's kit. Why go to
the trouble of opening it up and not doing 100% of it?"
Avstat
Aviation
7625 Hayvenhurst Avenue Suite 18
Van Nuys, CA 91406
Phone: (818)780-6032
Here
is a creative CSOB master cylinder plunger cover solution
contributed by Beech Lister, Kevin O., host of the B2OSH
Margarita & Pizza Party and Debonair owner and Beech parts
maven extraordinaire. Thanks Kevin!
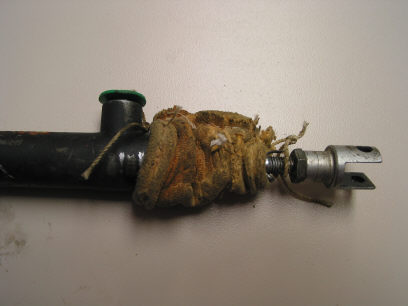 Nasty
40+ Year Old Cover
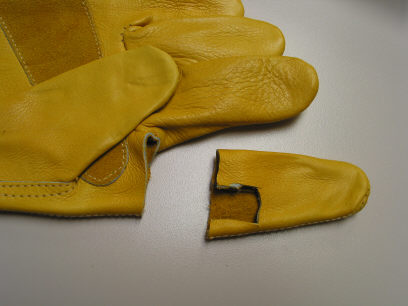 Pretty
Slick Huh?
 Presto!
A nice new cover for your master cylinder!
Kevin
also reminds us that if you have a Bonanza with a VV-15-625
master cylinder, you're SOL, because it's no longer made or
supplied by Beechcraft. BUT, you can buy the VV-15-625-1 and
shorten the shaft and presto you are in business again.
Reportedly, the master cylinder with the longer shaft was only
$133.00 several years ago!
Here's
the secret scoop:
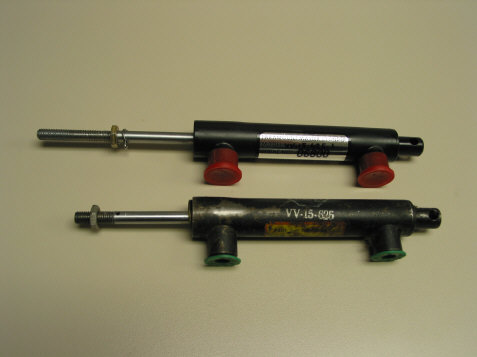

the top one is a VV-15-625-1
which is available from beech for $133.00. They started using it on the P
model and after----until the very latest airplanes (went to the Cleveland
Master cylinder).
the one at the bottom of the
picture is a VV-15-625 it was used on the
straight 35 till the N model (maybe M model)
the VV-15 -625 is no
longer available----but a Cleveland retrofit is available for around 8 or 9
hundred! (CSOB1 says: NO %$*$^$* WAY!!!)
NOW--the CSOB way to do this is
to cut off about a inch--so its the same length--thread it to the same
distance as the old one---and its a perfect match !!!---barrel and hook ups
are the same --shaft is not hardened so it threads easy.
Special
Note: If you use this master cylinder info find, you must come to OSH and
personally thank Kevin O. for this info. You can find him every year at the B2OSH
gathering in the North 40.
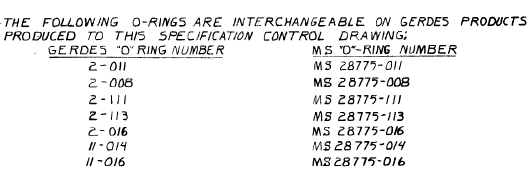
Parking Brake
Valve (PBV) Info
Here is
an image of the internals of the Scott 4200-A1 PBV
showing o-ring part numbers. These ancient nitrile rubber o-rings can be
the cause
of inoperative parking brake function.
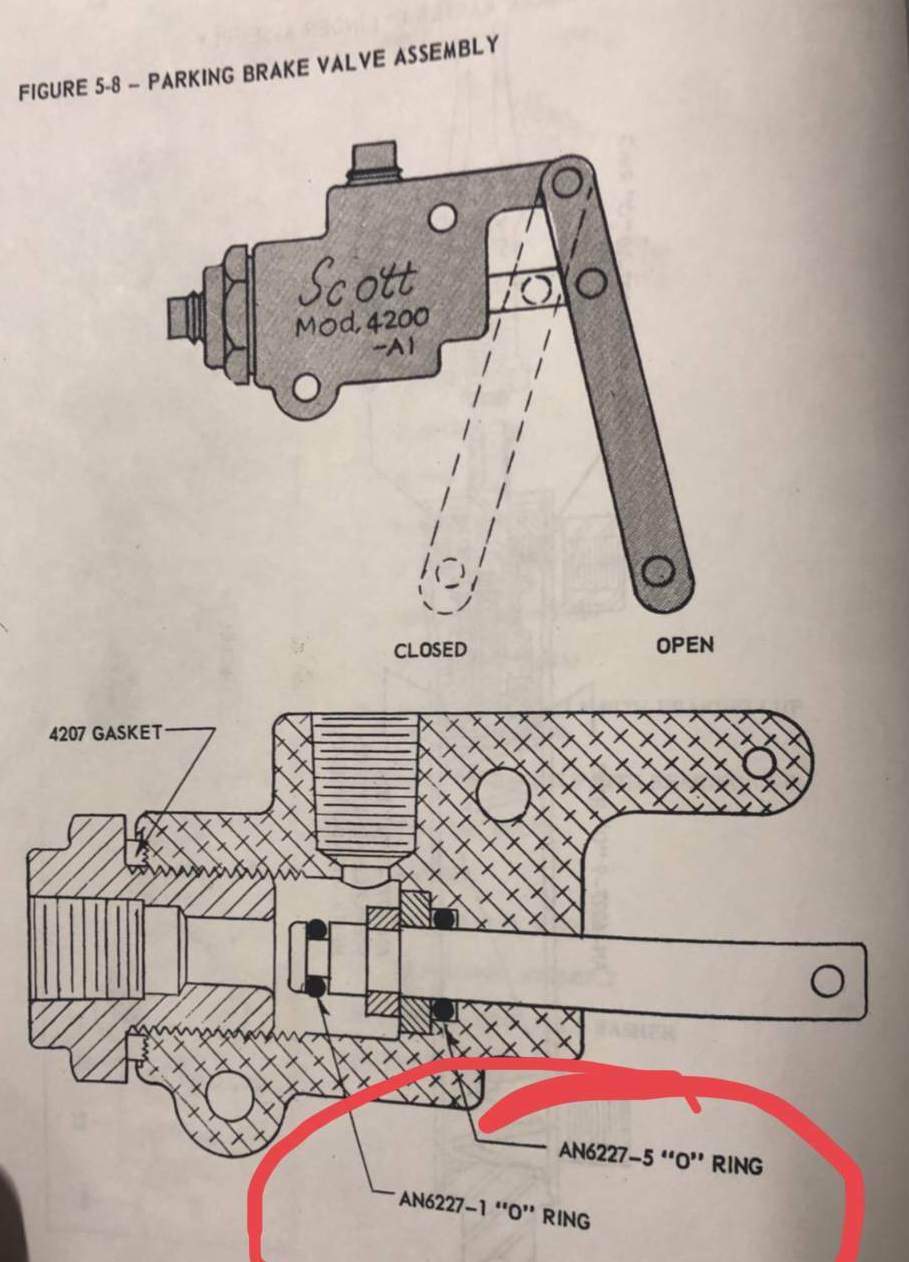
Click
HERE to see the resource for converting the AN part numbers to MS28775
With the MS28775 numbers the flurosilicone numbers would seem to be
AN6227-5 = MS28775-010 = M25988/1-010 (flurosilicone) AN6227-1
= MS28775-010 = M25988/1-006 (flurosilicone)
Be sure to secure A&P approval prior to any 0-ring substitution!

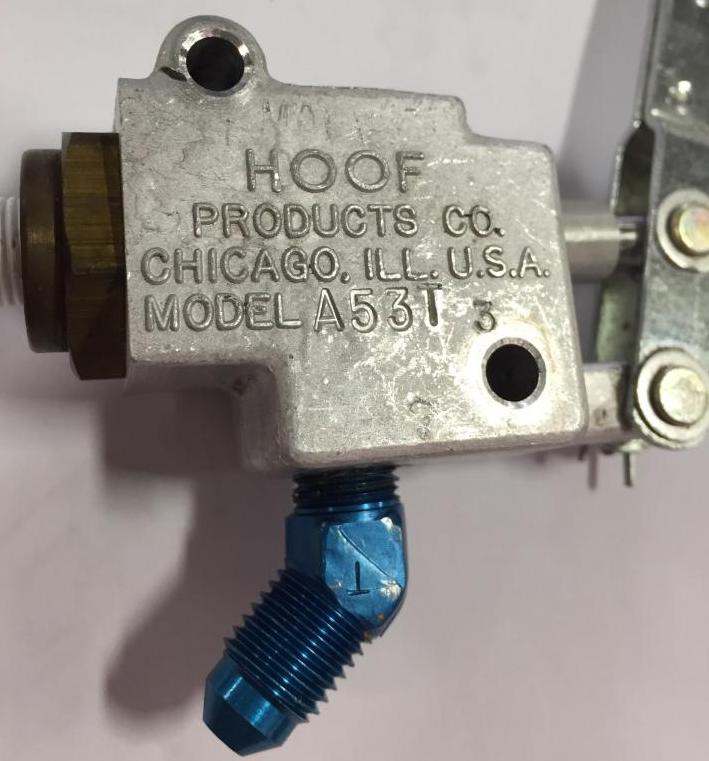
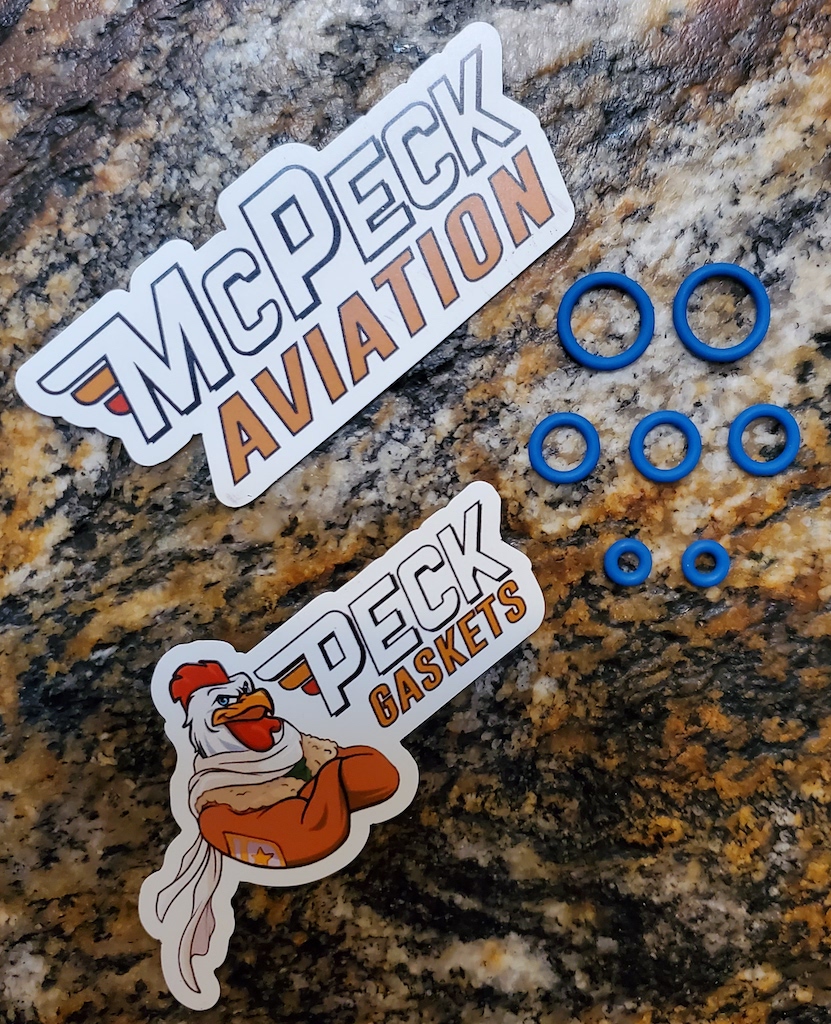
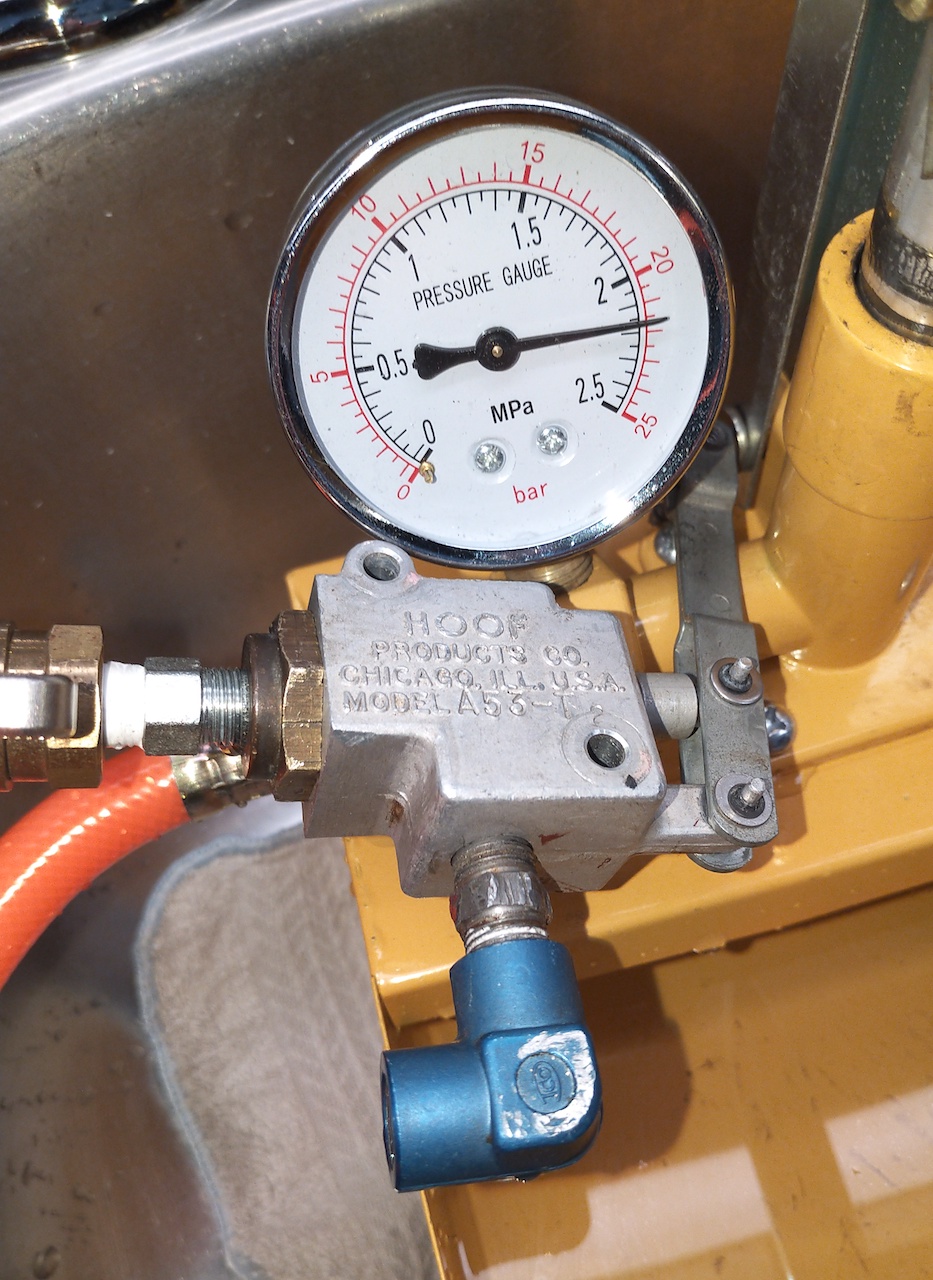
If you have a HOOF Model A53-T
PBV (common in Bonanzas and Barons), in your
airframe that is acting badly or leaking, you're in luck because
McPeck Aviation has a $9 O-Ring repair kit available for it.
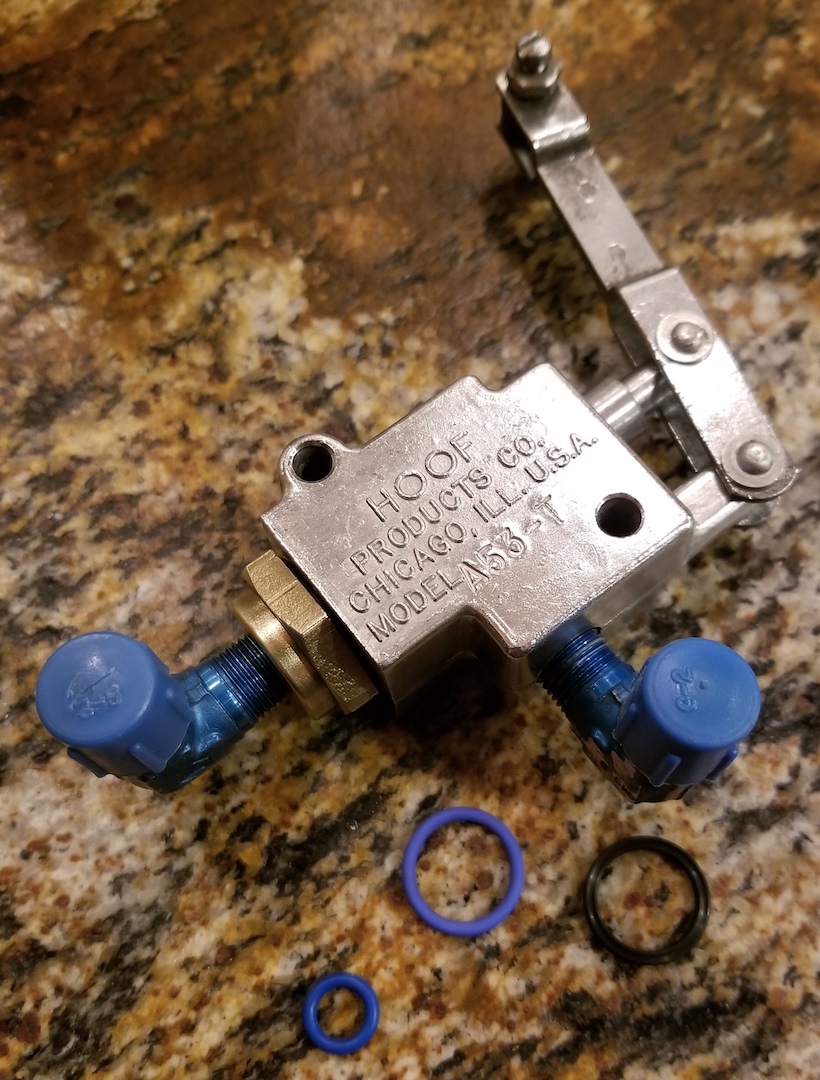
The plunger seal is in Fluorosilicone and has a very nice
tight fit. The brass fitting seal is in Viton with an upgraded modern spec
seal design replacing the originally supplied square ring. McPeck also
includes a Fluorosilicone alternate for the brass fitting seal should anyone
prefer it. Includes all seals to do one PBV. Price
per complete kit is $9.
Click the PayPal button below to make a $9.00 payment to place your order
with McPeck Aviation.
BE SURE TO INCLUDE YOUR
SHIPPING ADDRESS

Contact Adam McPeck for additional details on the Hoof O-Ring kit or to place an
order

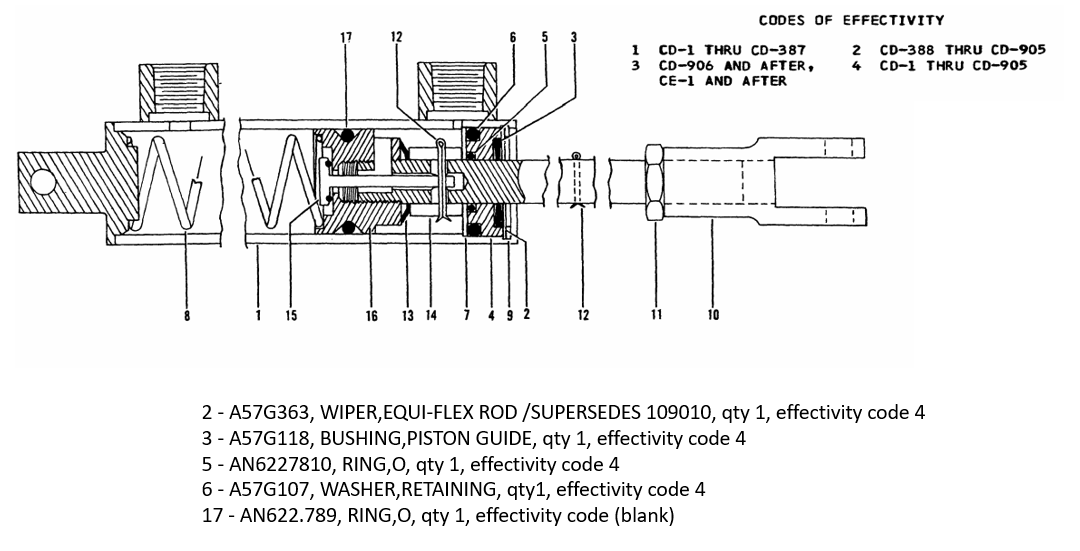
Below is more info on the Hoof A53-T PBV
Gerdes O-Ring Interchange to MS Number
Gerdes A-850-8 or Cleveland 60-10 Parts Catalog Extract is HERE
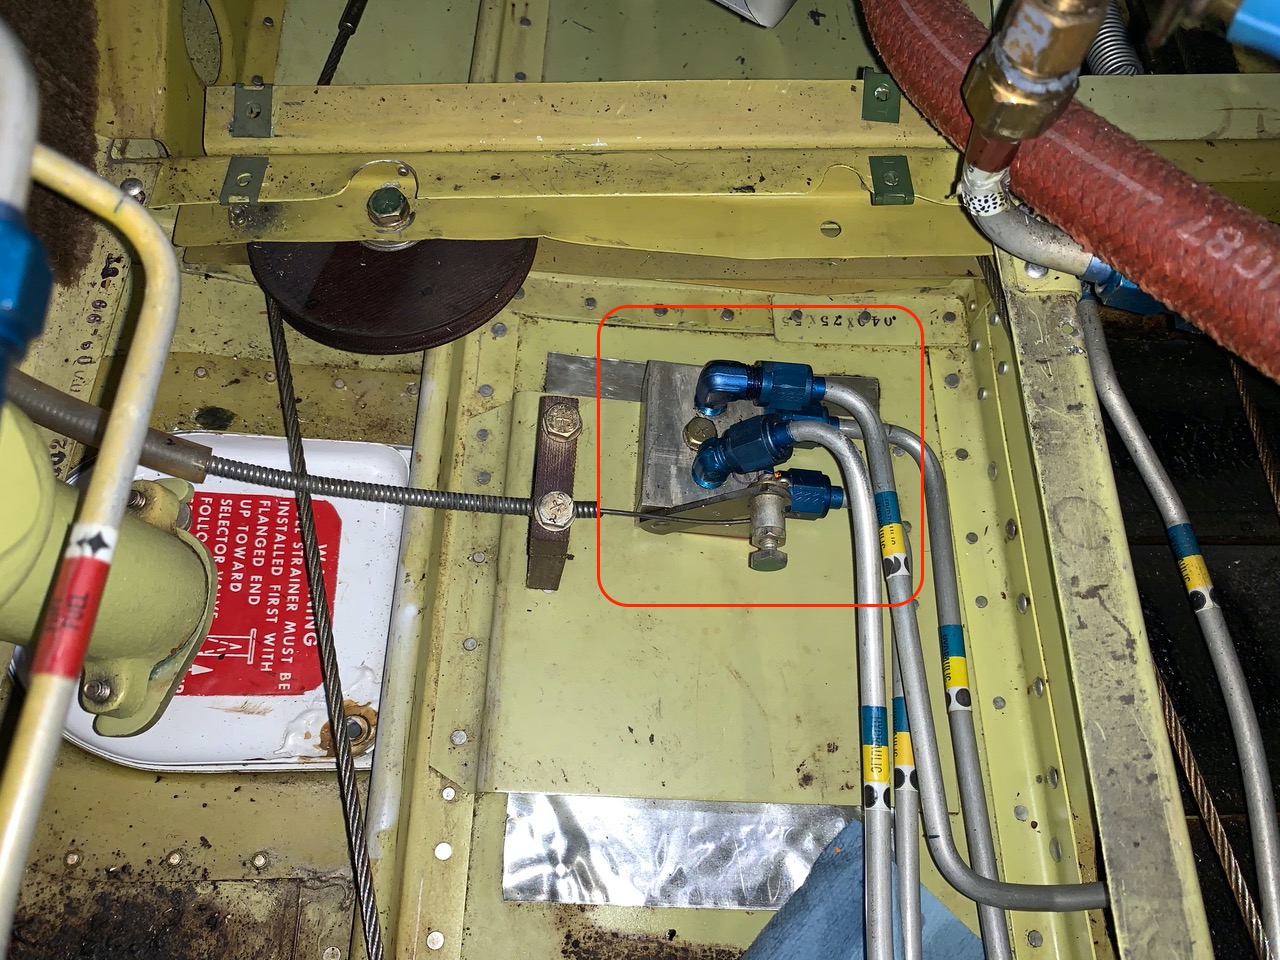
B58 PBV Location
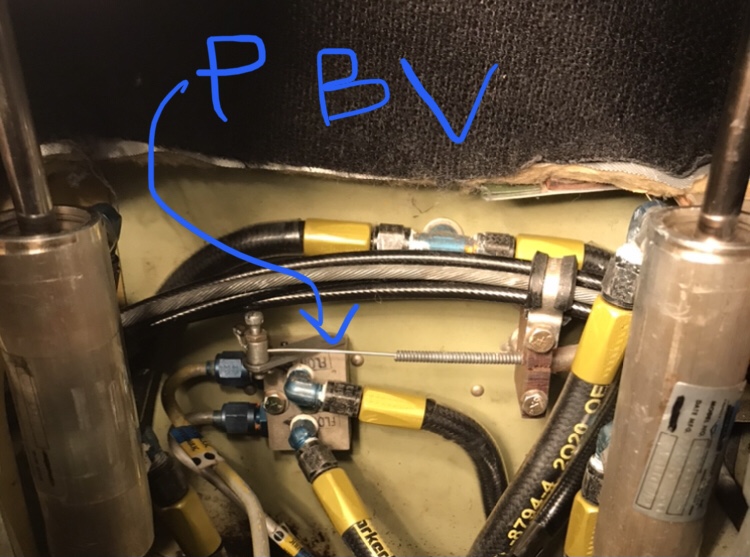
Photo Courtesy of Nick E.
Gerdes A-850-8 or Cleveland 60-10 Fluorosilicone O-Ring Replacement Parts
from McPeck Aviation
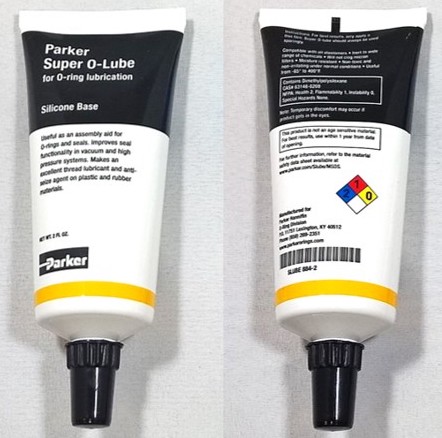
McPeck's Gerdes/Cleveland Fluorosilicone O-Ring replacement set is priced at $25.
McPeck also offers Parker O-Ring Lube for $21/tube.
Click the PayPal logo below to make a proper payment to
McPeck Aviation for your
Gerdes/Cleveland Parking Brake O-Ring Kit.
BE SURE TO INCLUDE YOUR
SHIPPING ADDRESS
Click below to email Adam McPeck for additional details or to place an
order
Musketeer owner Bruce B., offers the following excellent insight and photo of the Hoof valve
Here is the PBV for the later model F33
Bonanzas
Here are the IPC extracts for
the F33 parking brake valve
Extract #1
and Extract
#2
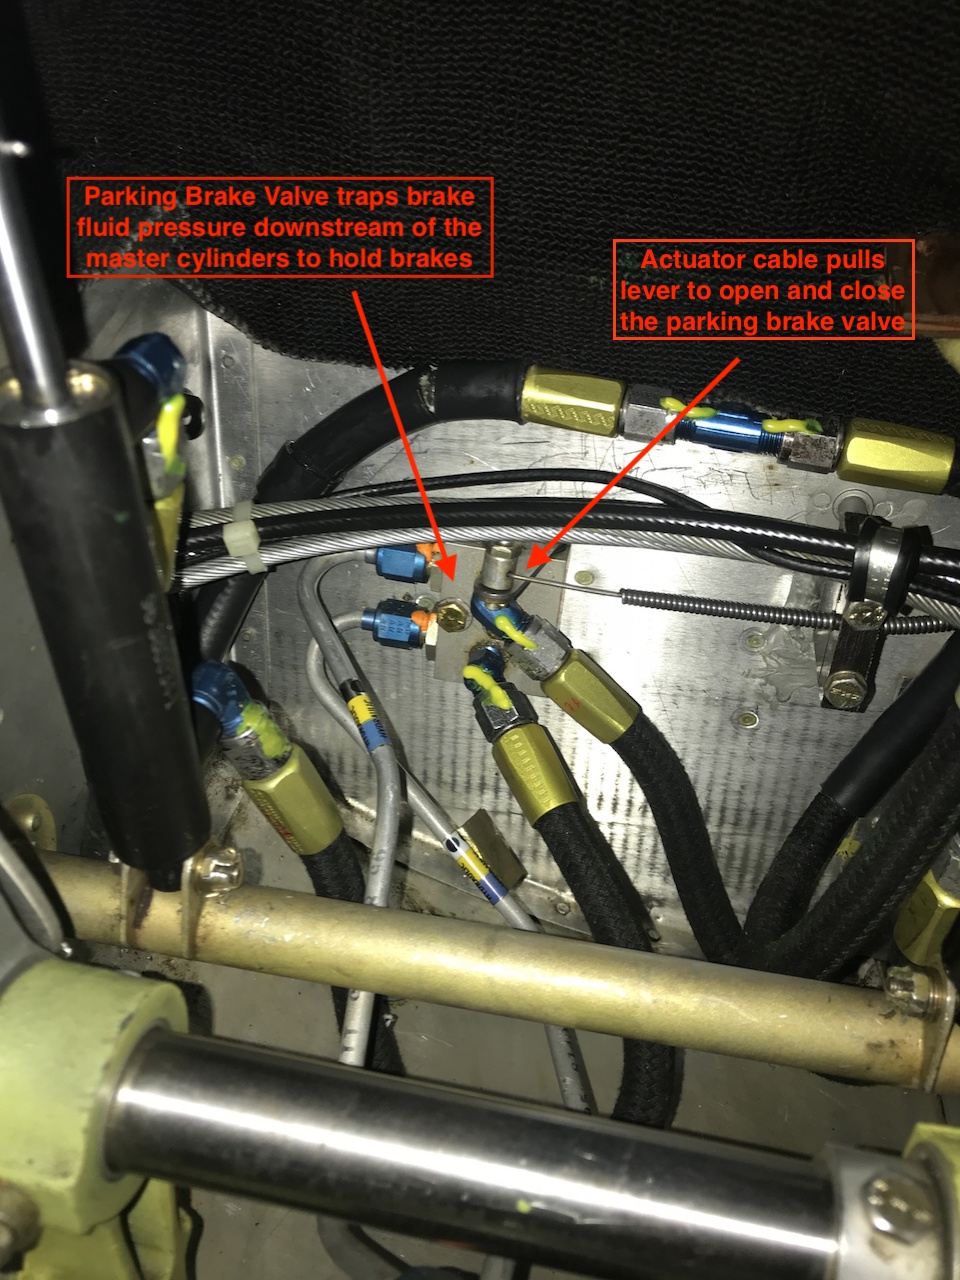 Photo Courtesy of Tom N. Photo Courtesy of Tom N.
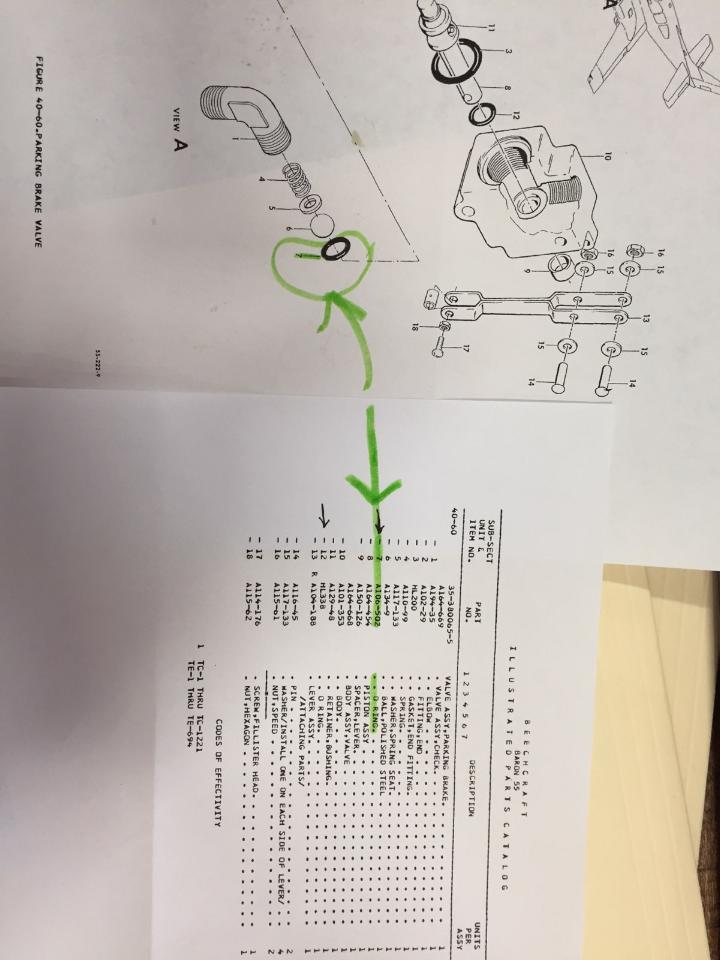
Here is
a Baron Master
Cylinder Extract #1 and
Extract #2 to help you identify the O-rings required
on some of the master cylinders.
Remember,
check YOUR illustrated parts catalog for the exact part numbers
for your SN.
Thinking about adding Co-Pilot
Brakes (Dual Brakes) to Your Beechcraft?
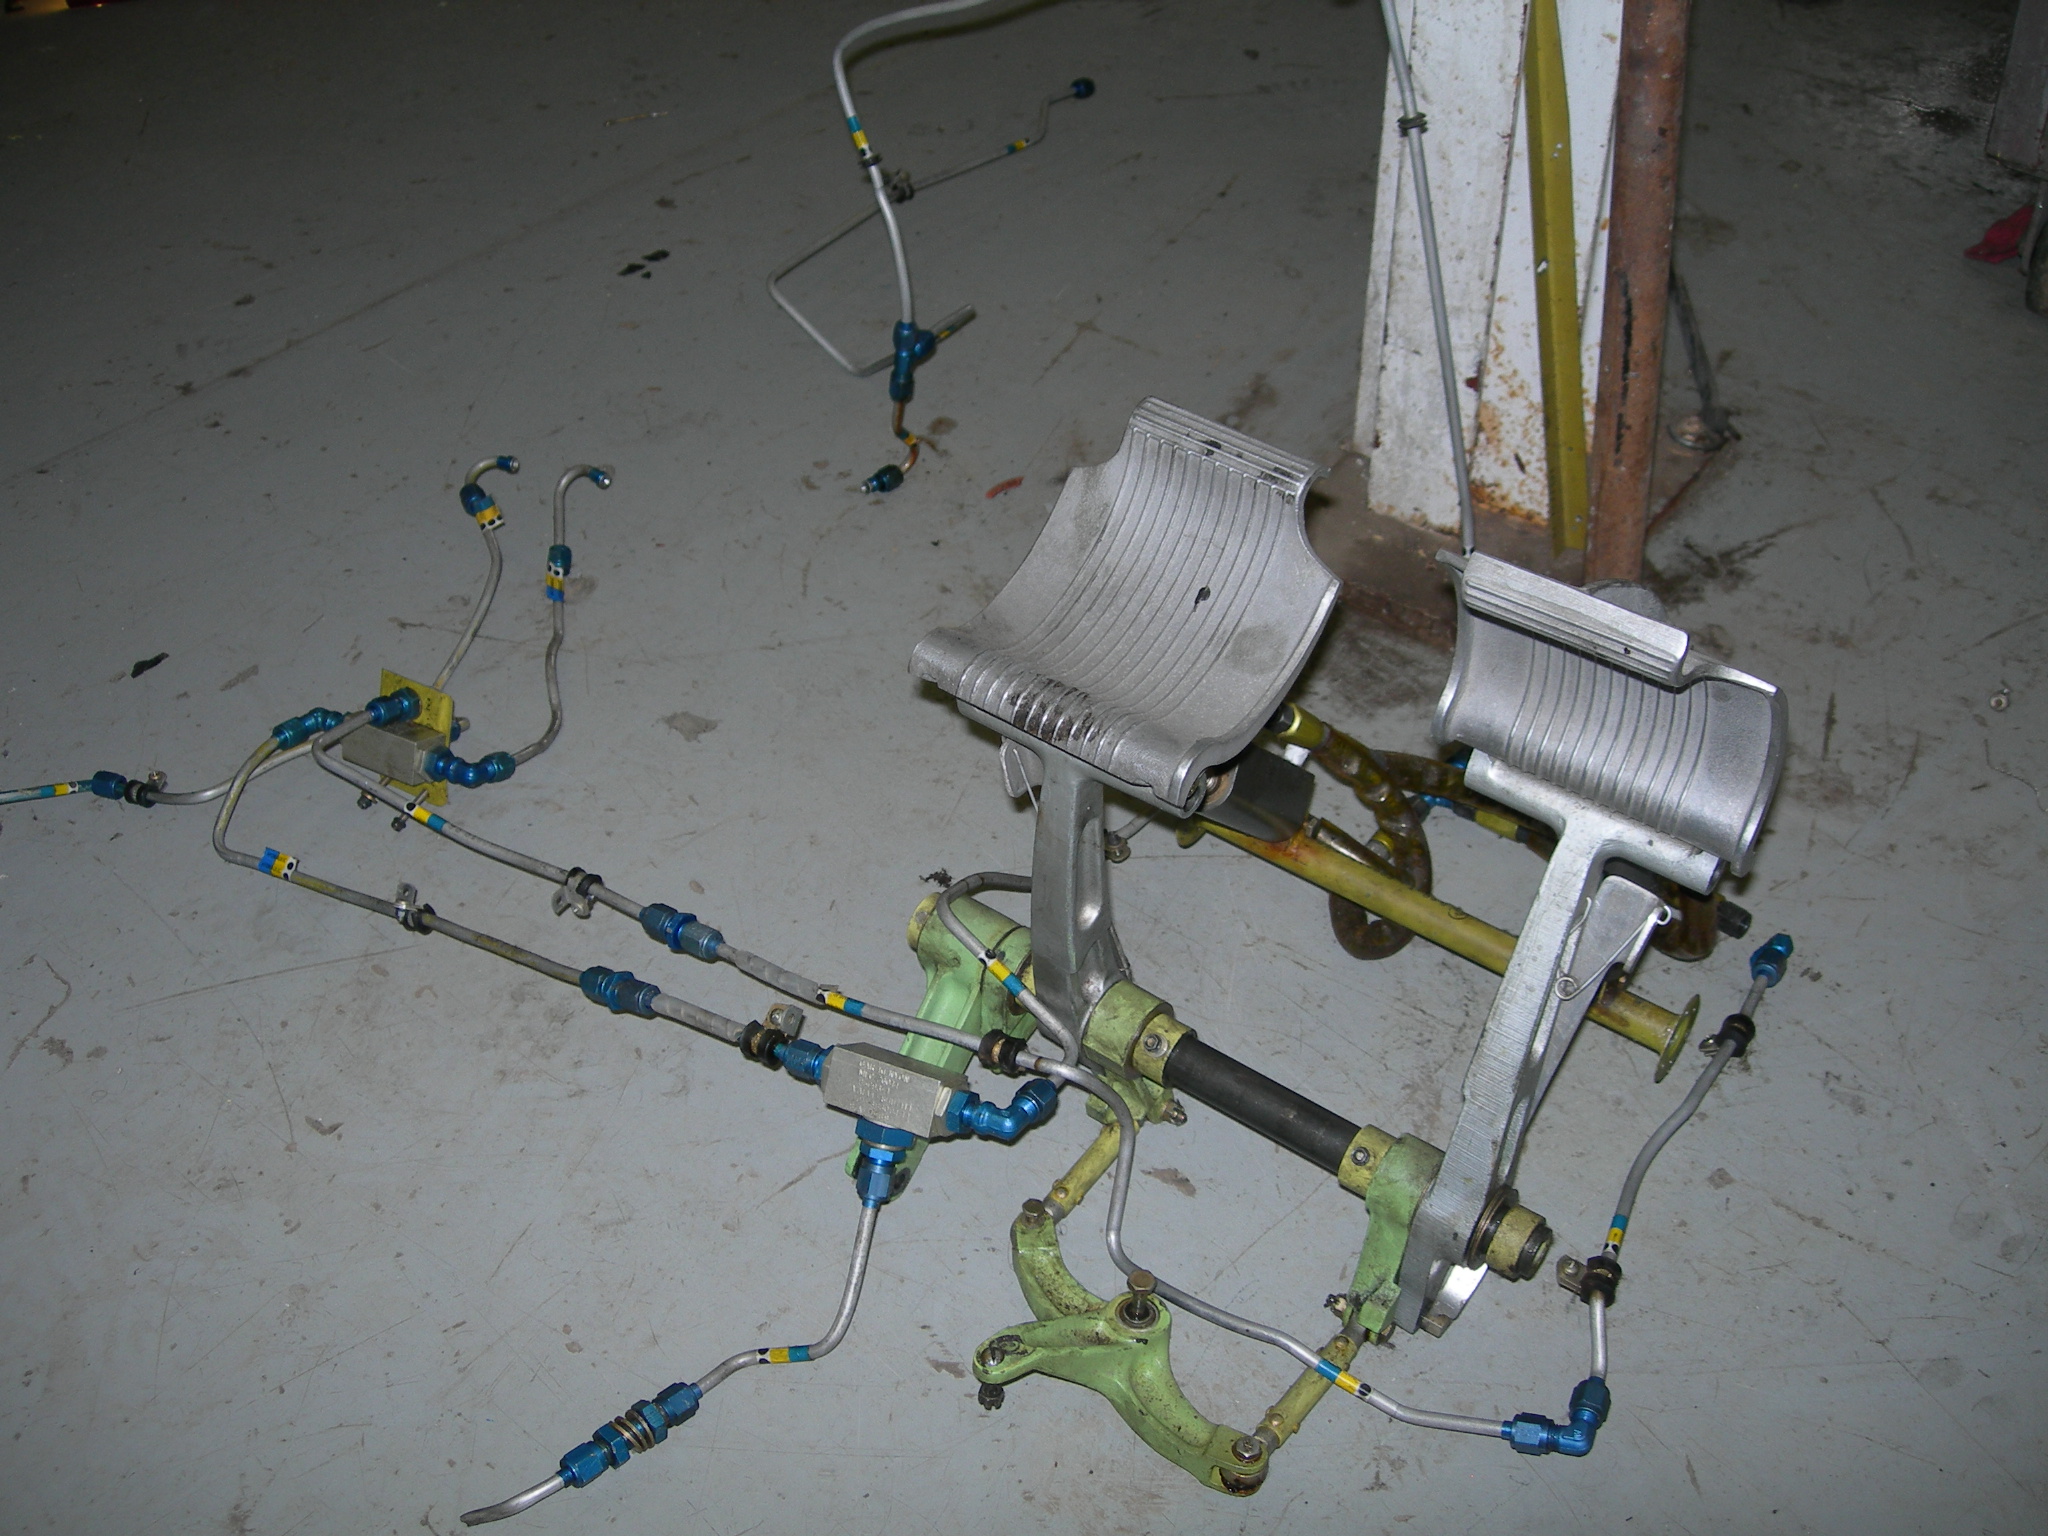
This is what you'd be looking for
from the Salvage Sources.
HERE is a Google Photo Album of how Jason M. documented his dual brake conversion.
HERE is another Google Photo Album documenting another dual brake conversion in a B55
Rumor has
it Beech made a kit back in the day to accomplish this with every piece
required. The PN is rumored to be: 36-58000-3
|